¶ Time-lapse photography
¶ Notes:
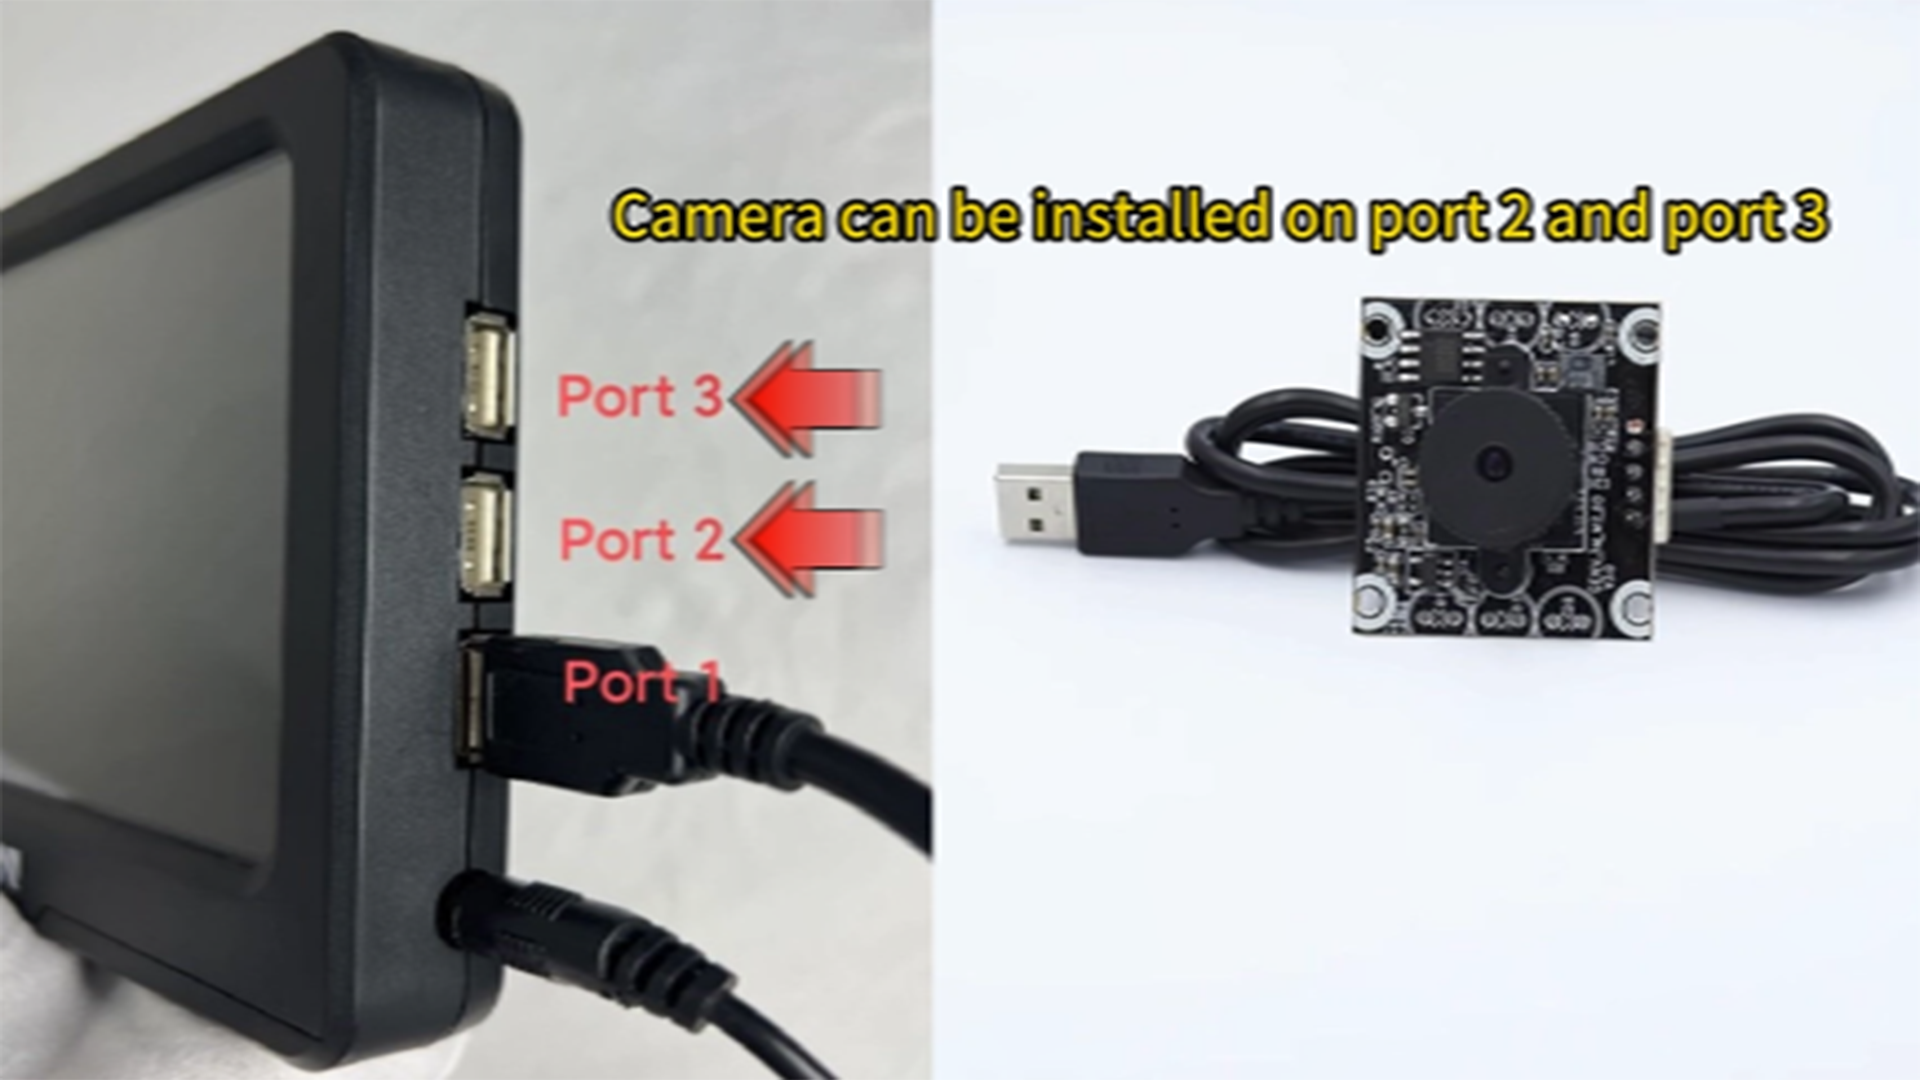
- The camera for time-lapse photography needs to support UVC protocol.
- The ports supported by the camera to connect to the PAD are "Port 2" and "Port 3".
¶ How to activate:
¶ 1.Cura software setup
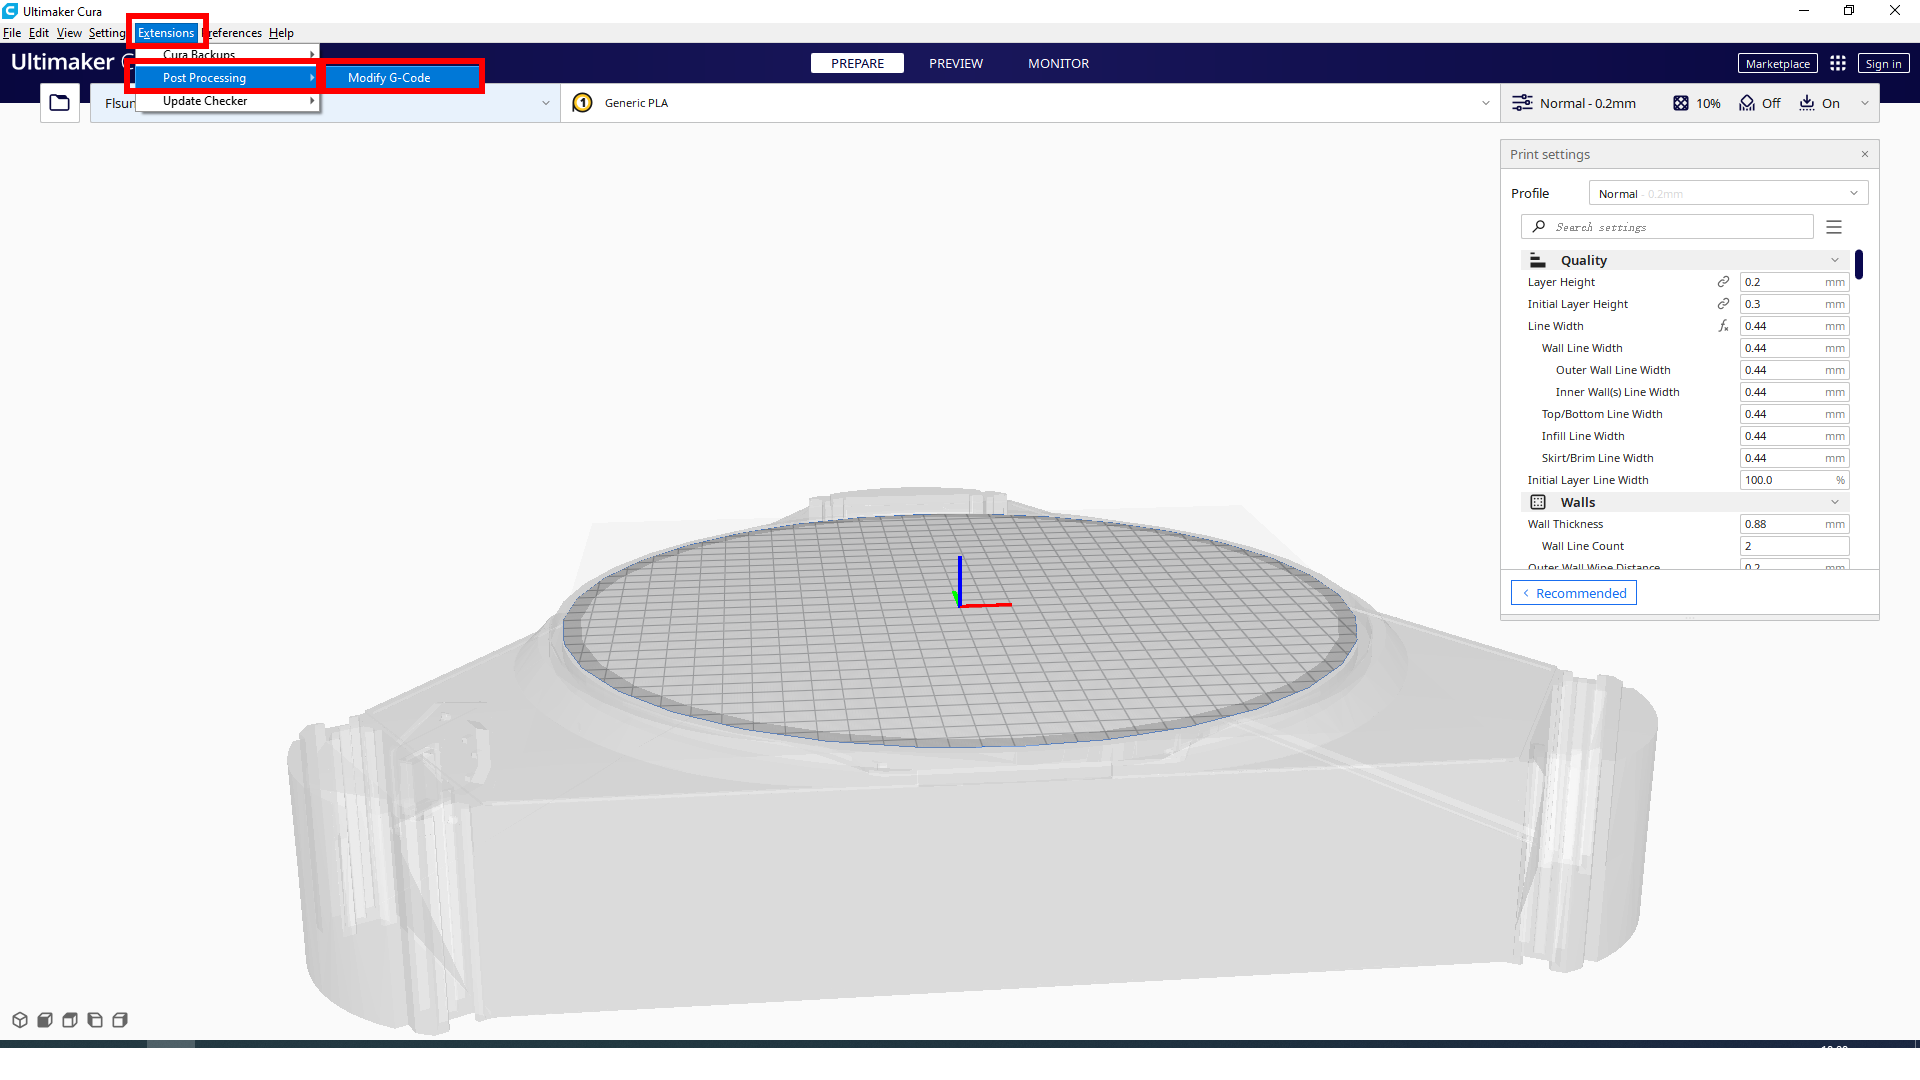
(1) Open the Cura software, click Extension - Post Processing - Modify G-CODE.
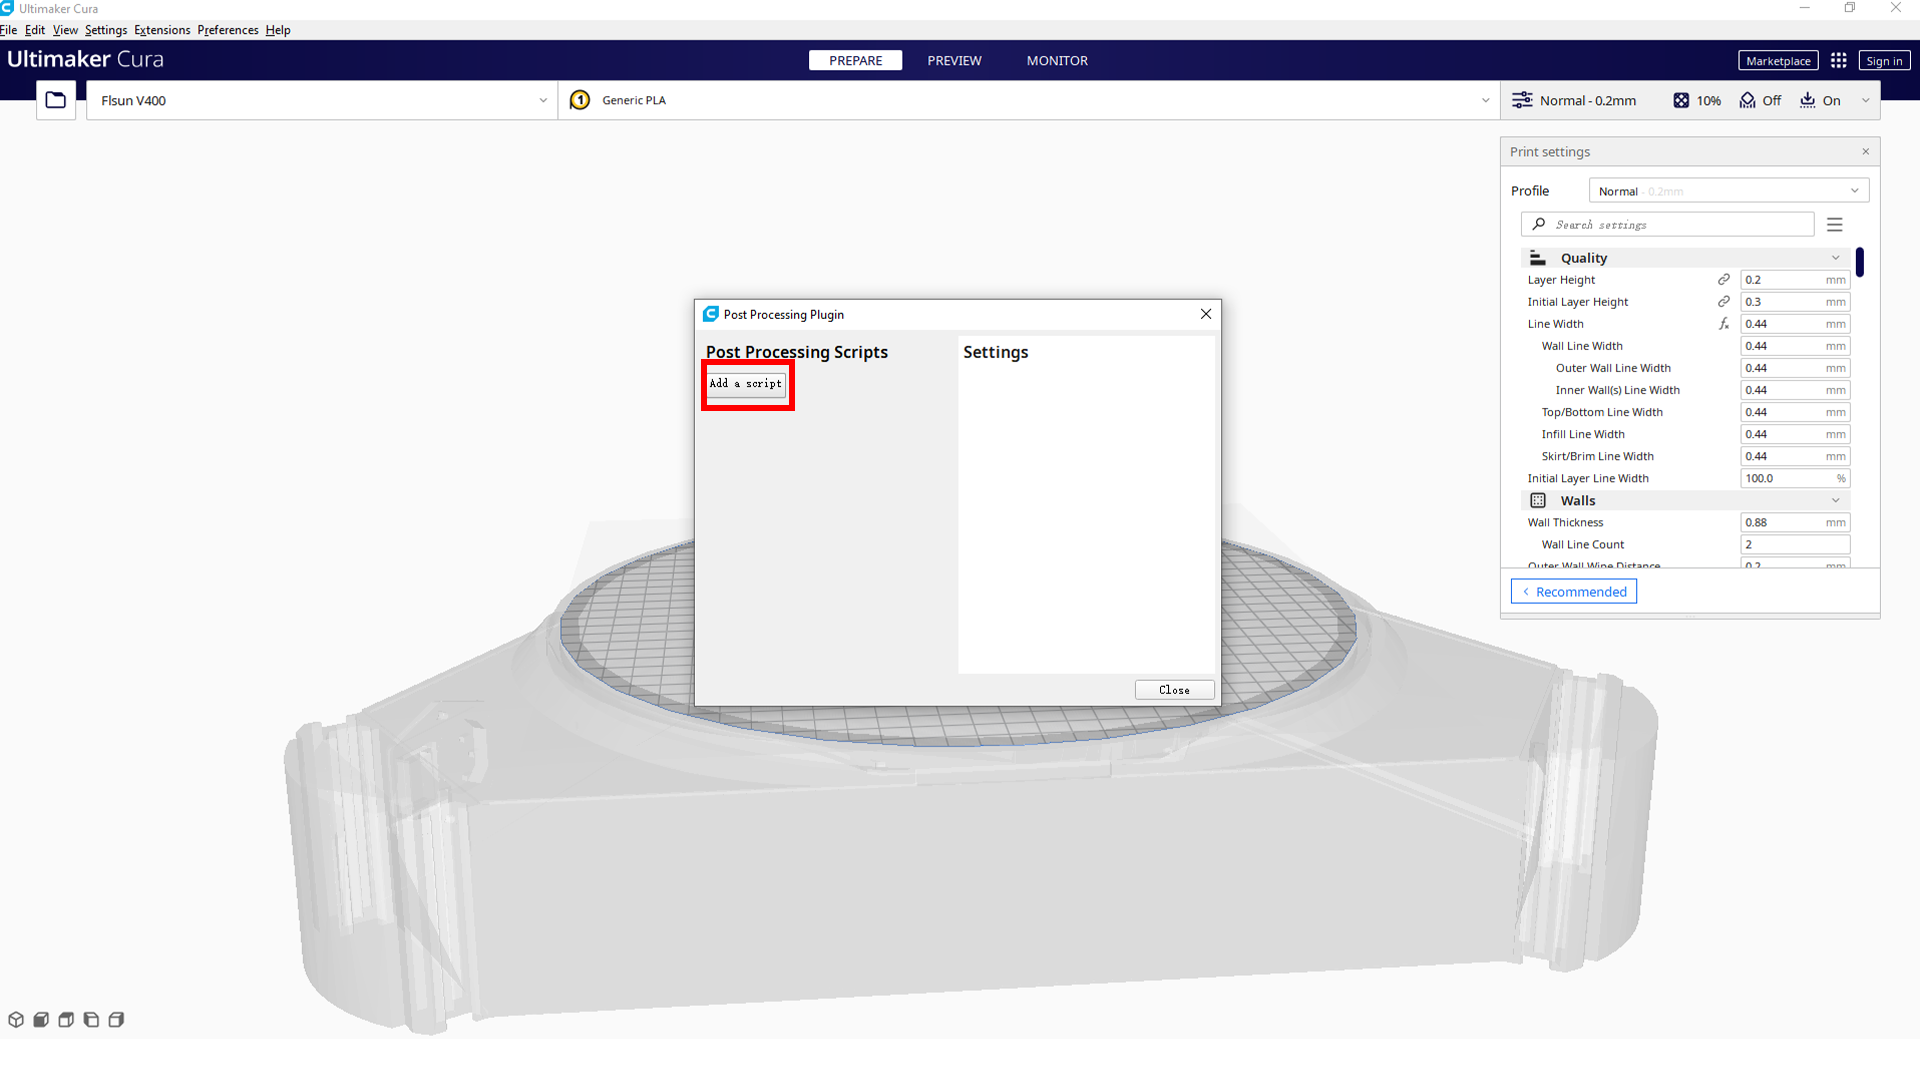
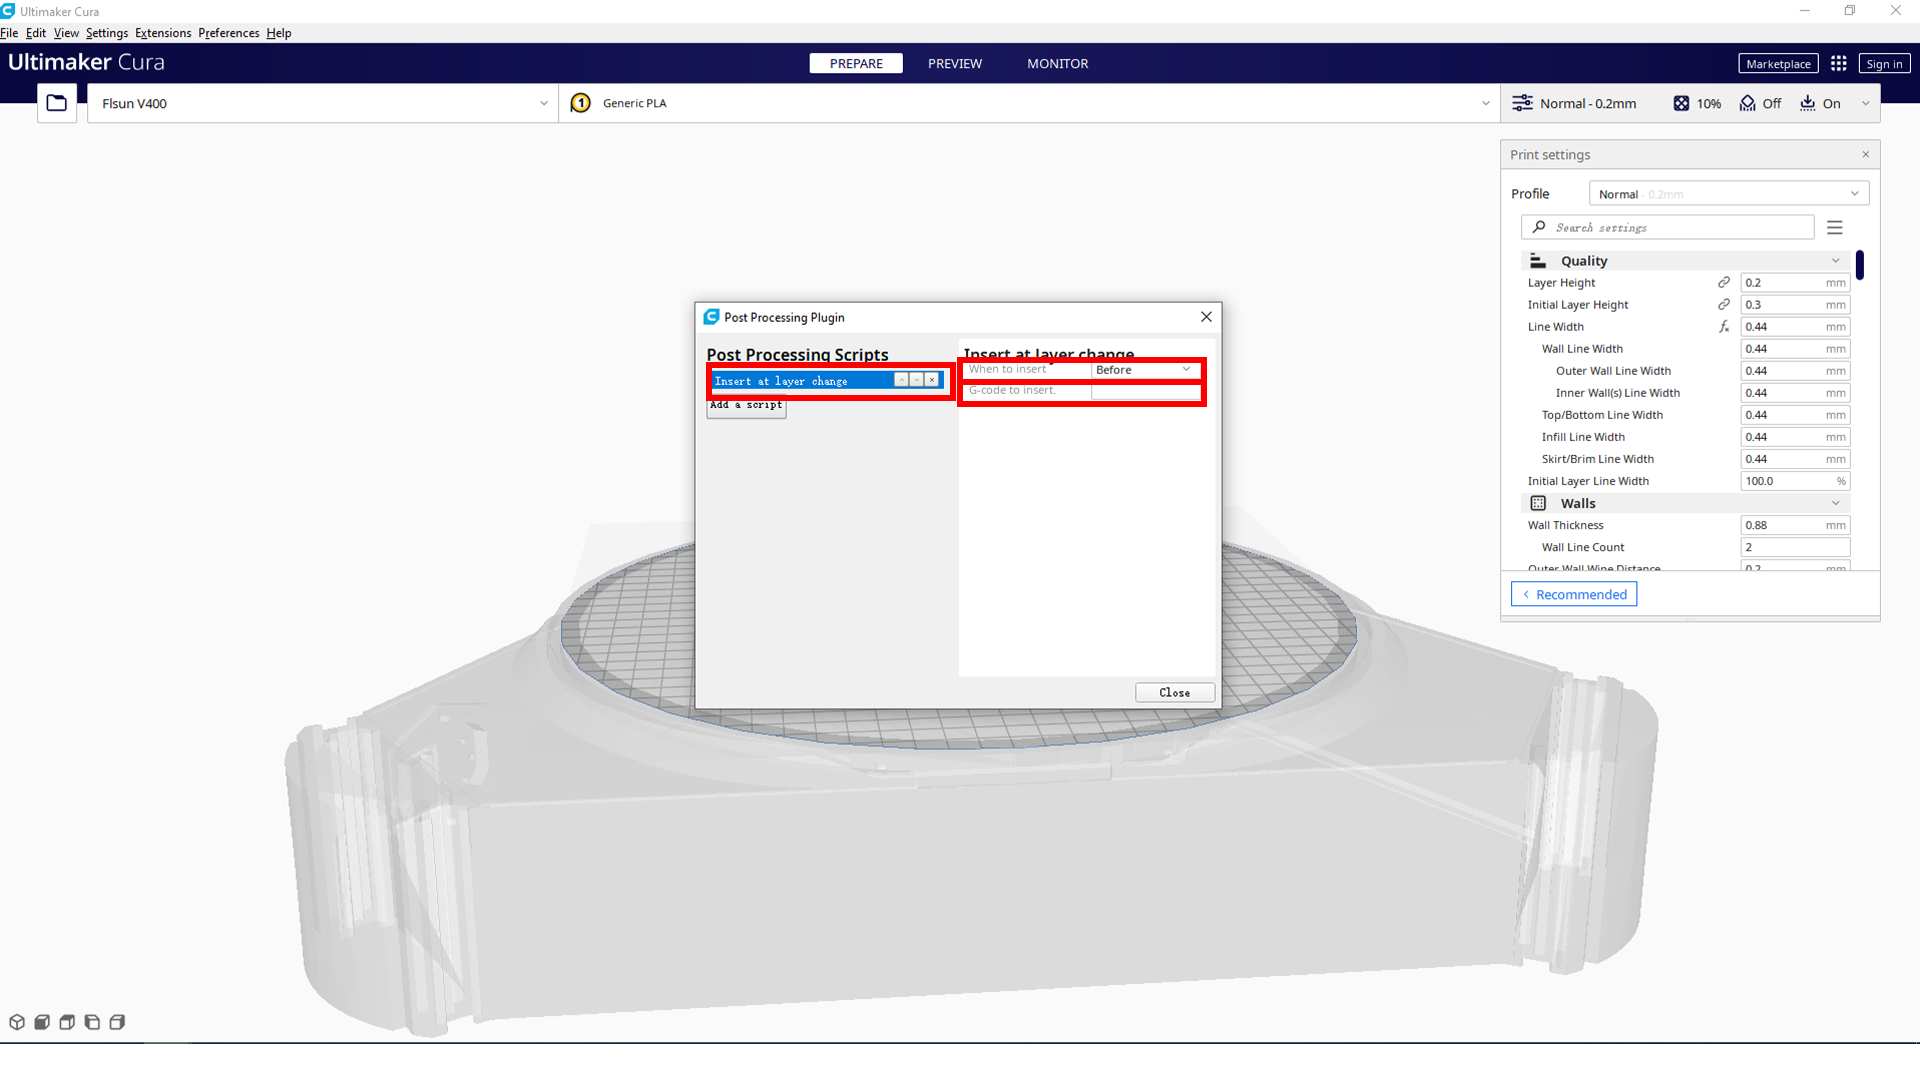
(2) Click Add Script and select "Insert at layer change".
(3) Choose "Before" in "When to insert" option, and fill in "G-code to insert". "TIMELAPSE_TAKE_FRAME" and click "Close".
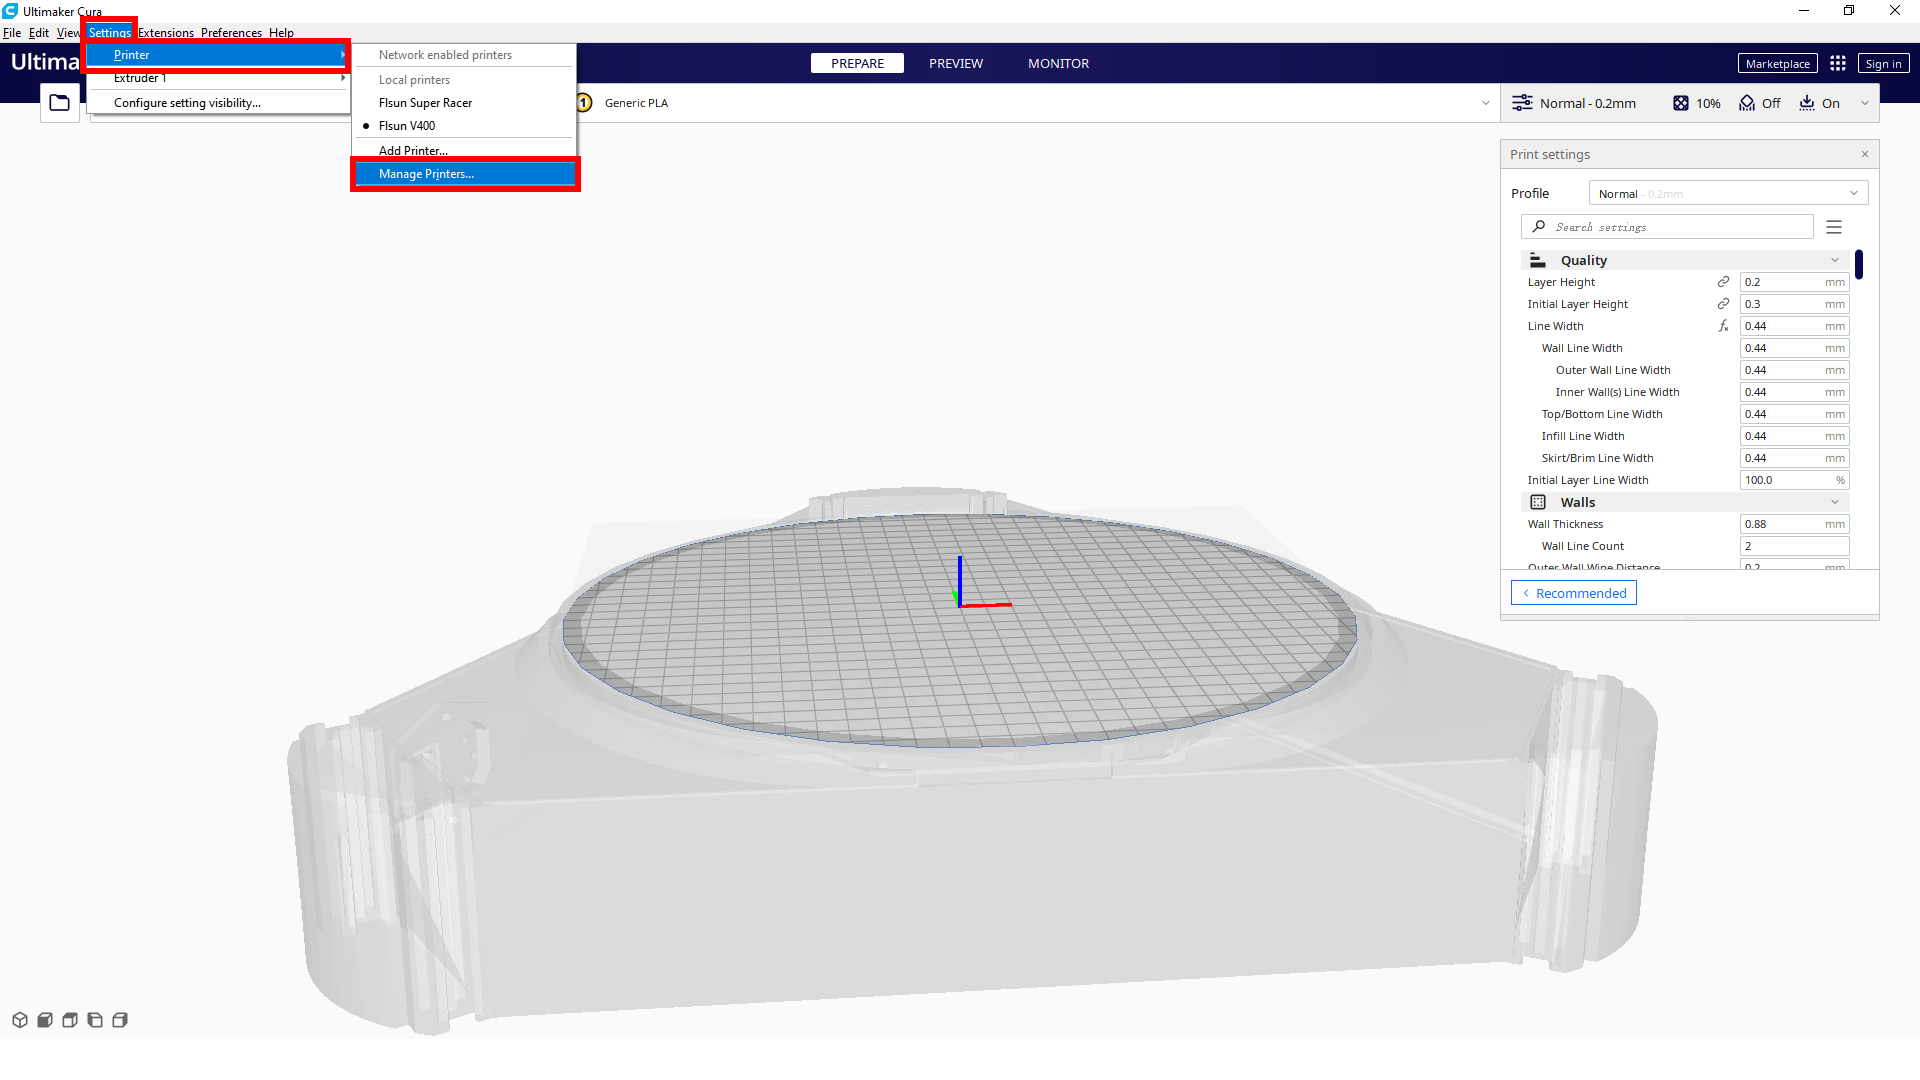
(4) If you need to output video after each print, add "TIMELAPSE_RENDER" to the end code of the G code. Click "Settings - Printers - Manage Printers".
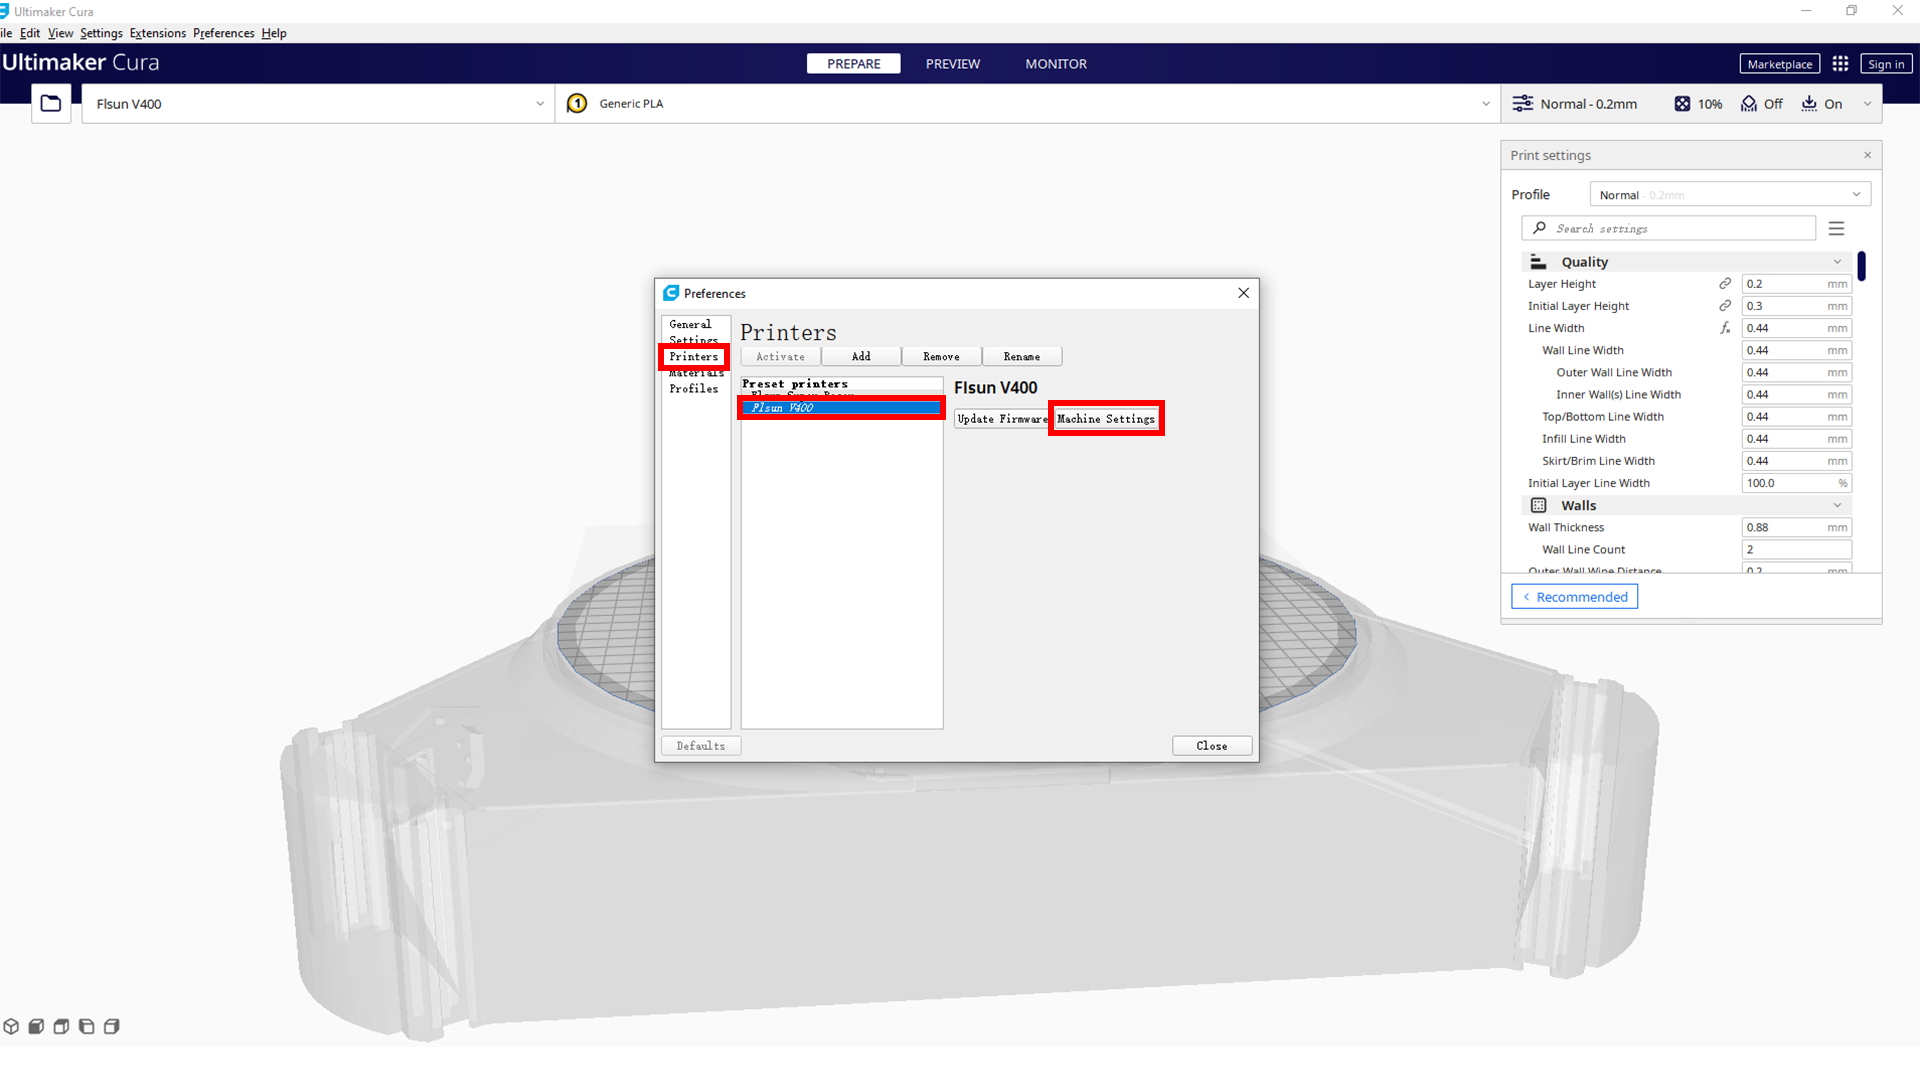
(5) Click "Printers", select your printer model, and click "Machine Settings".
Click "Printer", select your printer model, and click "Machine Settings".
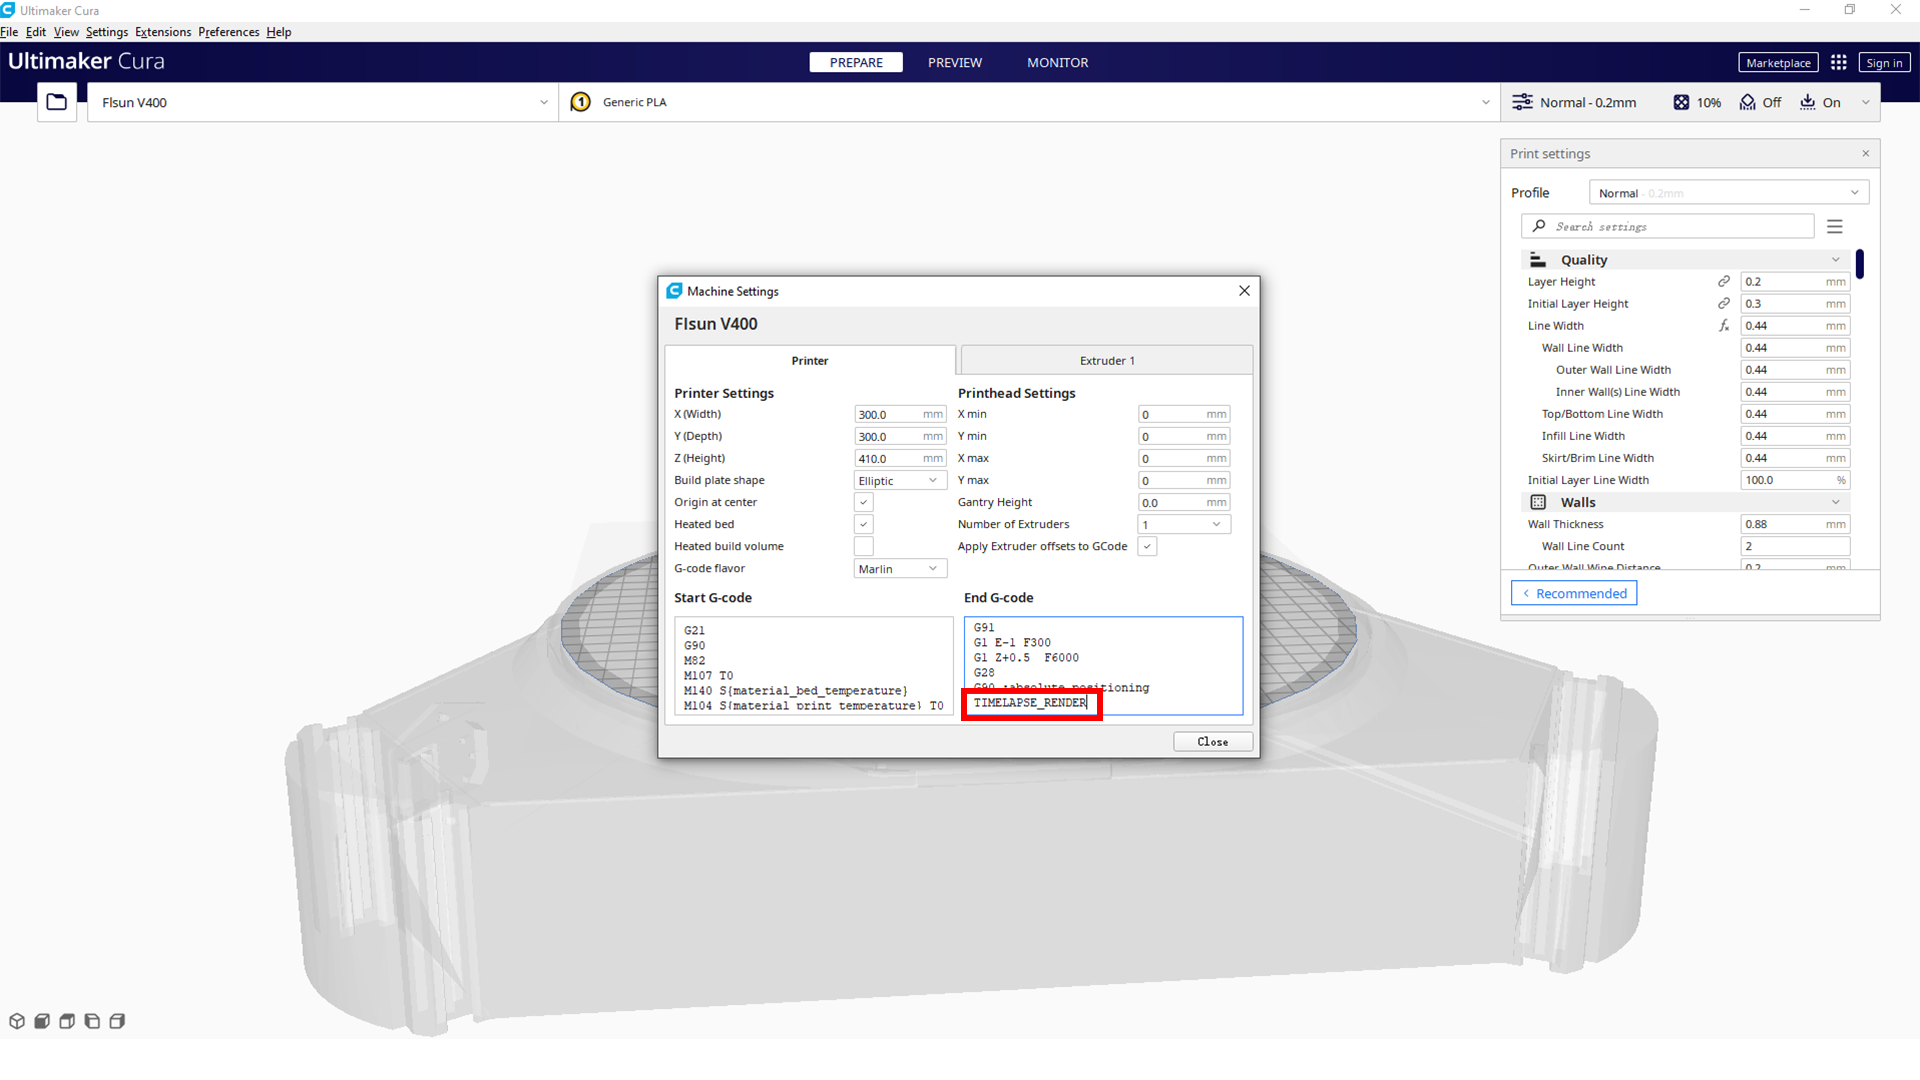
(6) Add "TIMELAPSE_RENDER" to the end code and click "Close".
(7) After the pad is turned on, plug the camera into the USB port on the right side of the pad.
¶ 2. Web Setup
(1) After the Pad is turned on, plug the camera into the USB port (port 2 or 3) on the right side of the Pad.
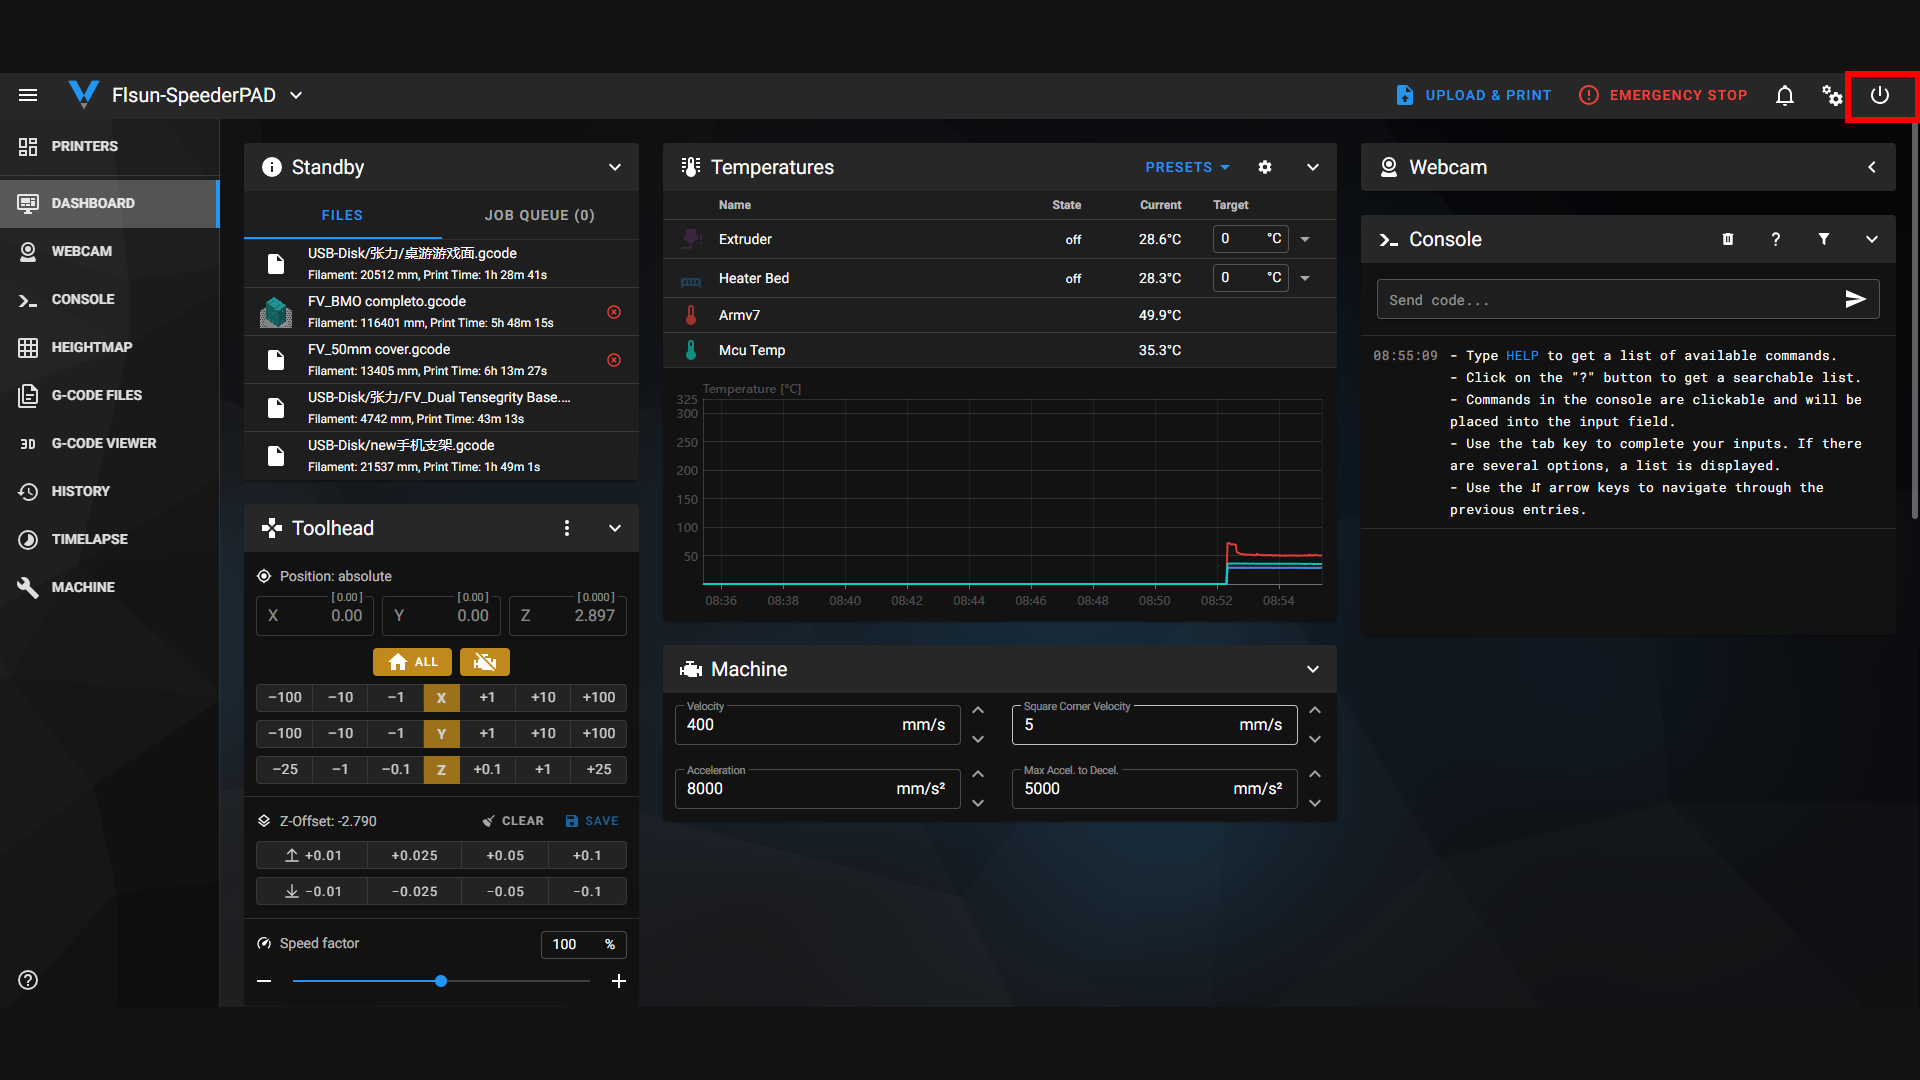
(2) Connect to WIFI and enter the generated IP address in a browser on the same LAN. Click the button at the top right corner of the webpage as shown below.
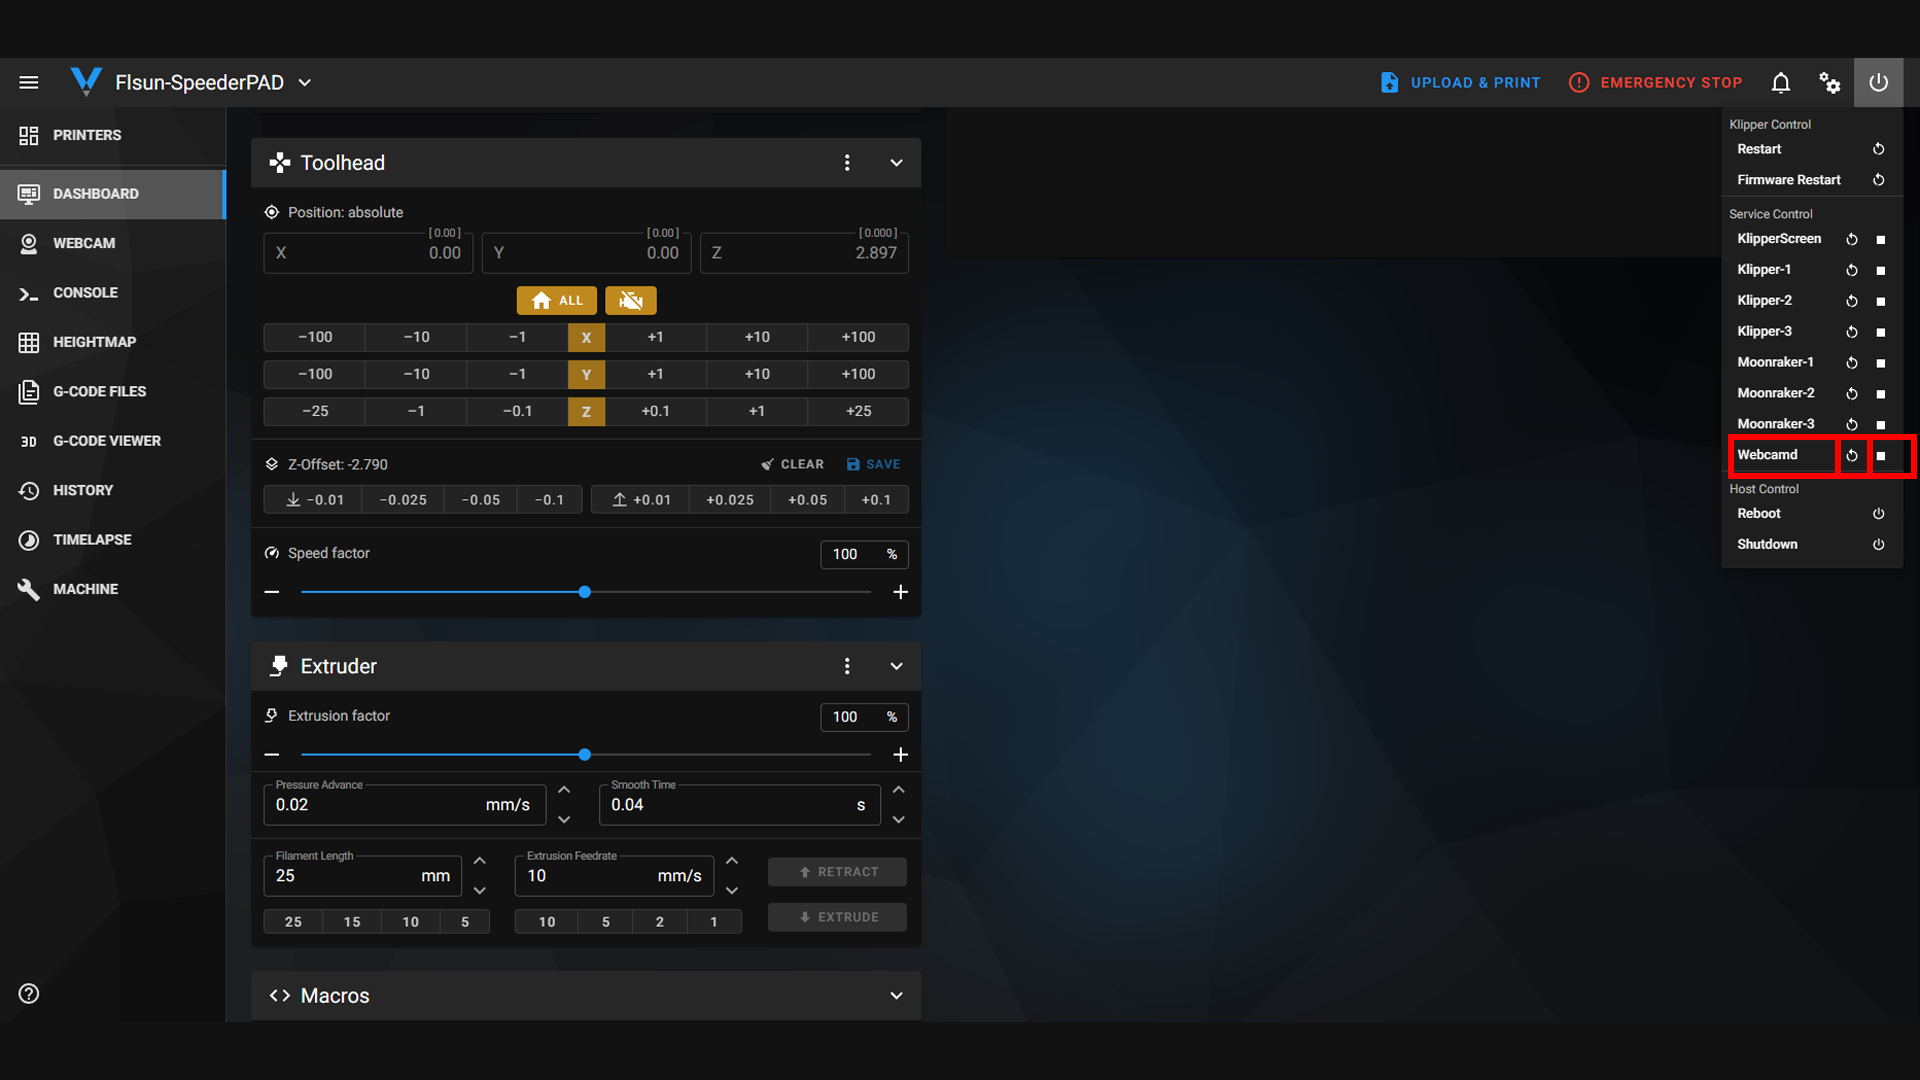
(3) Click the "Webcam" refresh button. As shown below.
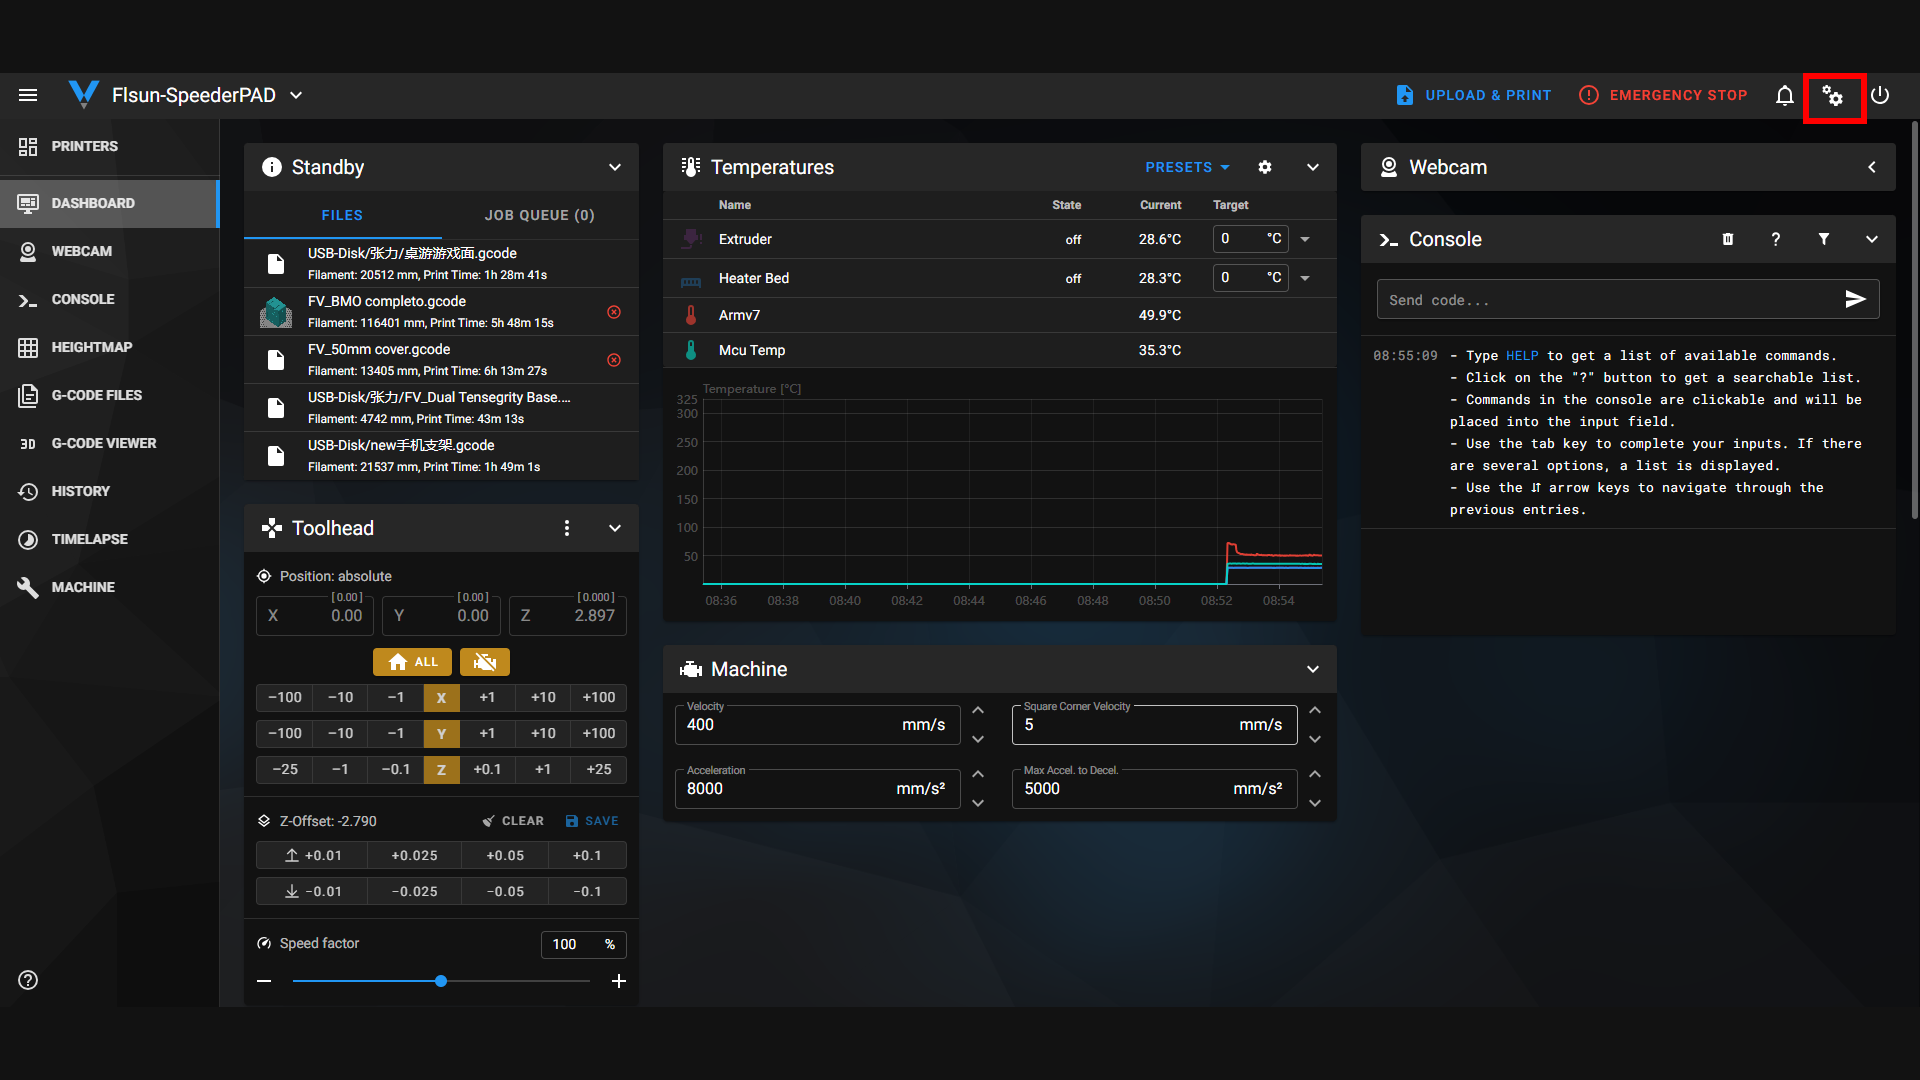
(4) If you want to set the time-lapse mode, click the button at the top right corner of the webpage, as shown below.
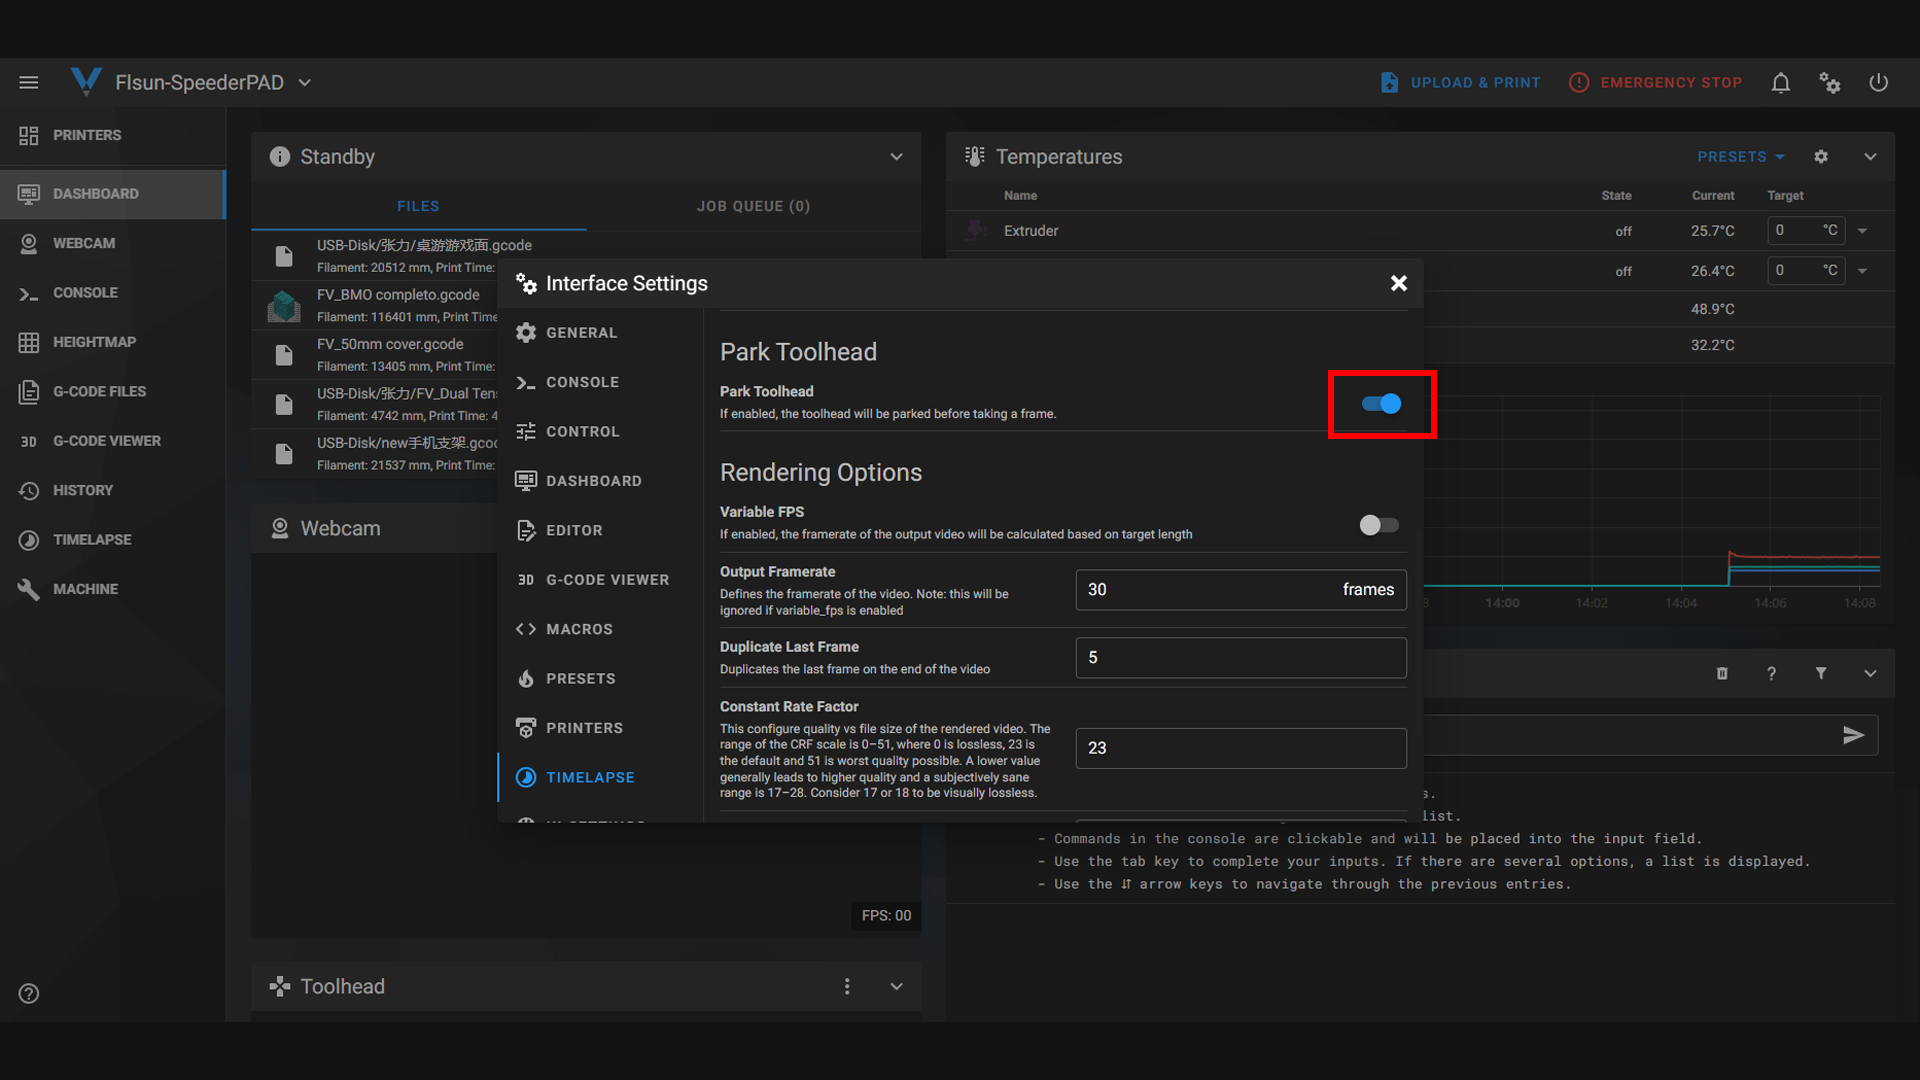
(5) Click "TIMELAPSE" and select the desired mode.
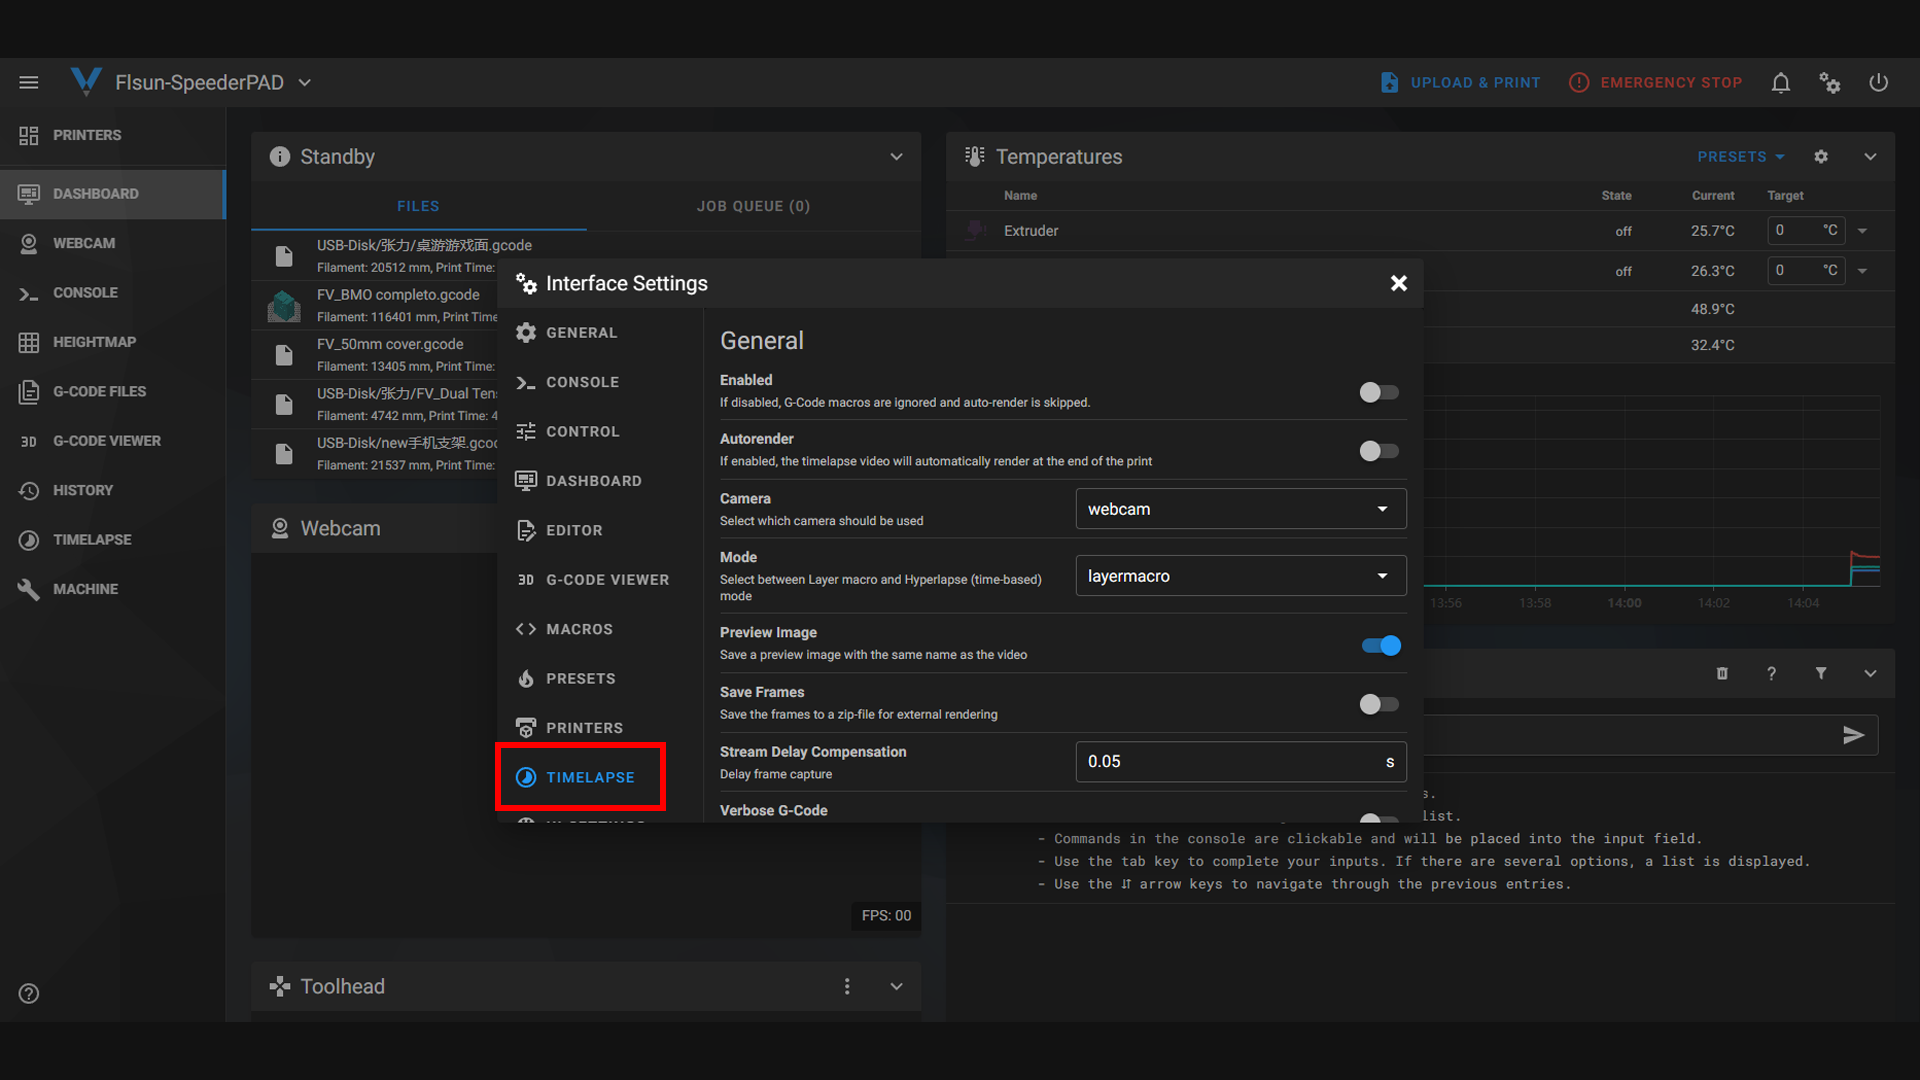
(6) For example, if you want to set the nozzle position, travel speed and distance, you can check "Park Toolhead".
¶ 3. How to print using Timelapse.
(1) Save the Gcode file to your computer.
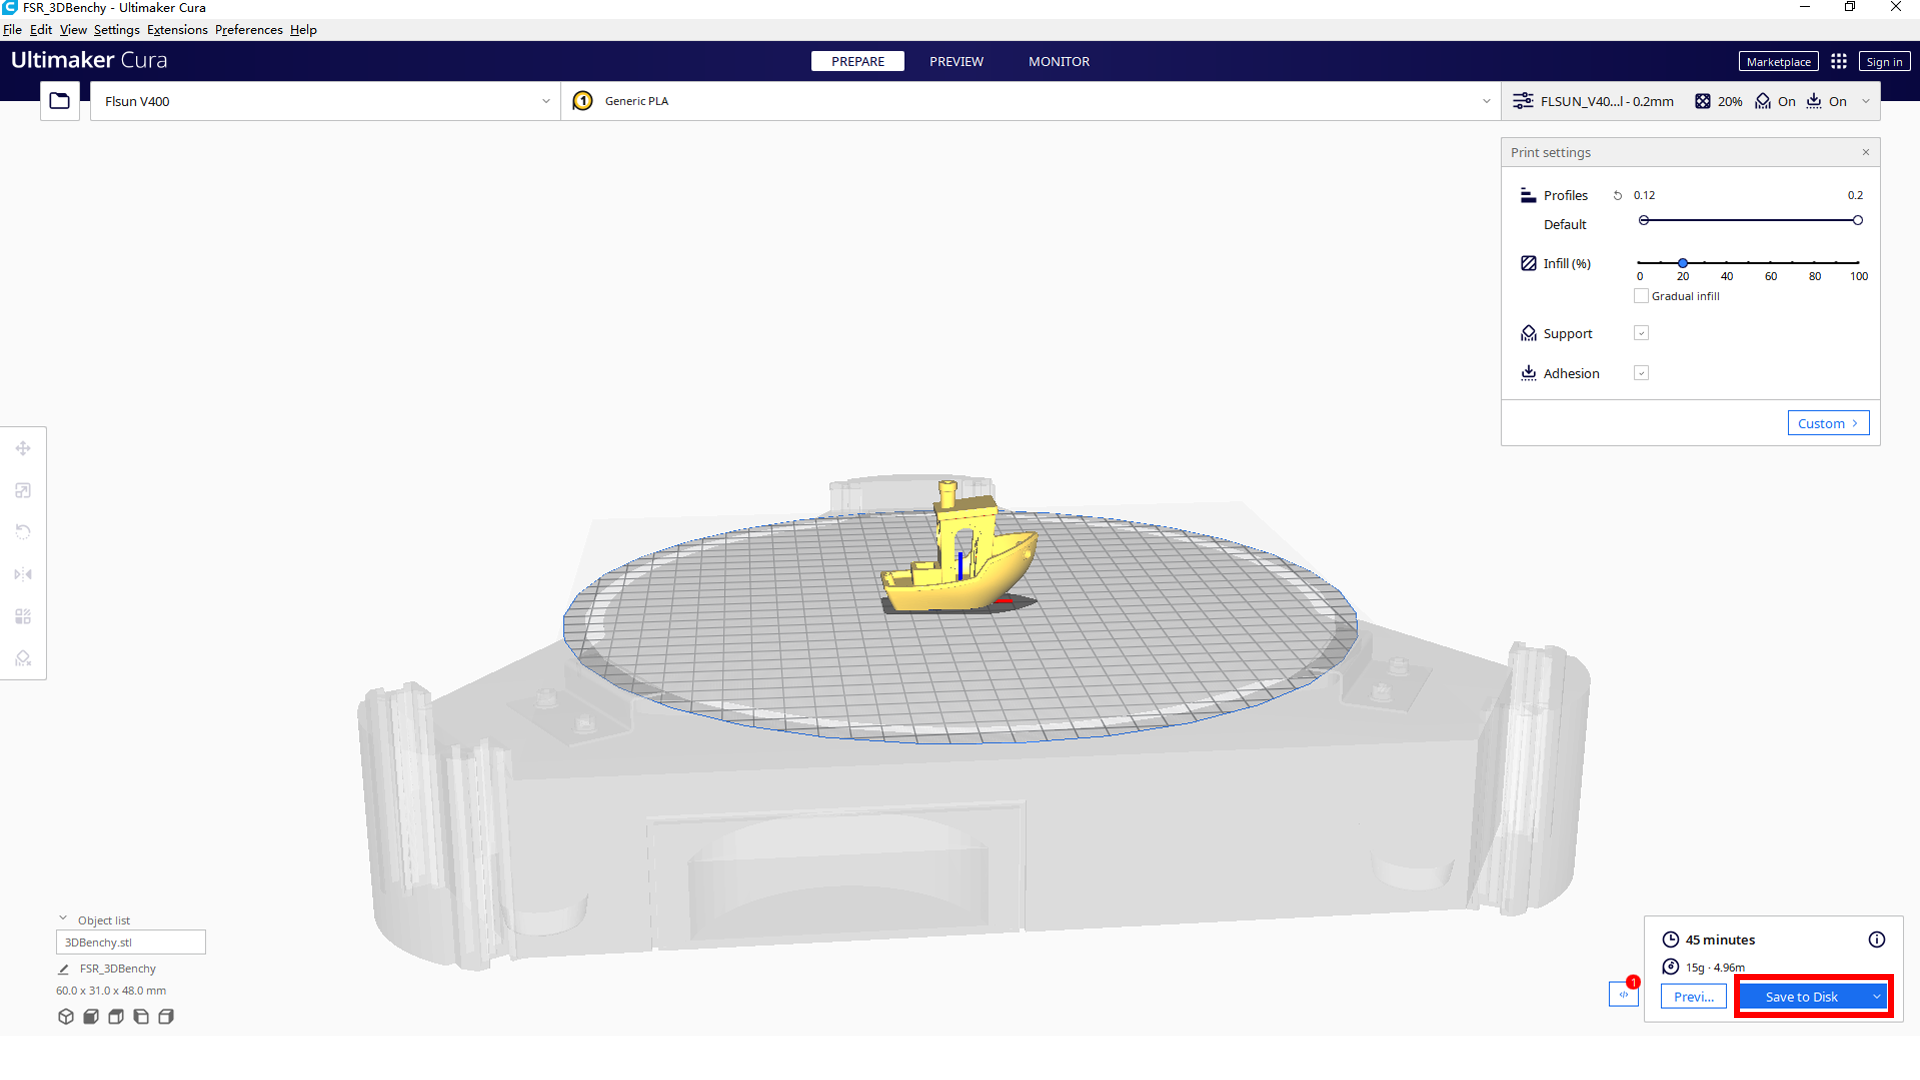
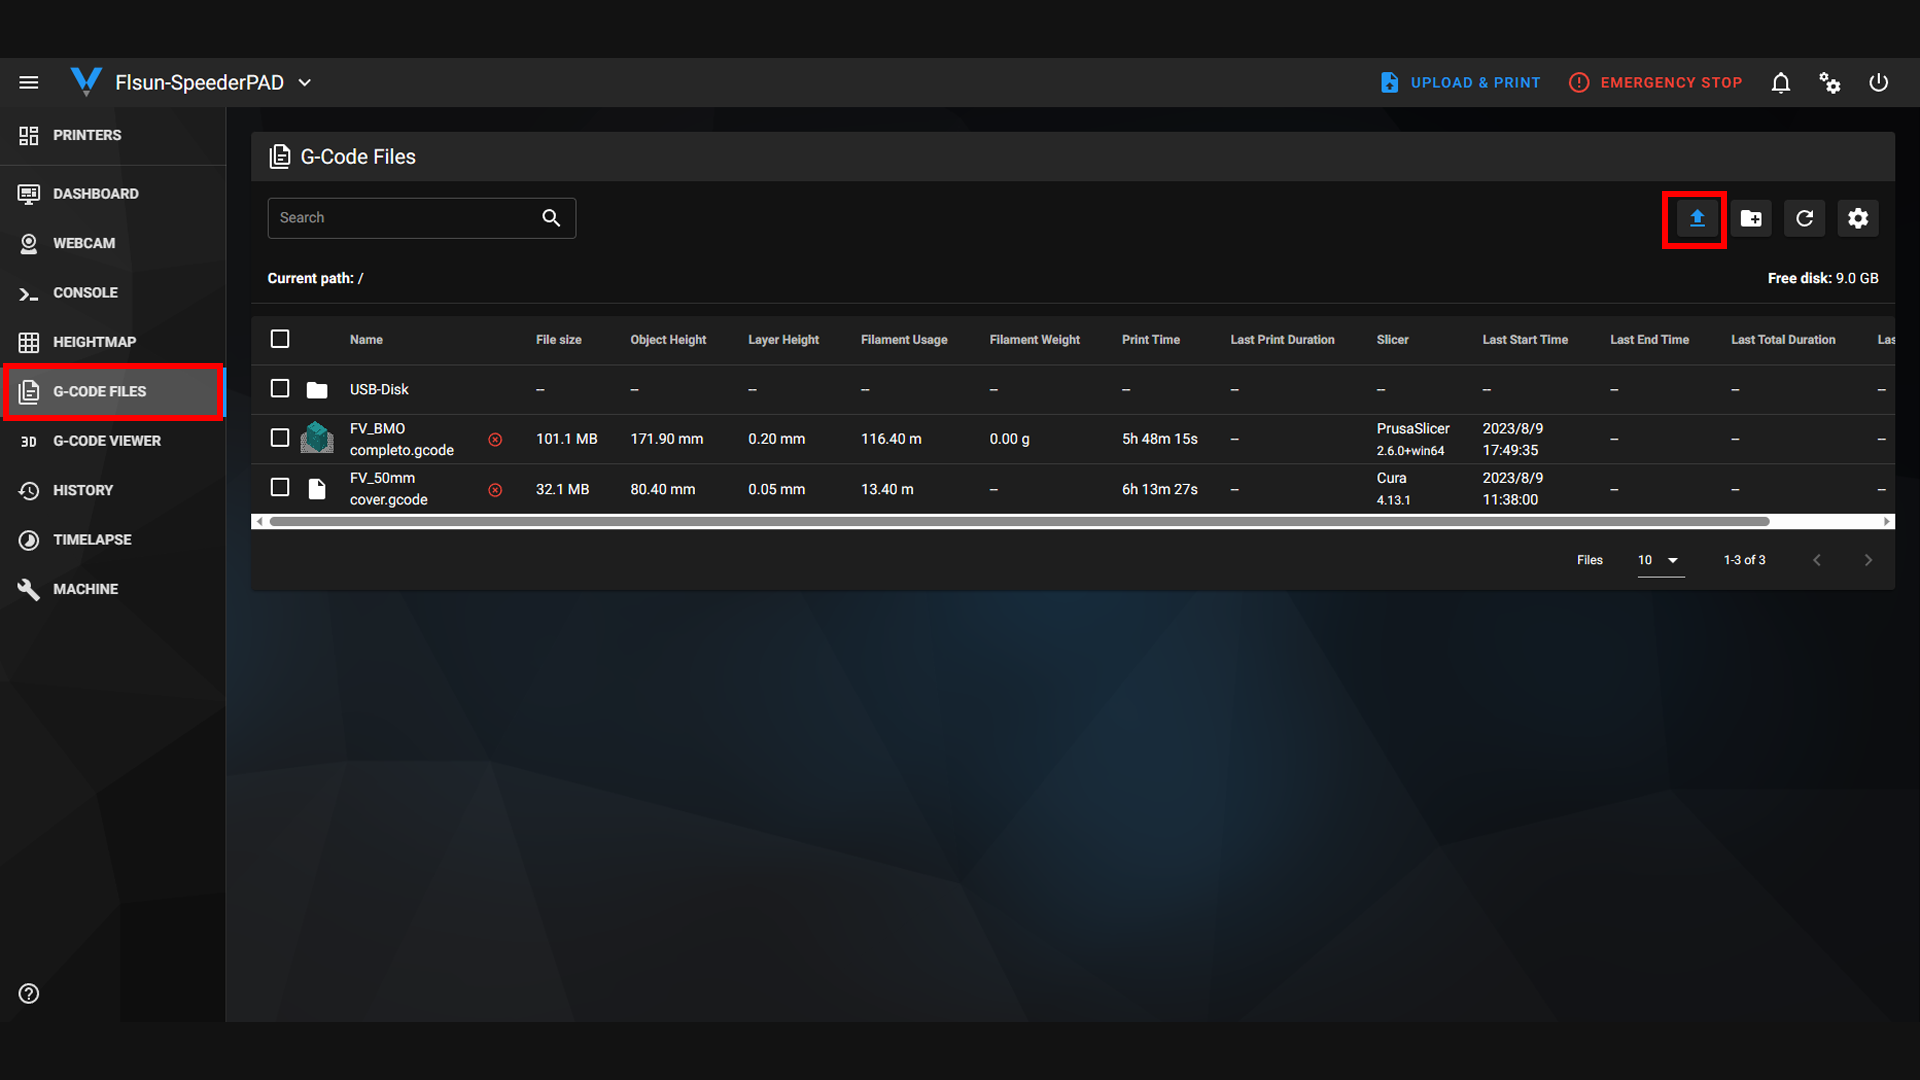
(2) Click "G-CODE FILES" and the upload button on the web page to upload the G-CODE file to the web page.
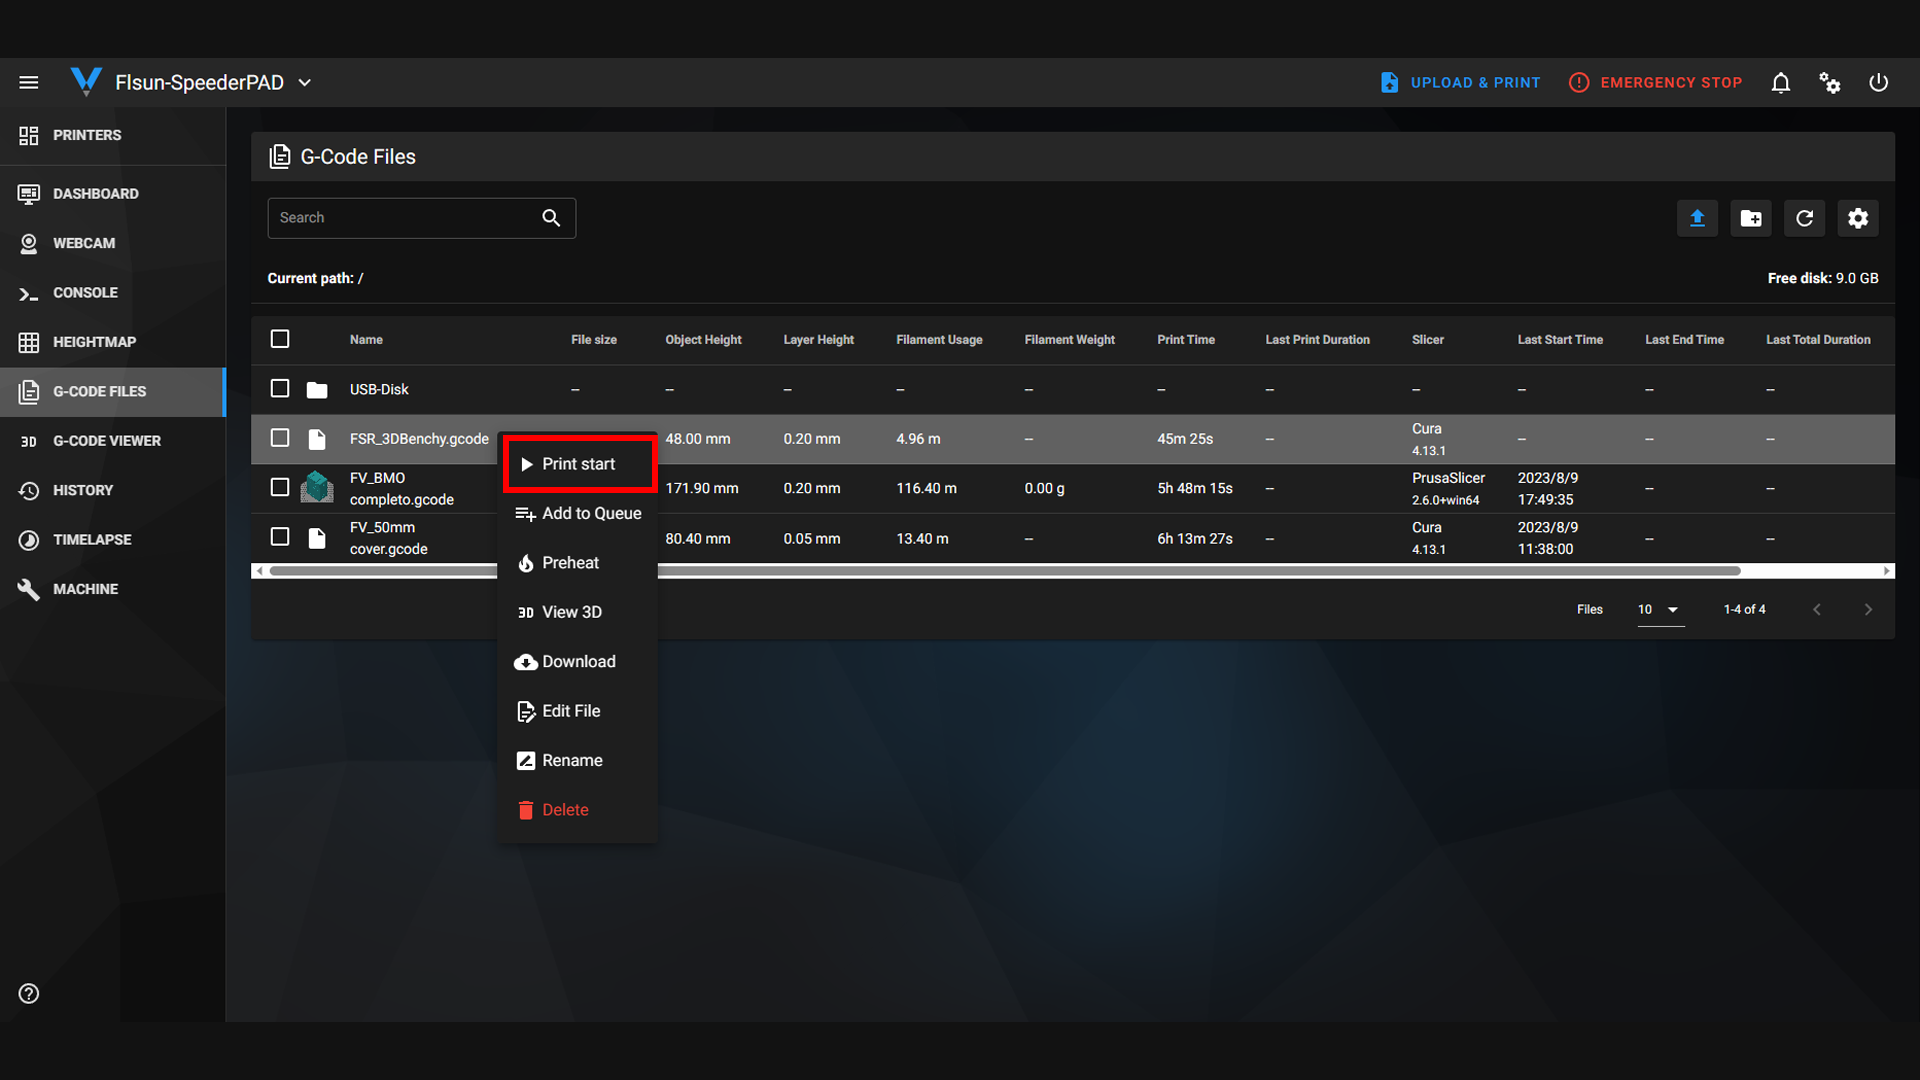
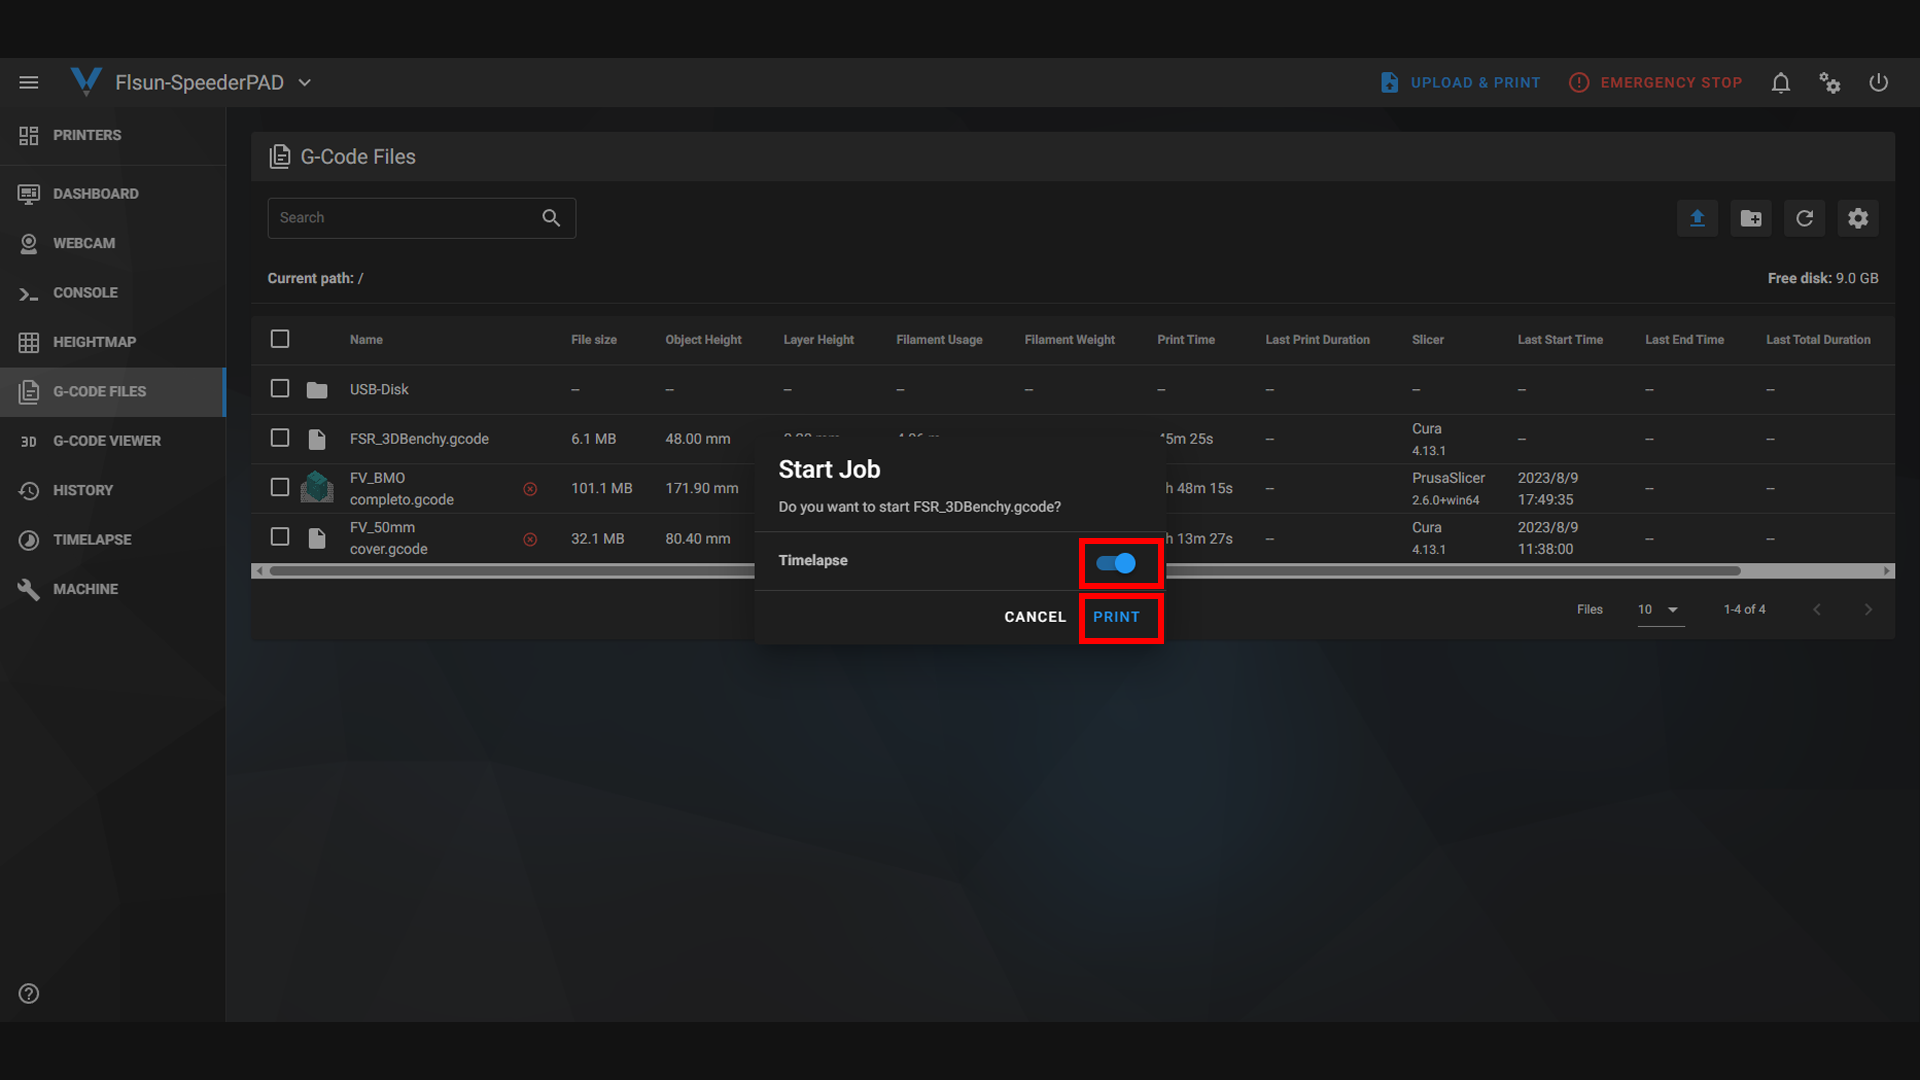
(3) Right click on the G-CODE file and click "Start Printing".
(4) After timelapse is configured successfully, click on the Gcode file, a popup box will prompt "Timelapse".
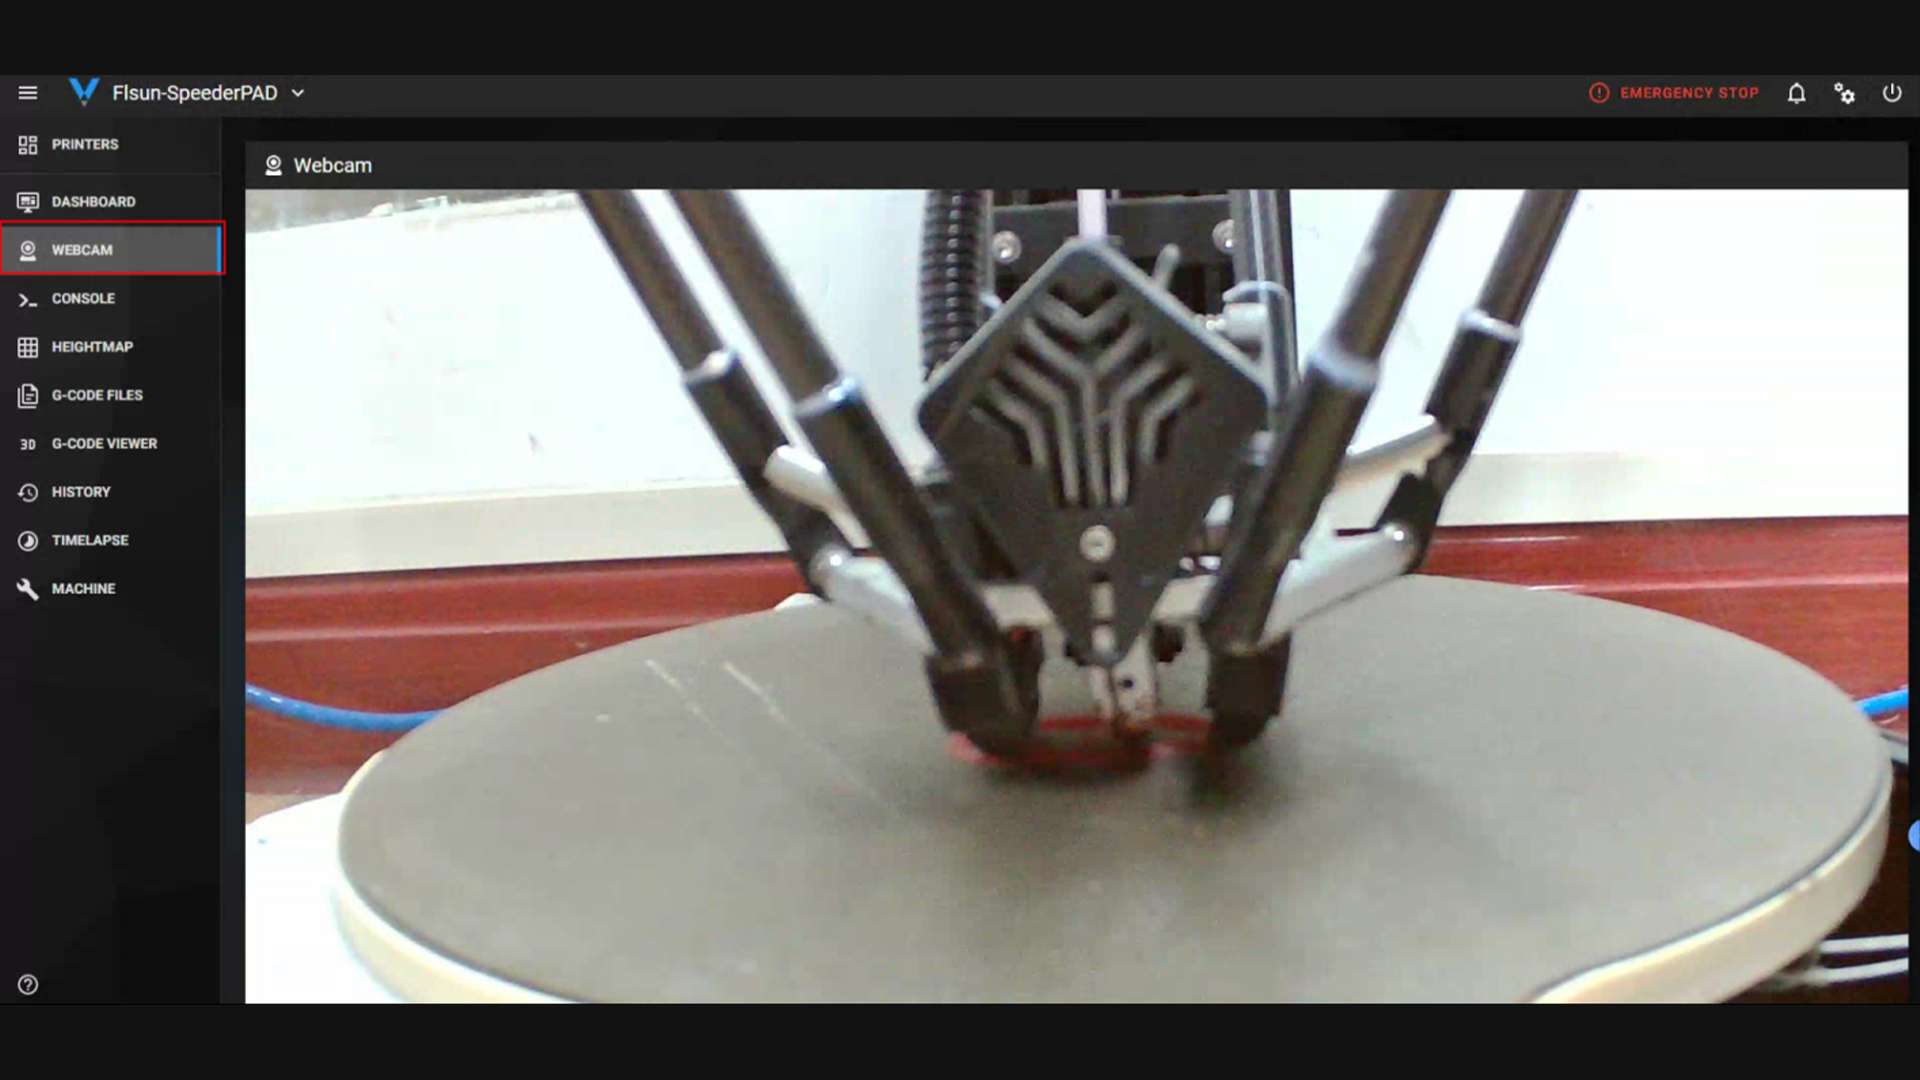
(5) Click "Webcam" on the homepage to monitor your printer in real time.
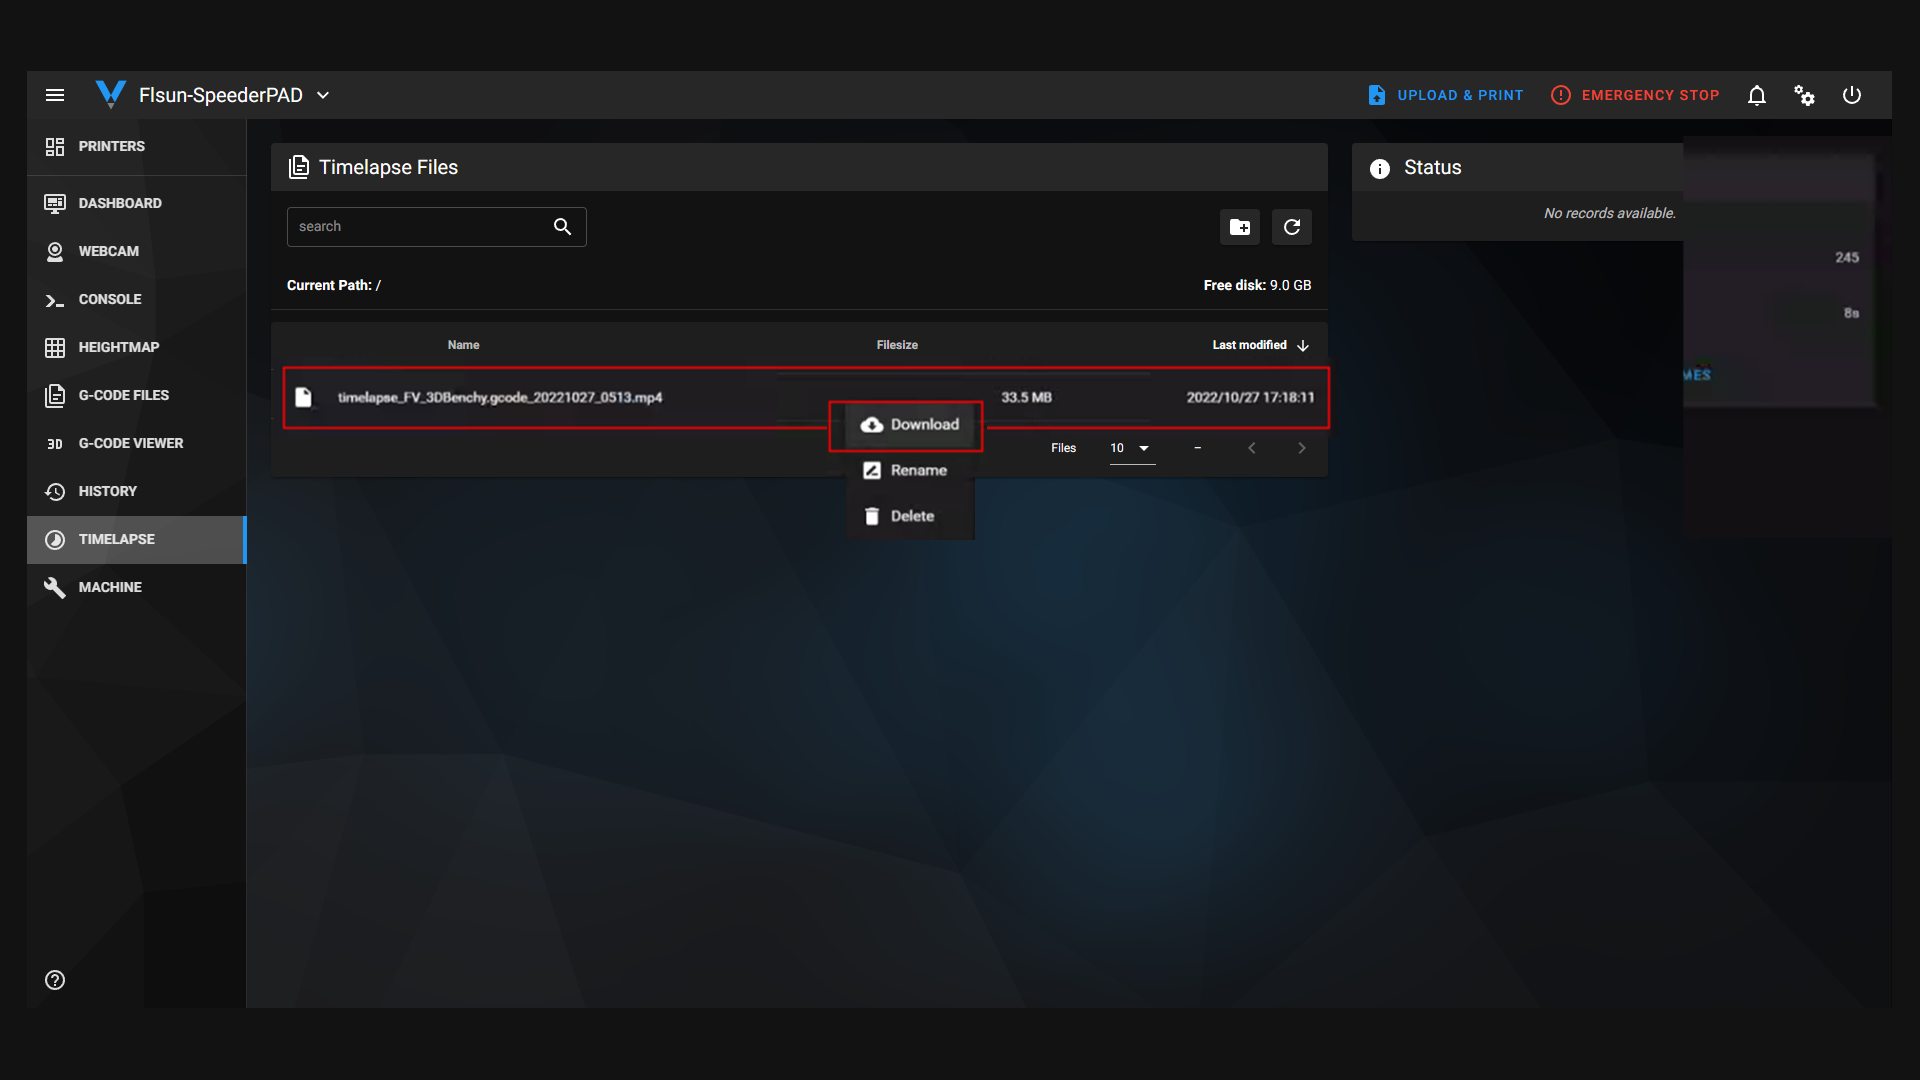
(6) After printing, the video will be automatically saved in the "TIMELAPSE" column.
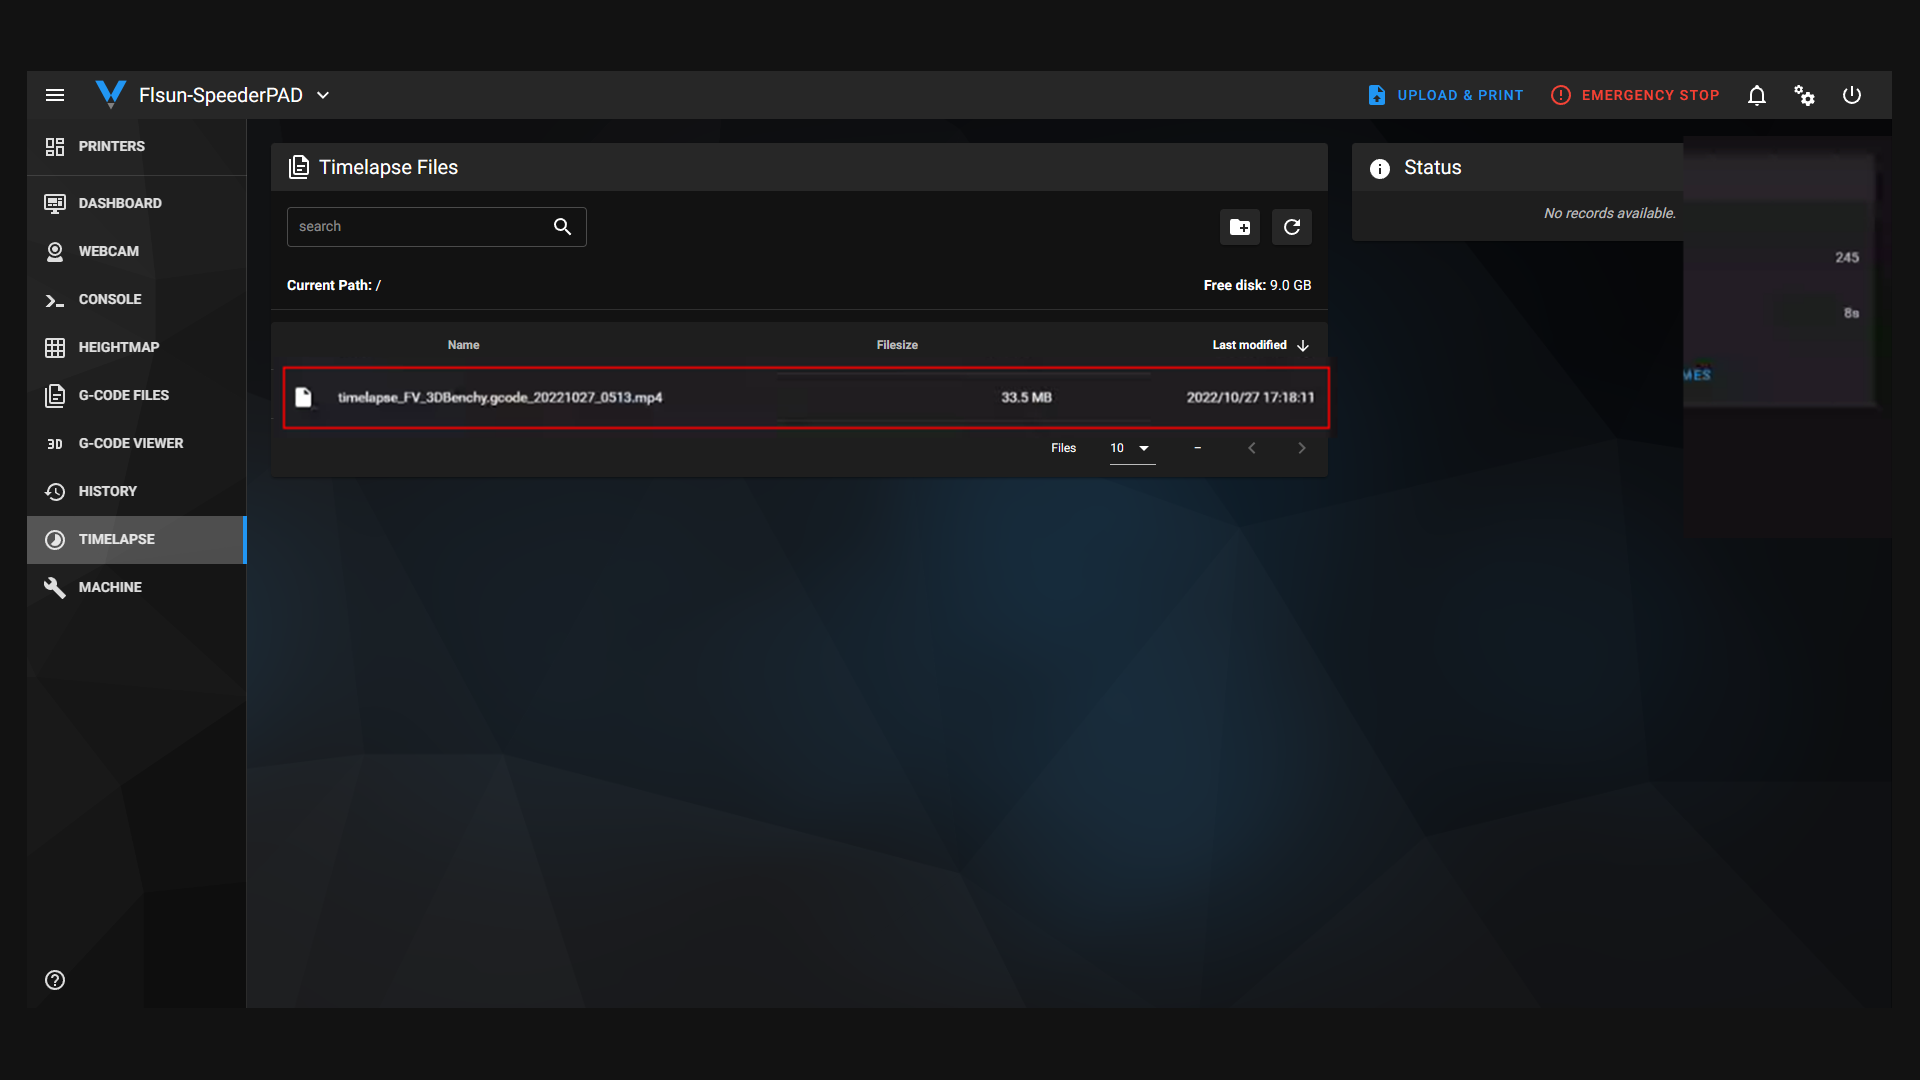
(7) Right-click the file and click Download.
