¶ I. Motherboard
The control center of all moving parts of the printer.
¶ II. When to replace
There is obvious damage to both the motherboard and the driver;
The failure is determined by the after-sales service team to be caused by a problem with the motherboard kit.
¶ III. Required tools
New motherboard kit
H2.0 Allen wrench
H2.5 Allen wrench
Slotted screwdriver
¶ IV. Replacement steps
Note: Before starting any disassembly and assembly, make sure the machine is powered off.
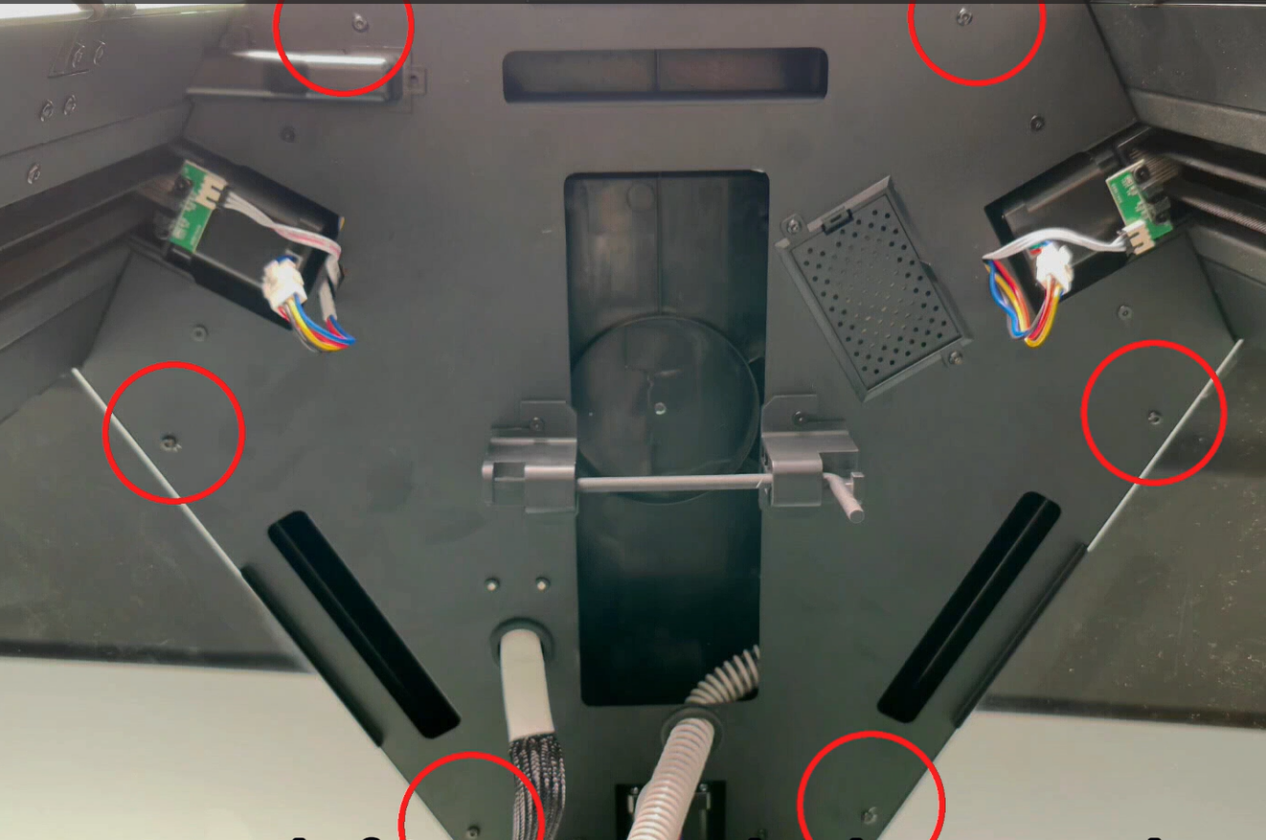
¶ 1. Use an H2.5 Allen wrench to remove the 6 screws that fix the upper shell cover;
¶ 2. Remove the cover;

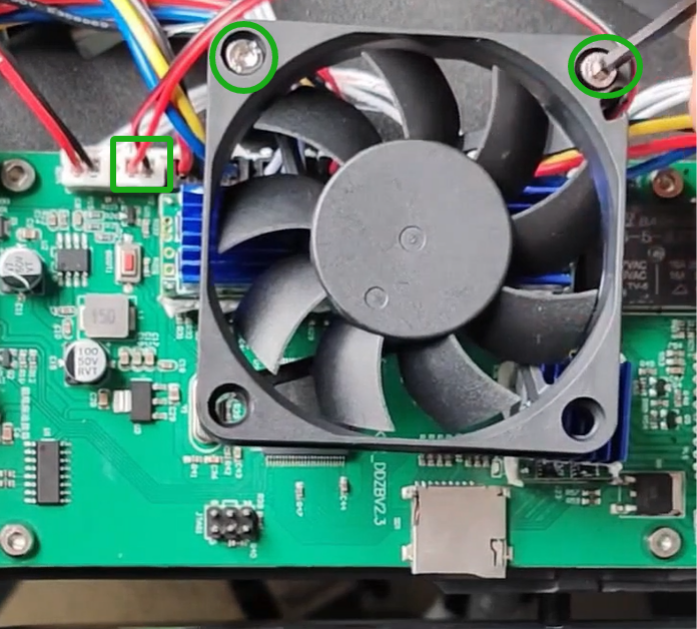
¶ 3. Use an H2.5 Allen wrench to remove the screws that fix the fan, unplug the fan terminal, and remove the motherboard fan;
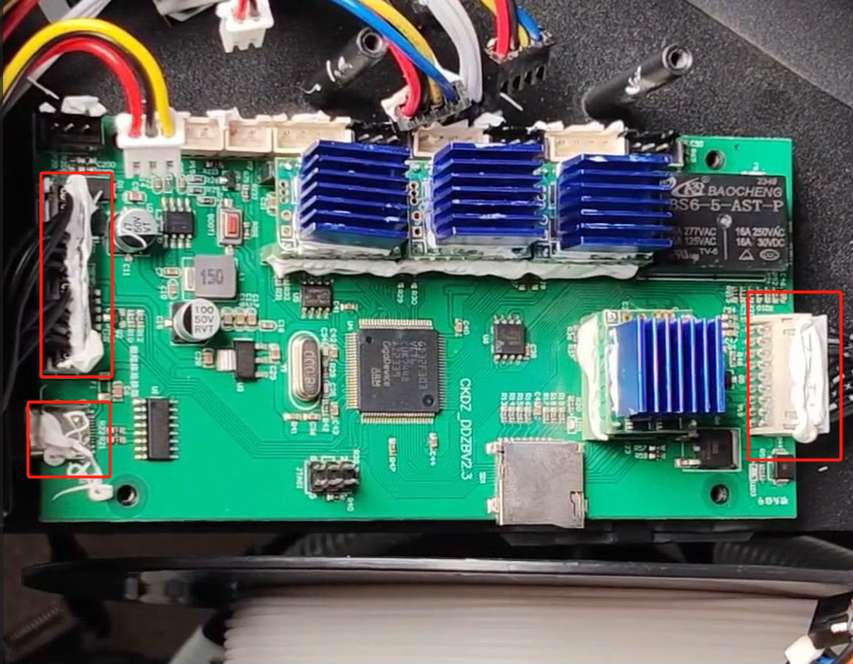
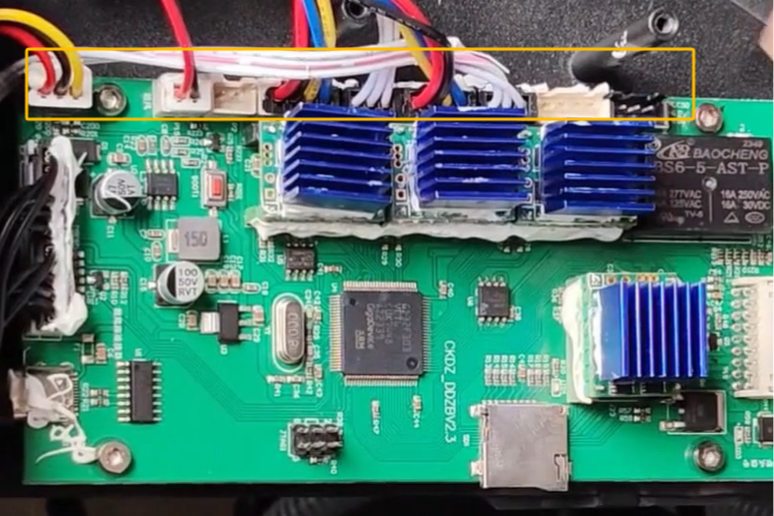
¶ 4. Remove the motor wire, limit switch wire, motherboard fan wire, filter fan wire, and blower wire;
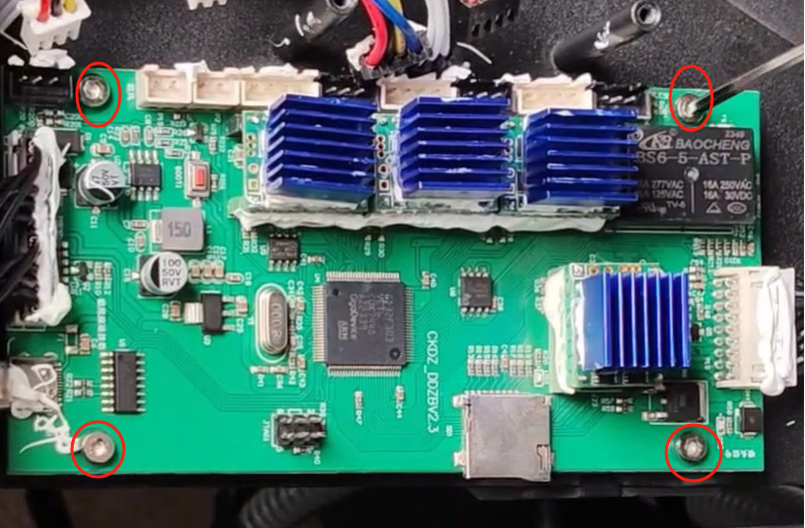
¶ 5. Use an H2.5 wrench to remove the screws that fix the motherboard;
¶ 6. Unplug the effector wire, motherboard adapter cable, and type-C cable;