¶ Overview
The S1 Blower Upgrade Kit includes a thicker wind guide plastic rib pipe and a higher wind volume blower. After the replacement, it can effectively reduce the noise of the blower, allowing you to print without the annoyance of noise.
Please ensure to review this guide before upgrading, follow the steps outlined in this guide, and check that all steps included in this upgrade are completed. If you have any questions, please contact our technical team.
It is recommended to upgrade the silent fan after updating the motor driver.
¶ Required Materials
¶ (1) The upgrade kit includes:
Blower: 1 unit;
Controller: 1 unit;
Drive transfer wire: 1 piece (already connected);
Plastic rib pipe: 1 piece;
Plastic rib pipe silicone head: 1 piece
DC buck power supply: 1 unit (already connected);
Hexagonal head machine screws M48: 6 pieces;
Hexagonal flat round head tapping screws (flat tail) ST2.98: 8 pieces;
Magnets: 3 pieces;
Acetic acid tape: 1 roll;
S1 Motor Drive Burning Rig Connection Wire: 1 piece;S1 Motor Drive Board PCBA: 1 piece;
Cross flat head tapping screws KA2*6: 1 piece;
Retaining bands: 2 pieces.
¶ (2) Parts that need to be 3D printed:
Blower housing (including left and right shell): 1 set
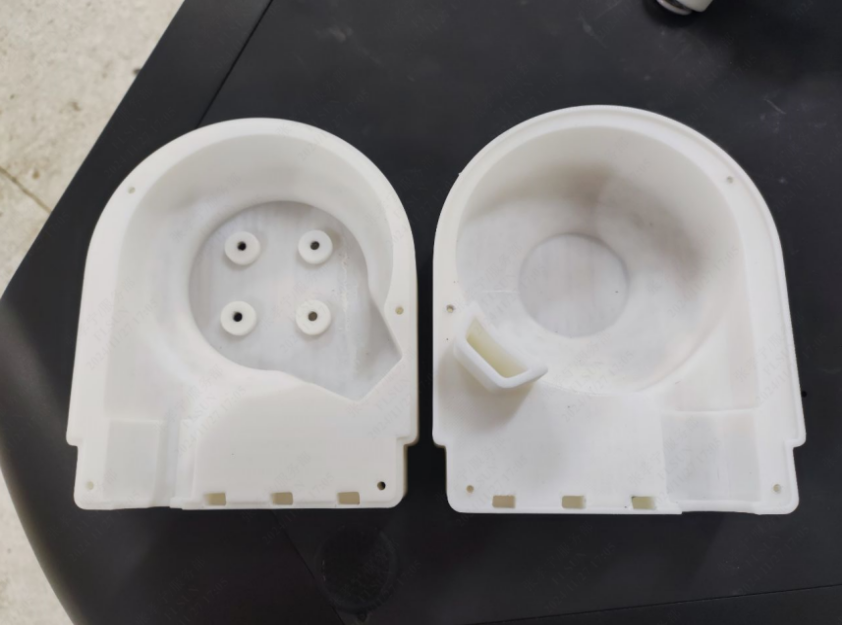
¶ Stl download link:
https://drive.google.com/drive/folders/1kr0S_eRK0BghpEHL57WXKeZuOlqM520G?usp=sharing
¶ Operation Steps
¶ (1) Preparation
Before replacing the fan, please check the upgrade kit materials to ensure they are complete; then 3D print the blower housing. After printing is finished and checked, proceed to the next step.
¶ (2) Update the mainboard firmware
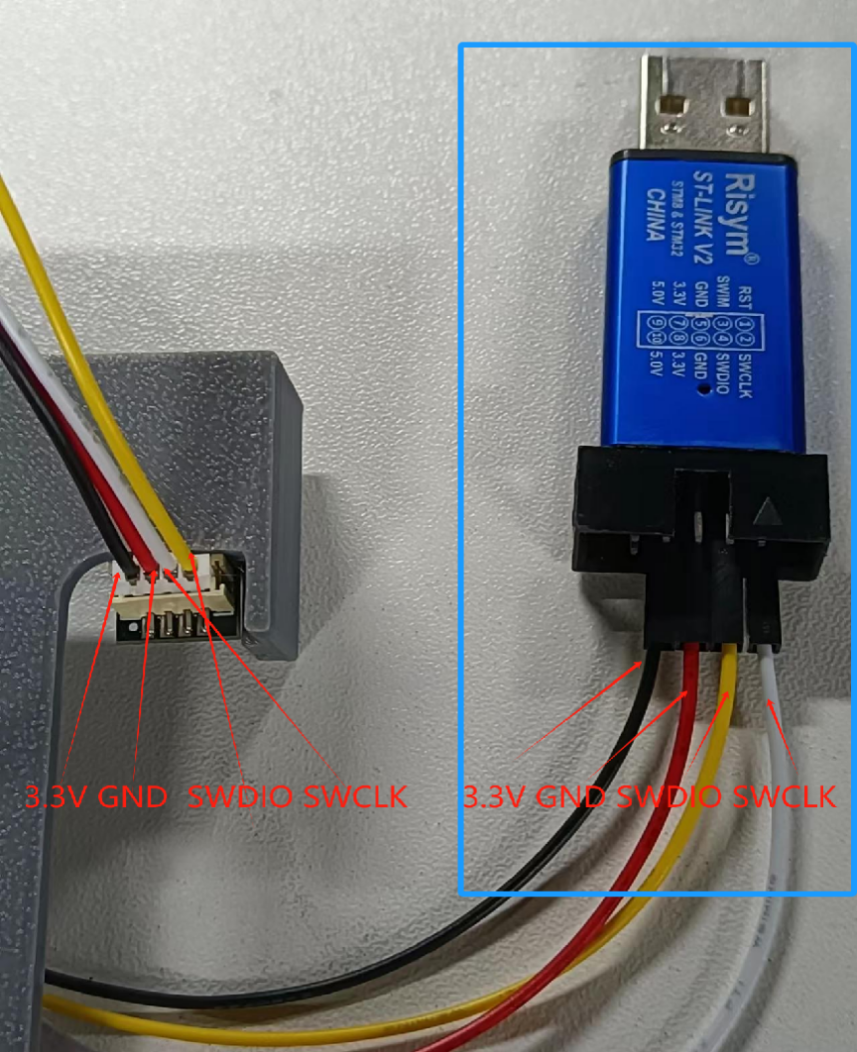
The steps to update the mainboard firmware are the same as those for updating the closed-loop motor drive board (when burning the firmware, select the klipper-low-S1Pro-V1.0.0.1005.bin file). It is recommended to update the closed-loop motor drive program first and then update the mainboard program. For a clearer and more concise explanation, only the wiring sequence is detailed here.
¶ 1.The wiring sequence of the ST-LINK V2 programmer end remains the same as when burning the closed-loop motor drive board:
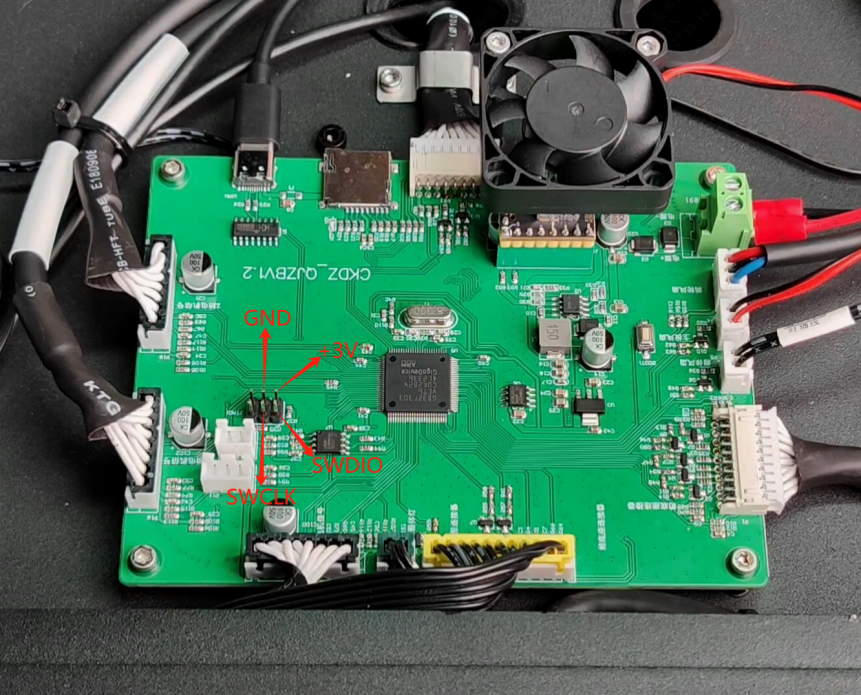
¶ 2.The mainboard firmware burning pin diagram is shown in the figure below:
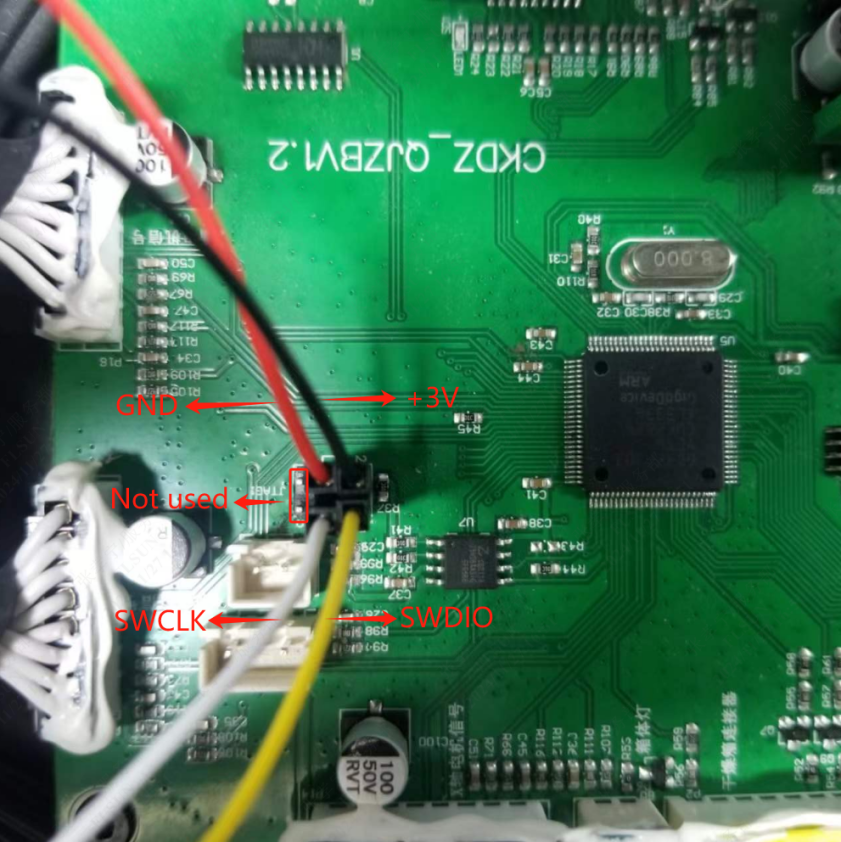
¶ 3.The mainboard wiring diagram is shown in the figure (the two pins on the far left are not used):
¶ Motherboard firmware download link:
https://drive.google.com/file/d/1WdLjsxMB836n0qlnYroi5YH55pAvl7nS/view?usp=sharing
¶ (3) Adjust the printer configuration file:
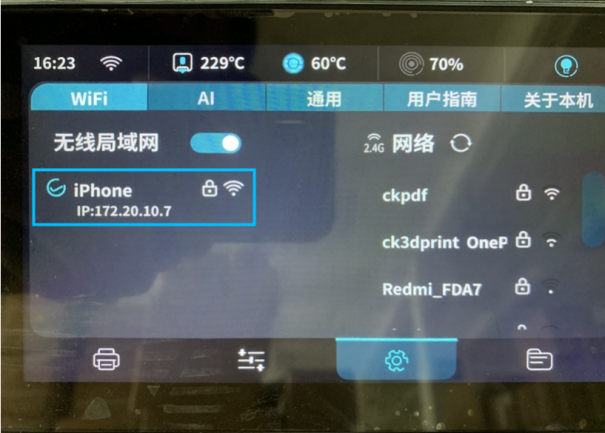
¶ 1.Connect the printer and the mobile terminal to the same local area network.
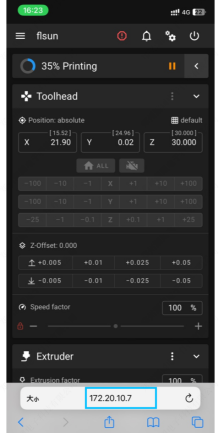
¶ 2.Enter the printer's IP address in the mobile terminal browser to connect to the printer.
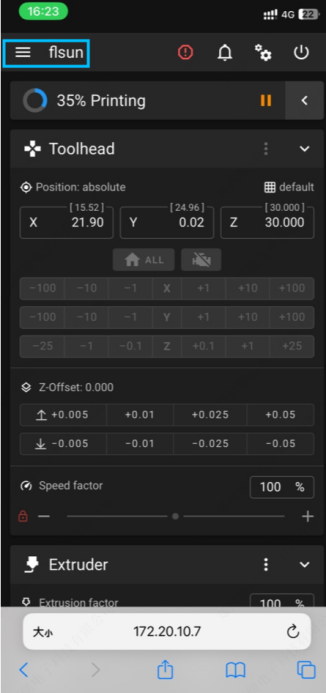
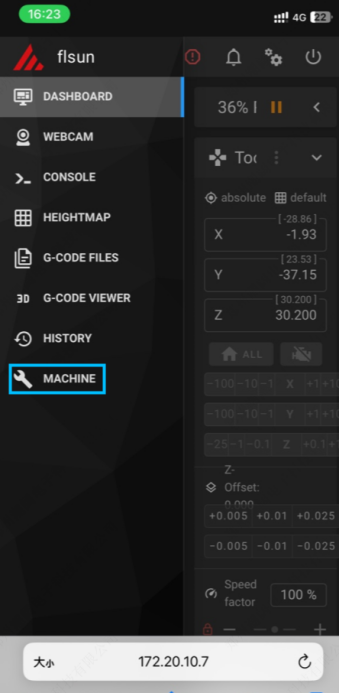
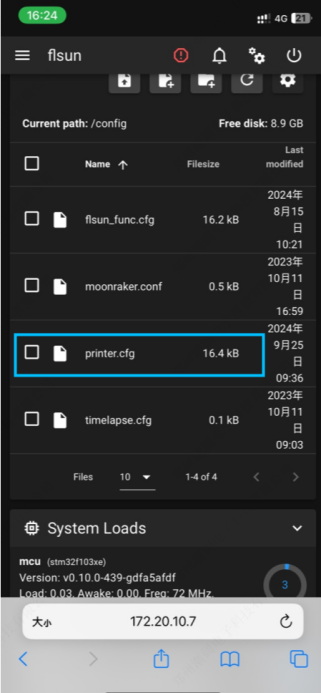
¶ 3.Click on the "Menu" bar at the top left, open the last item, and open the "printer.cfg" configuration file:
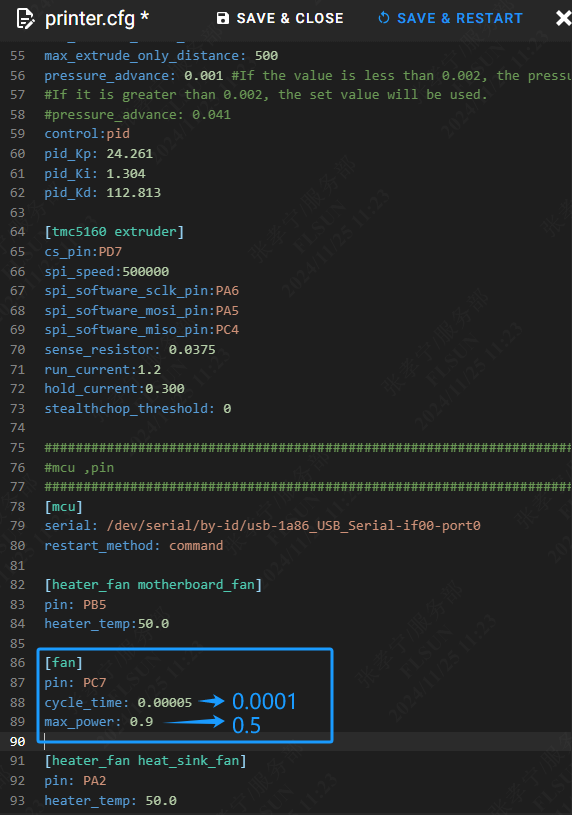
¶ 4.Find the command line where "[fan]" is located (S1 is around line 86), change "cycle_time" from 0.00005 to 0.0001; change "max_power:0.9" to "max_power:0.5", and then add an M106 macro code block (add approximately to the position shown in the figure, below the [adxl345] module), and finally click "Save and Restart" at the top right:
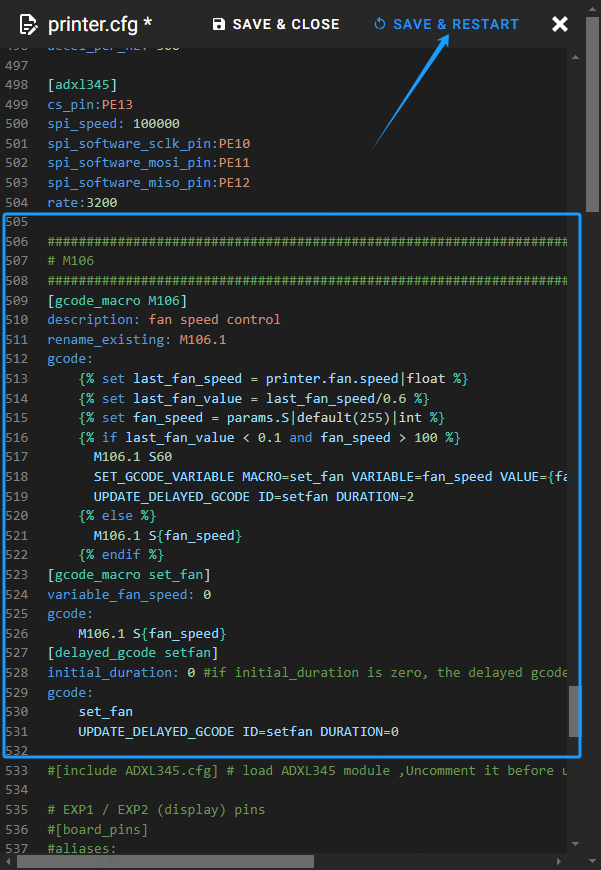
¶ M106 Macro Code Download Link:
¶ Disassembly
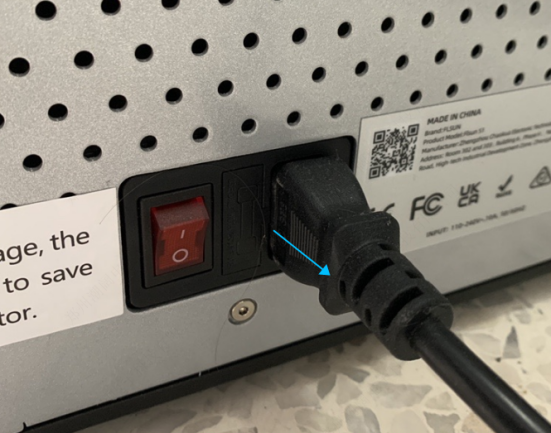
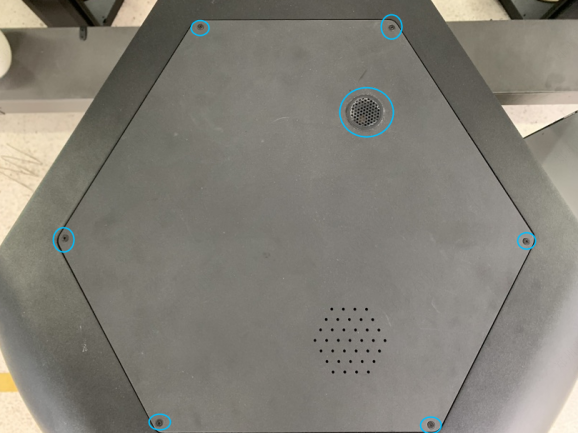
¶ 1.Turn off the power to the machine and ensure all indicator lights are off. Use a 2.0mm hexagonal wrench to remove the upper cover screws, open the machine's upper cover, and remove the upper cover air intake filter.
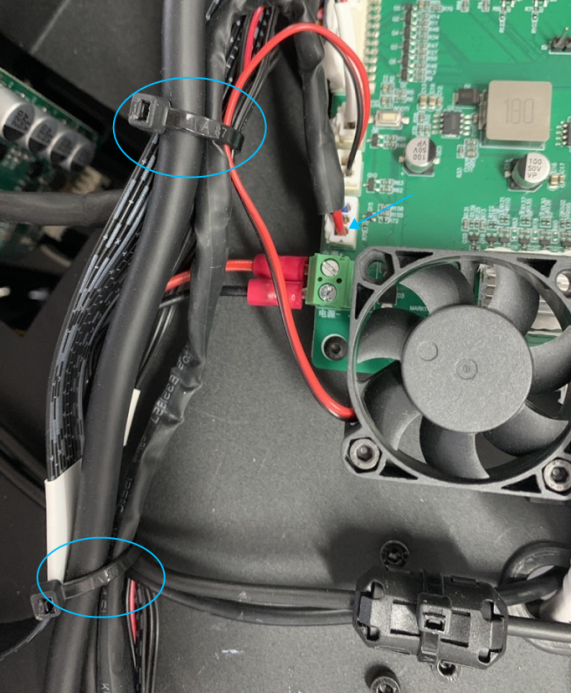
¶ 2.Cut open the fan drive power wire's retaining band and unplug the fan drive power plug from the mainboard.
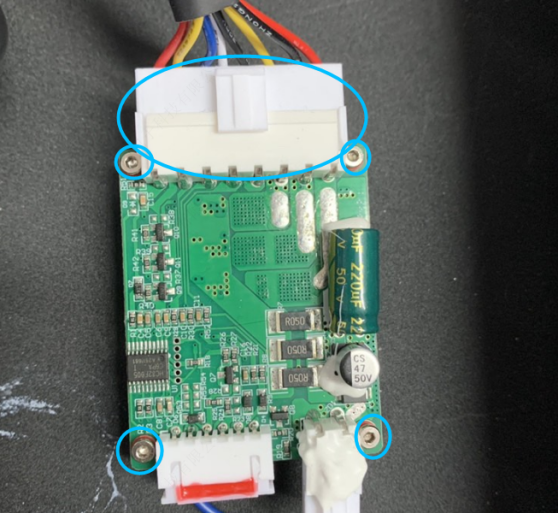
¶ 3.Disconnect the fan from the drive board's connecting plug and use a 1.5mm hexagonal wrench to remove the drive board (screws can be reused later).
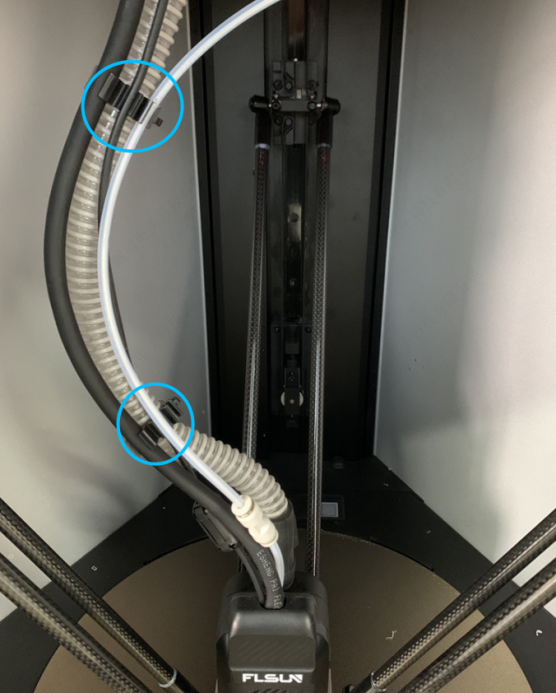
¶ 4.Remove the four-hole line tie from the original plastic rib pipe.
¶ 5.Pull the silicone head off the effector and also remove the silicone head from the plastic rib pipe (neither the silicone sleeve nor the plastic rib pipe will be used anymore).
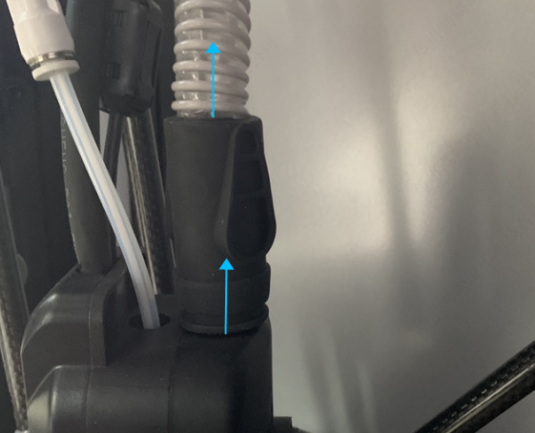
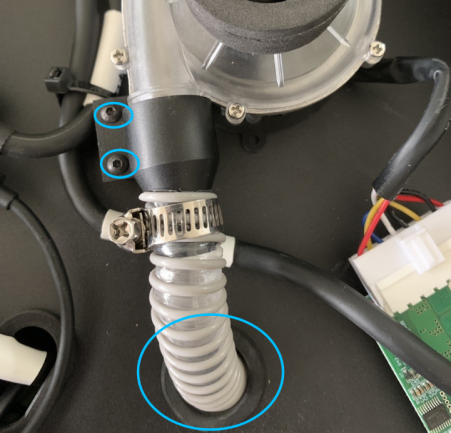
¶ 6.Use a 2.0mm hexagonal wrench to remove the two screws from the plastic rib pipe connector and pull out the plastic rib pipe along with the connector, also remove the silicone ring.
¶ 7.Use a 2.0mm hexagonal wrench to remove the three screws from the blower's bottom and remove the blower. (Note: The screw removal here is difficult, you can operate the machine on a desktop or remove one side of the machine's door panel for operation)
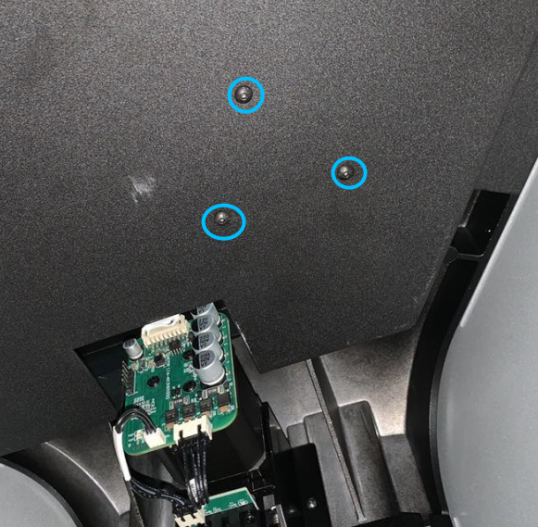
All disassembly work has been completed.
¶ Installation
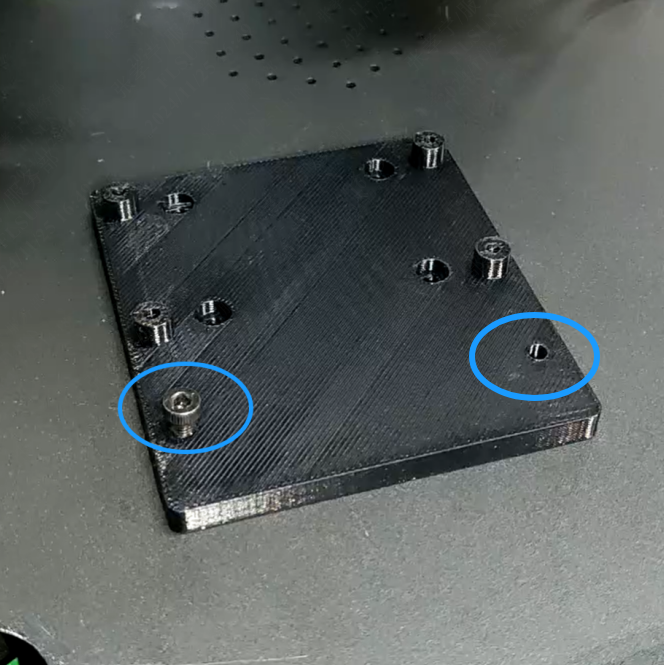
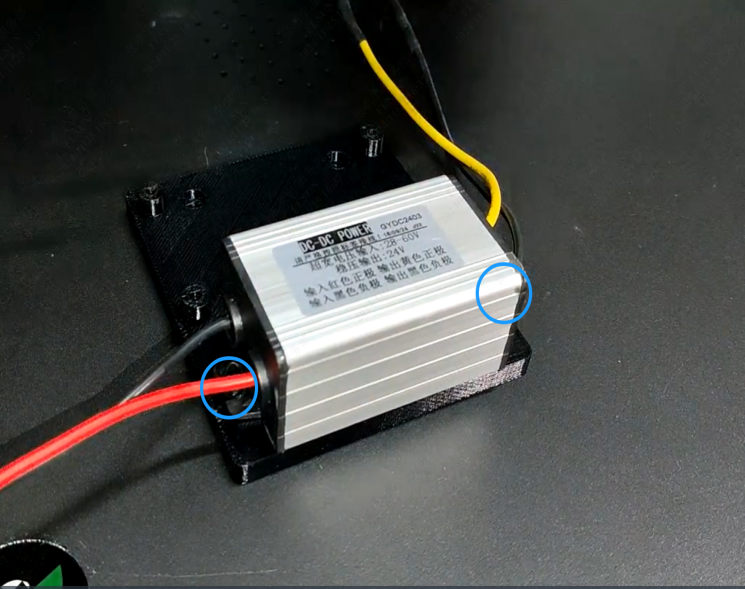
¶ 1.Install the DC buck power supply on the drive pressure plate, which requires two M4*8 hexagonal head machine screws to fix:
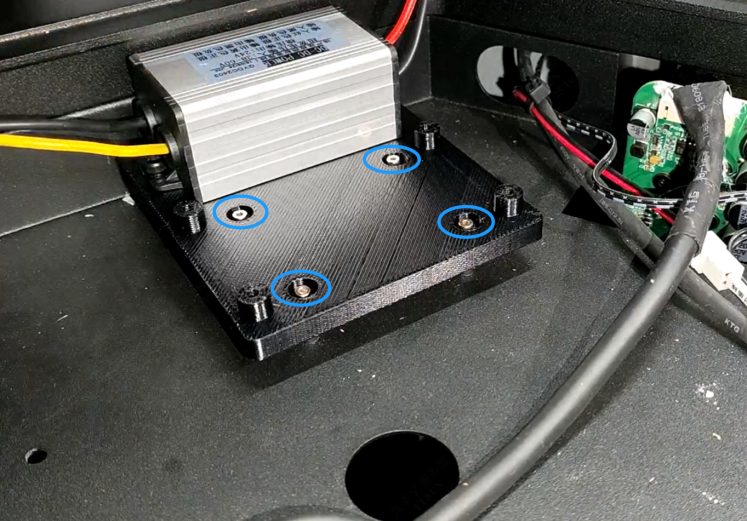
¶ 2.Use the four screws removed from the original drive to fix the "drive pressure plate" in the original drive position:
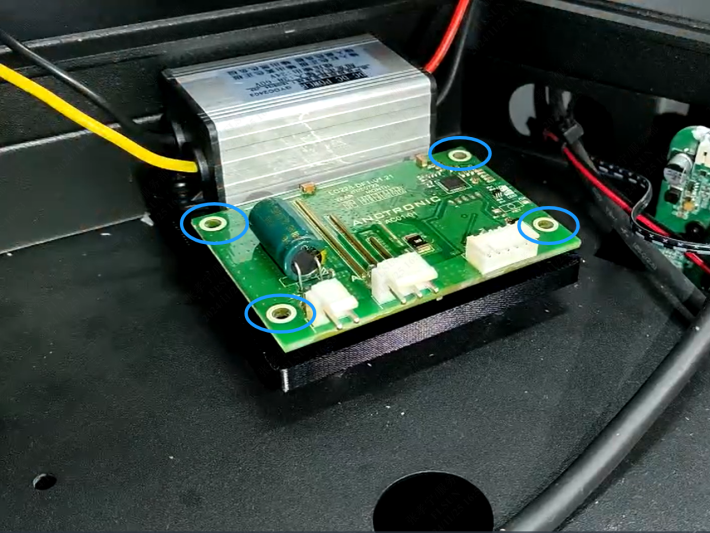
¶ 3.Use four ST2.9*8 hexagonal flat round head tapping screws to fix the fan drive board to the "drive pressure plate" as shown in the figure:
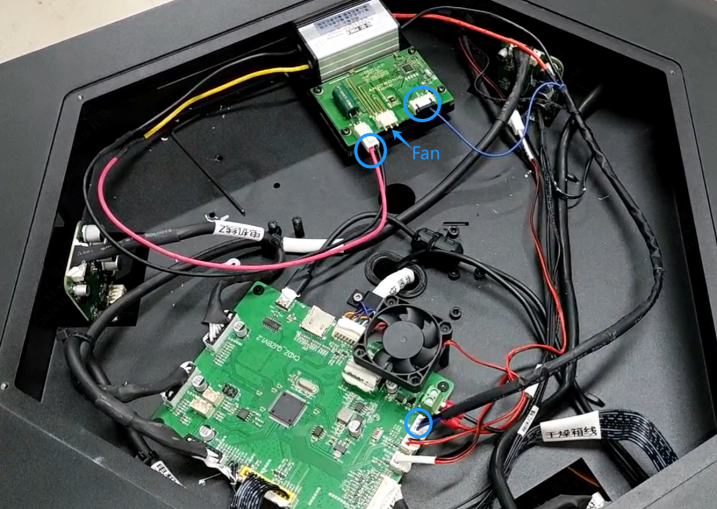
¶ 4.Plug the 3pin connector of the drive transfer wire into the mainboard, and the 2pin and 1pin connectors into the corresponding sockets on the fan drive board (as shown in the figure). Straighten the wire bundle and fix it with a cable tie:
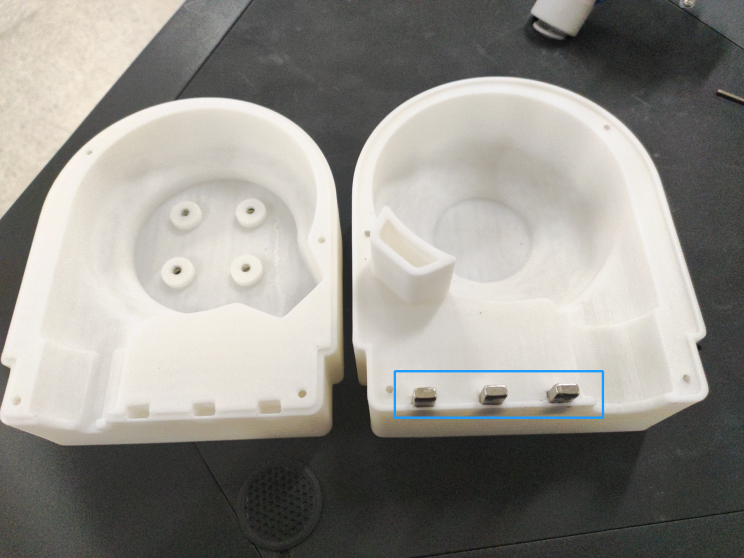
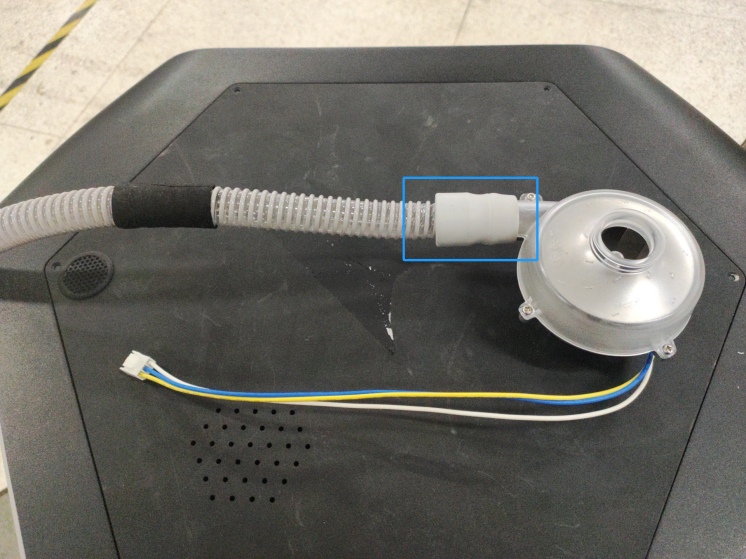
¶ 5.Insert the three magnets into the corresponding notches of the blower housing, connect the end of the plastic rib pipe with the silicone sleeve to the blower's exhaust port:
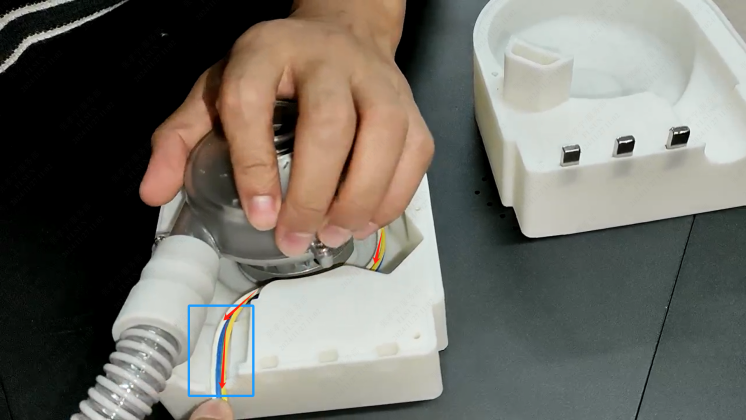
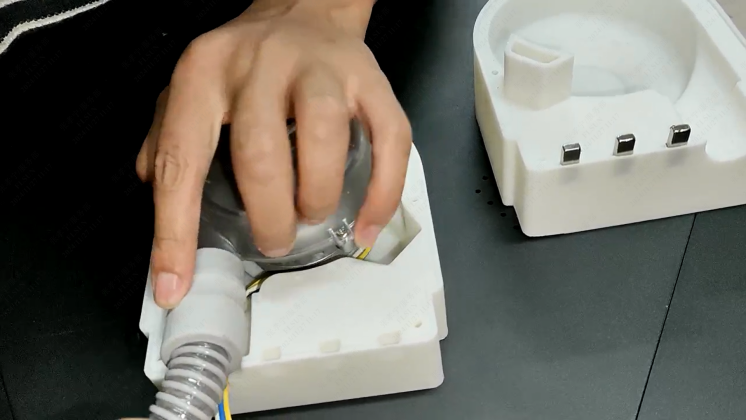
¶ 6.Install the blower and the plastic rib pipe into the right shell of the blower housing. place the blower wiring in the wire slot, pay attention to the wiring layout to ensure that the blower and wire bundle do not interfere with each other:
¶ 7.Use four M48 hexagonal head machine screws to fix the blower on the right housing, then cover the blower housing with the left shell, and lock it with four ST2.98 self-tapping screws as shown in the figure:
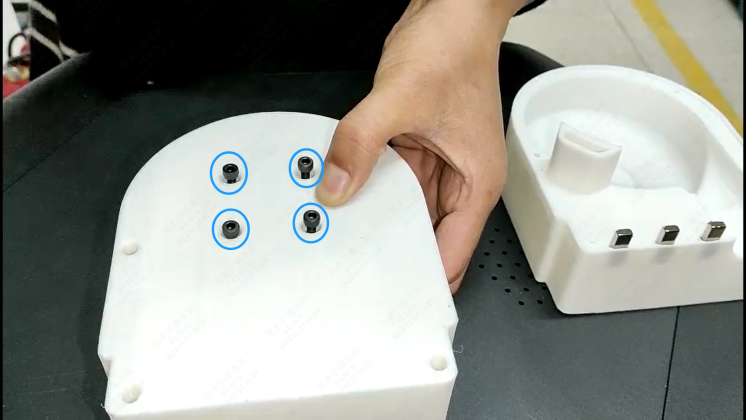
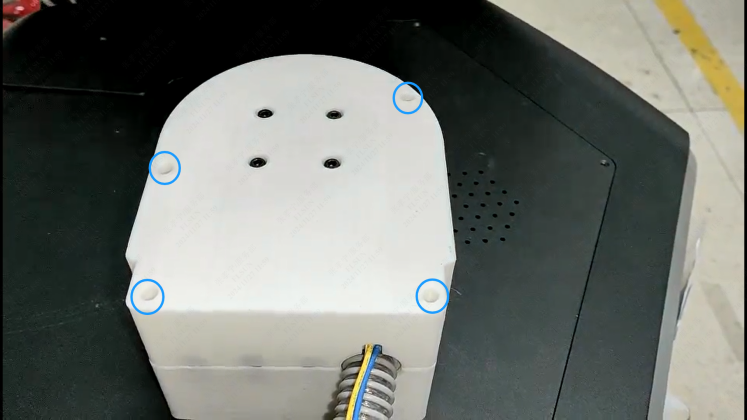
¶ 8.Wrap the acetic acid tape evenly around the plastic rib pipe at the shell outlet (anti-friction):
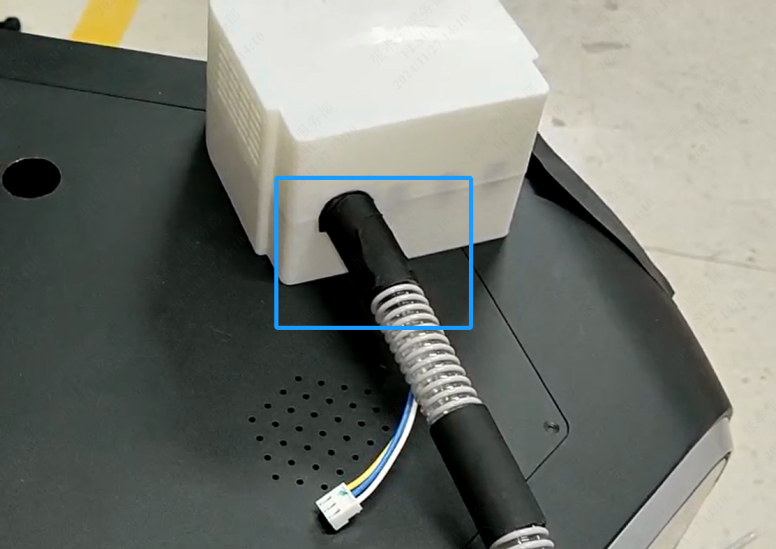
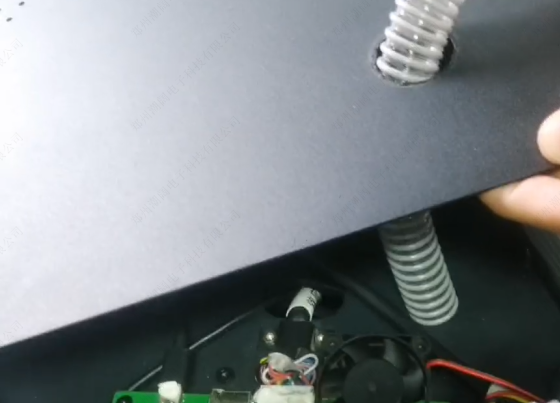
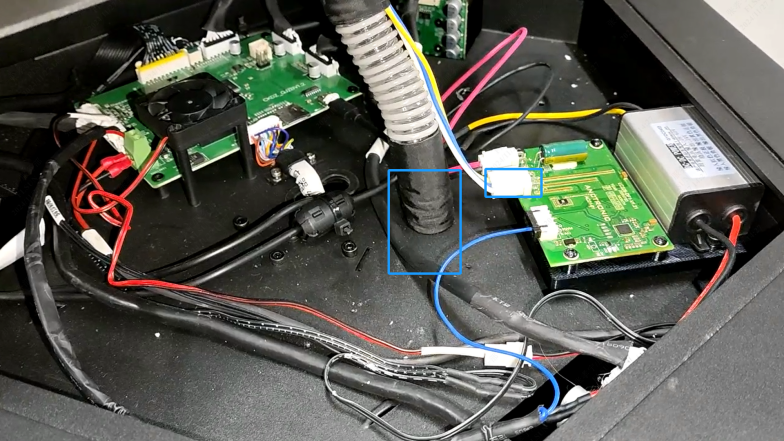
¶ 9.Pass the plastic rib pipe and blower wires through the air intake and the wind pipe hole of the top plate and the upper sheet metal frame, pay attention to the position of the acetic acid tape at the wind pipe hole of the upper sheet metal frame. Plug the blower's 3pin connection line into the corresponding position on the blower drive board:
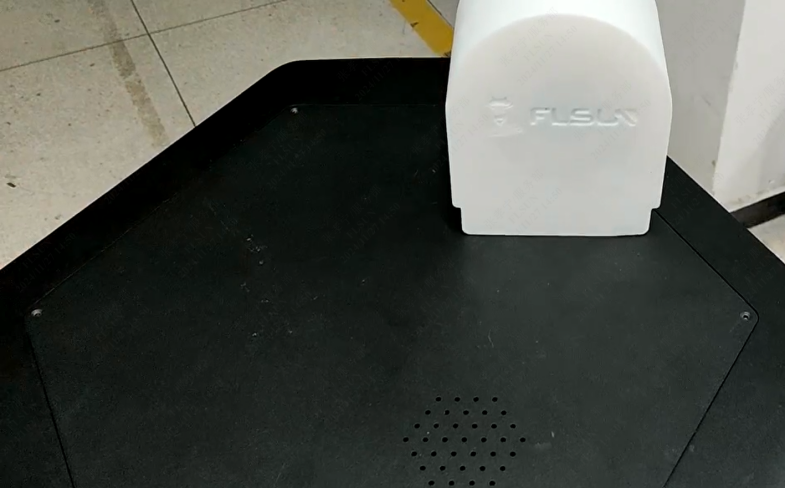
¶ 10.Install the upper cover:
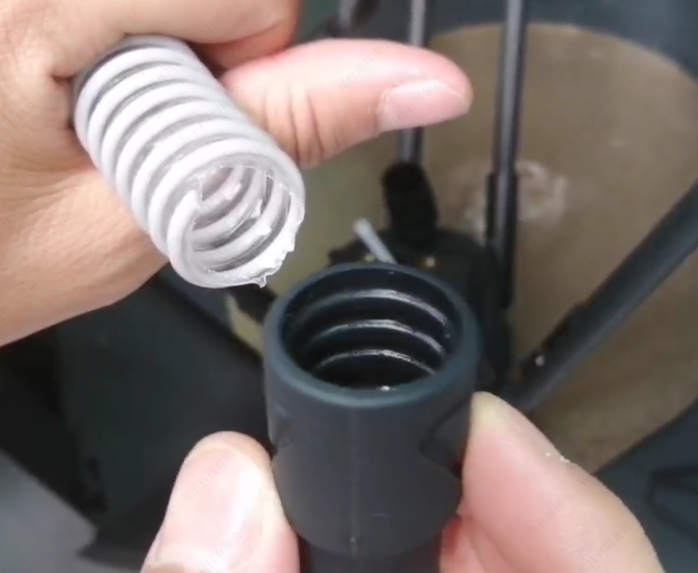
¶ 11.Push the other end of the plastic rib pipe into the new silicone sleeve, pay attention to the strength, keep the pipe's outer diameter from deforming, prevent the plastic rib pipe from damage. Then rotate and install the silicone sleeve on the effector's air intake hole.
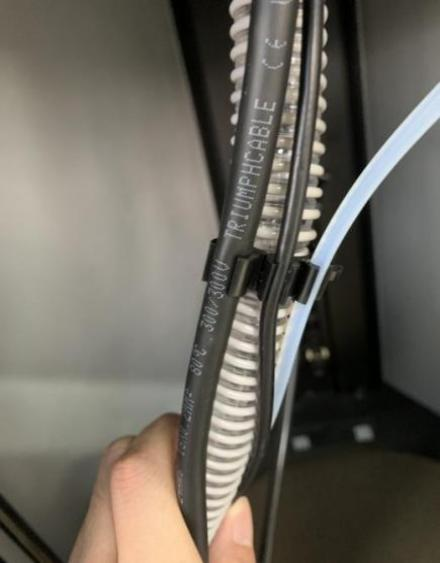
¶ 12.Install the "four-hole line tie" from the package, evenly clamp it in three places:
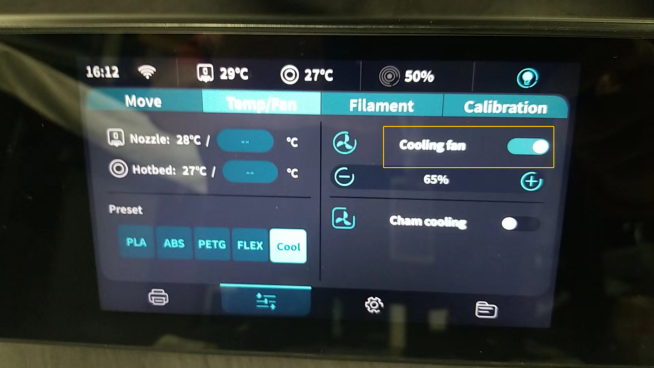
¶ 13.Power on the machine, turn on the cooling fan (click "Control → Fan → Cooling Fan" in order), make sure the fan can work normally (you can feel the air outlet near the nozzle with your hand, be careful not to heat the nozzle to prevent burns):
¶ 14.Open the calibration interface to recalibrate the machine.
Congratulations, you have completed all operations, and you can now enjoy a quieter experience.