¶ Boot wizard and first printing video:
¶ Boot wizard:
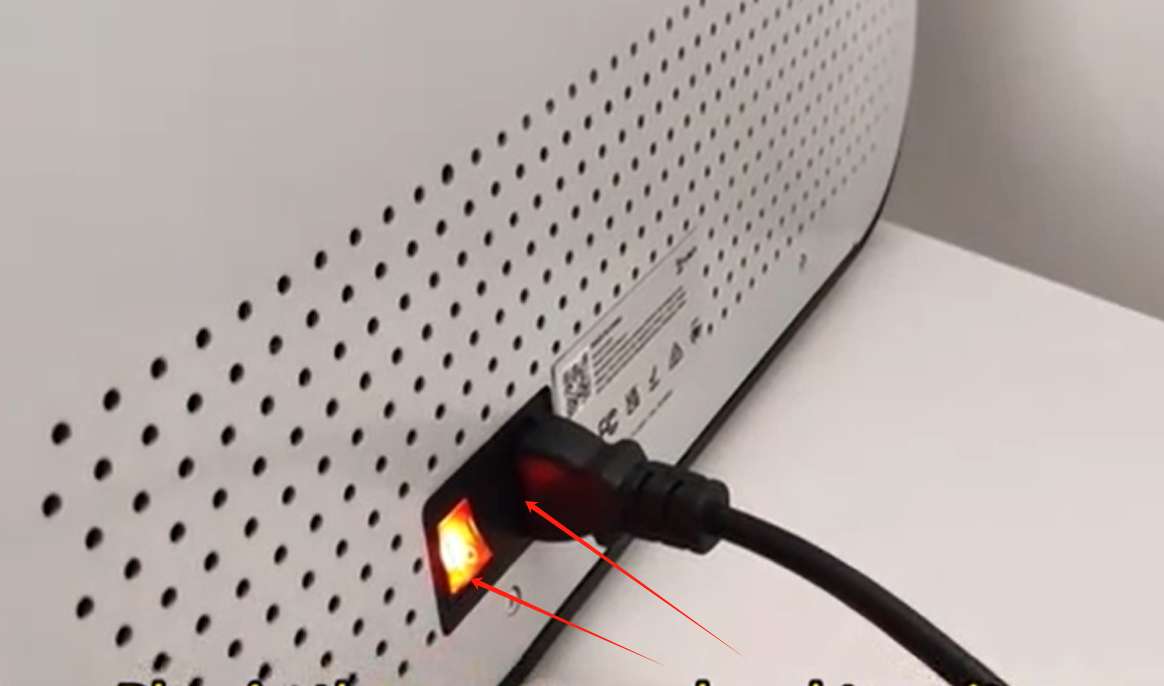
¶ 1. Connect the power cord and press the boat-shaped switch to power on the machine;
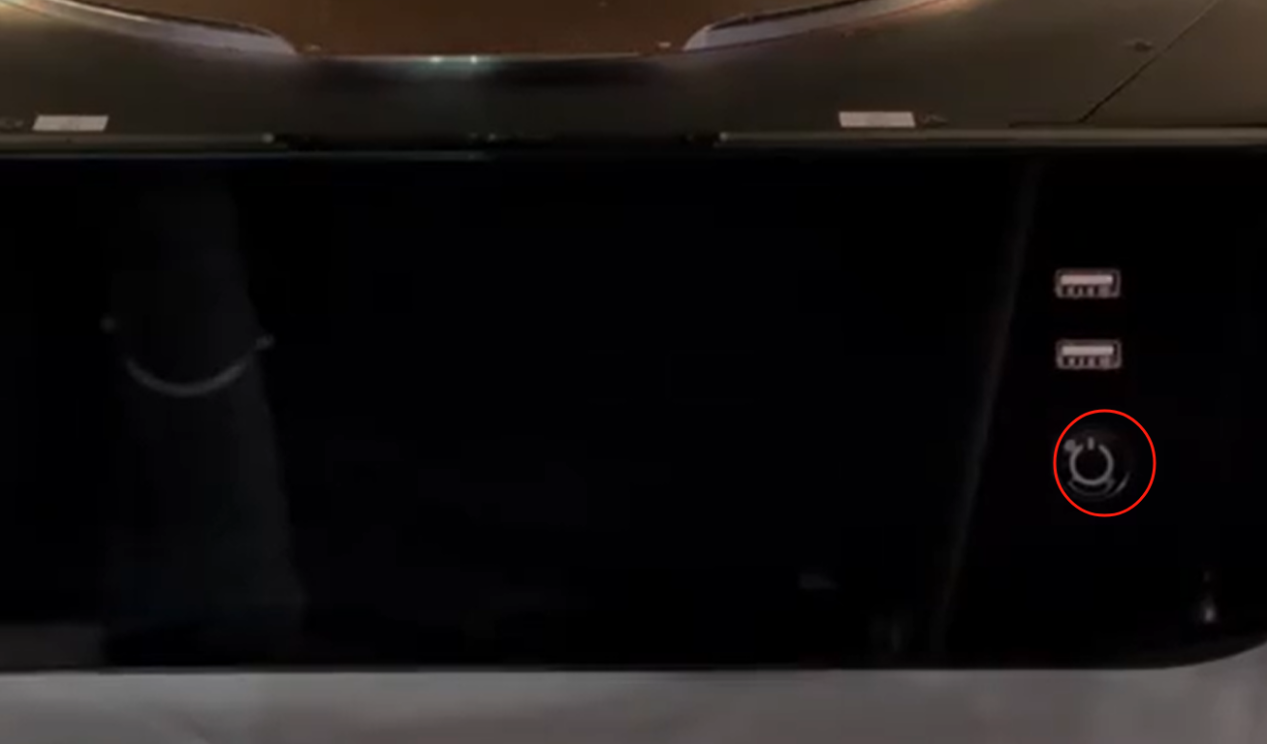
¶ 2. Short press the power button on the screen module to turn it on;
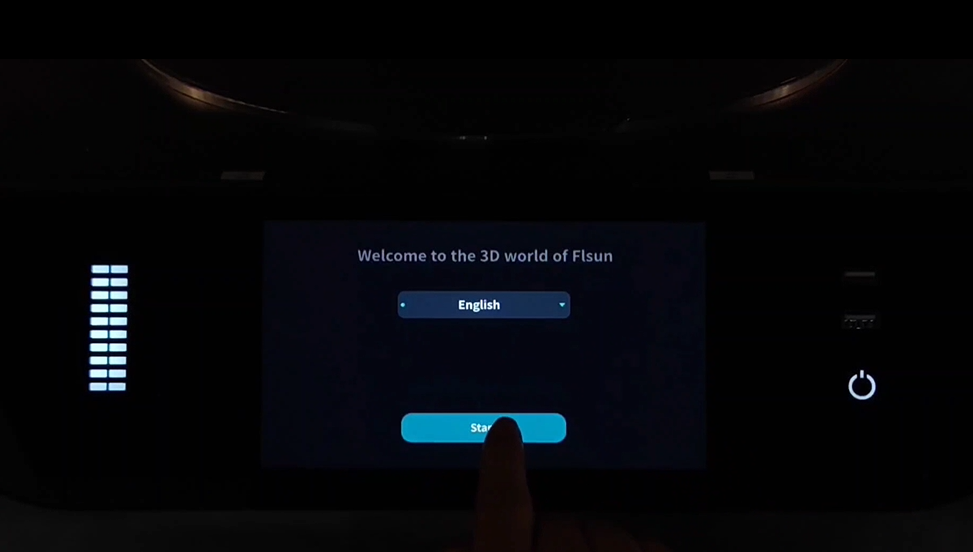
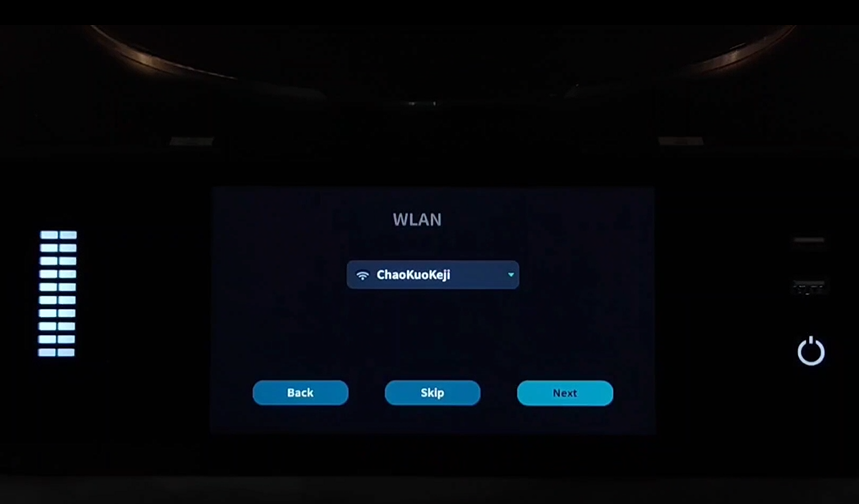
¶ 3. Complete the language settings and WiFi settings as shown on the screen. If you do not want to connect to WiFi yet, you can choose to skip;
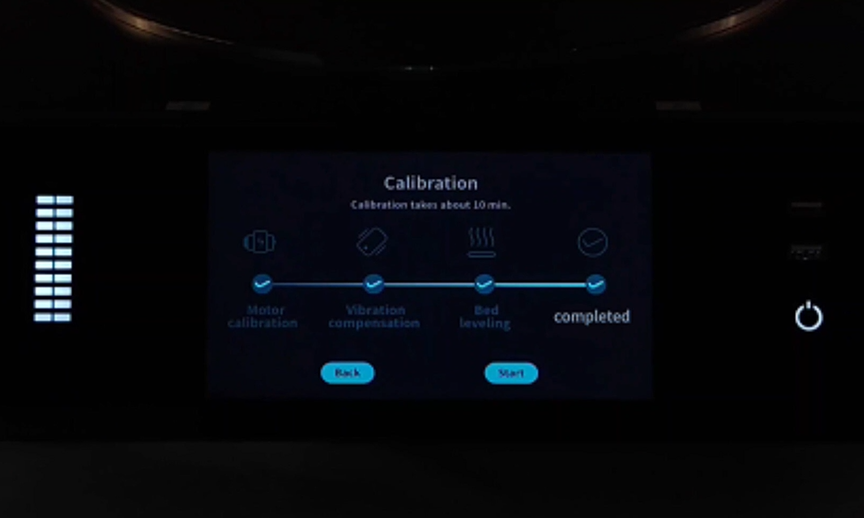
¶ 4. Complete the machine calibration according to the on-screen guidance. This process takes about 10 minutes;
Notice:
If an error occurs during the calibration step of the boot wizard and the motor is calibrated, the system will be entered directly. If there is a problem with leveling or resonance compensation, an error message will appear after the startup wizard ends. After an error occurs, the corresponding recalibration operation needs to be performed again.
¶ First print:
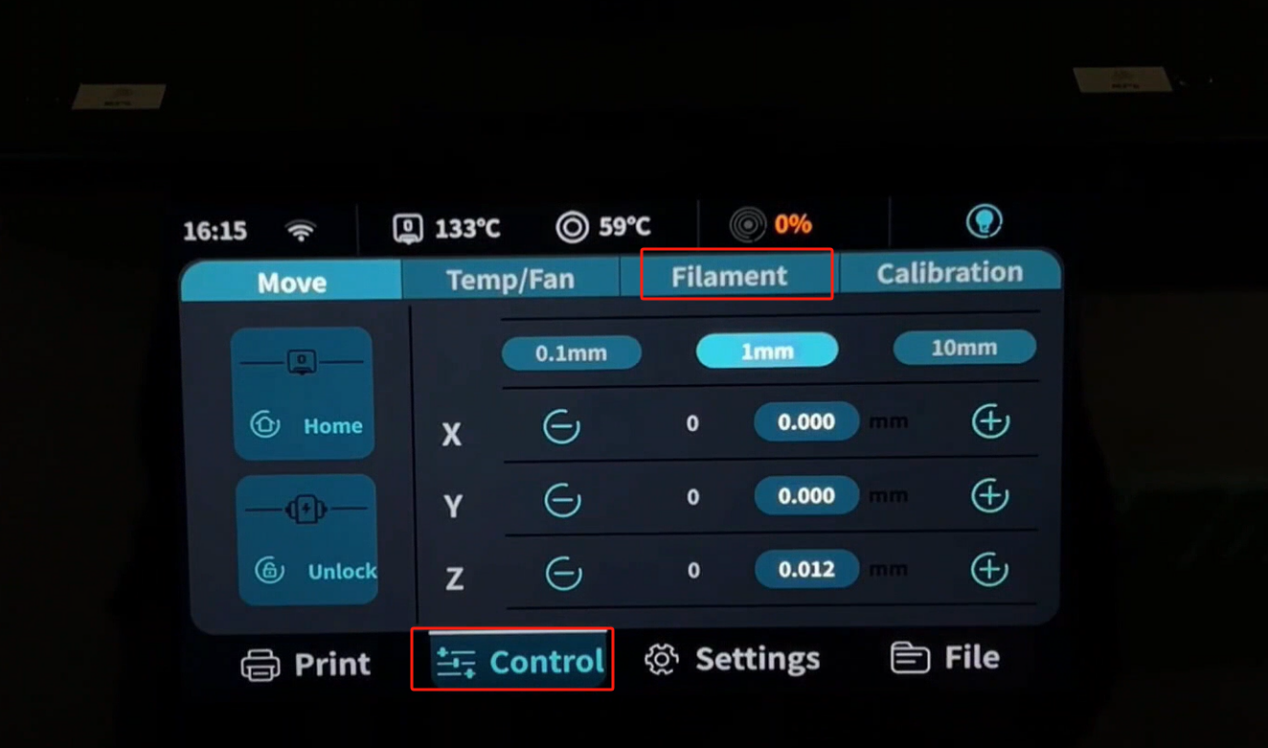
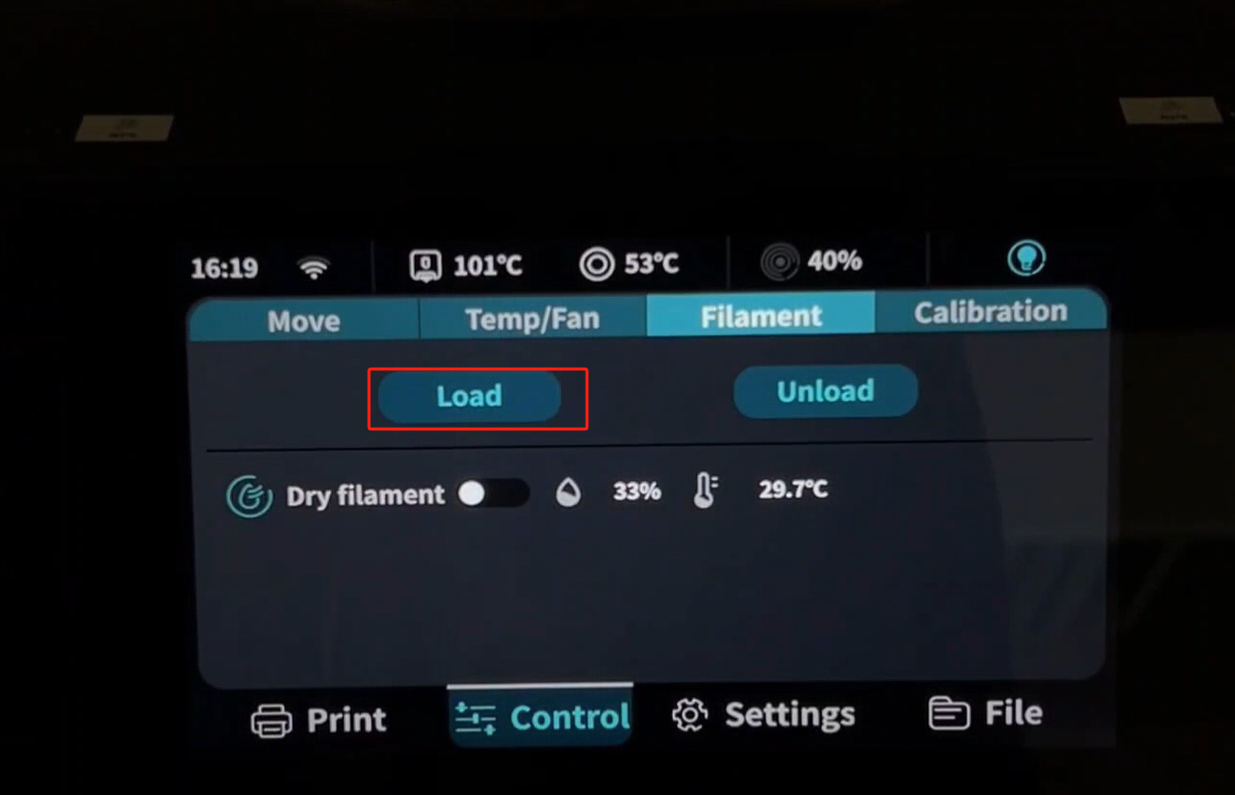
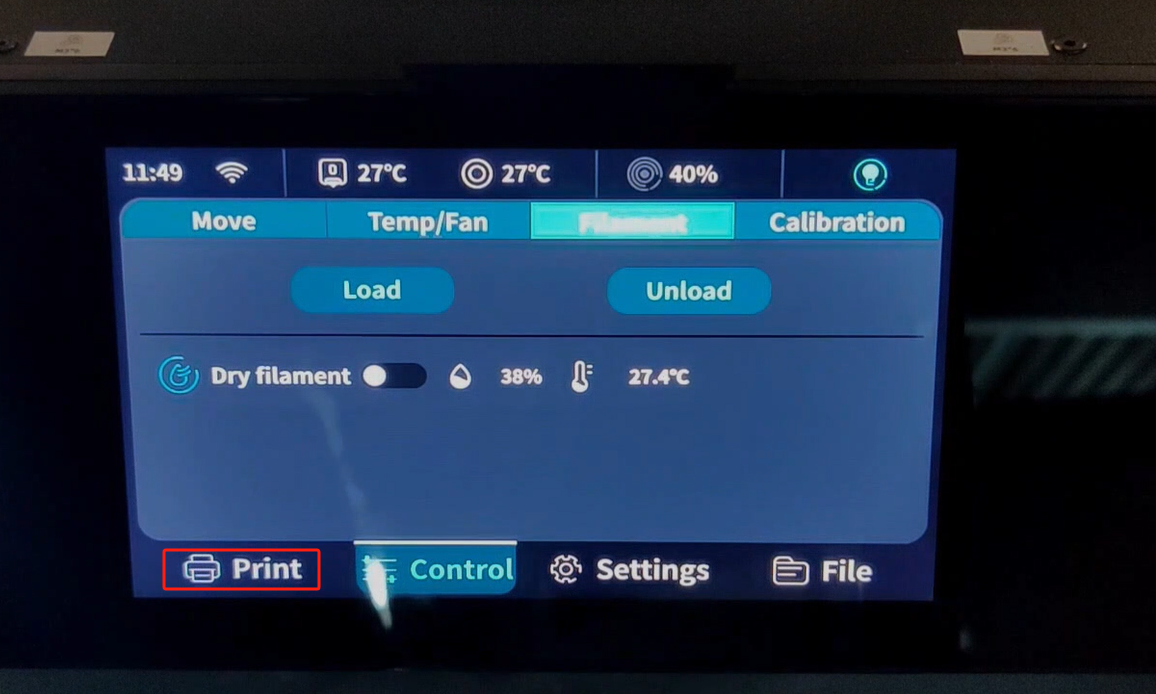
¶ 1. Click "Control" - "Filament", and a pop-up window will appear: Please insert the filament all the way;
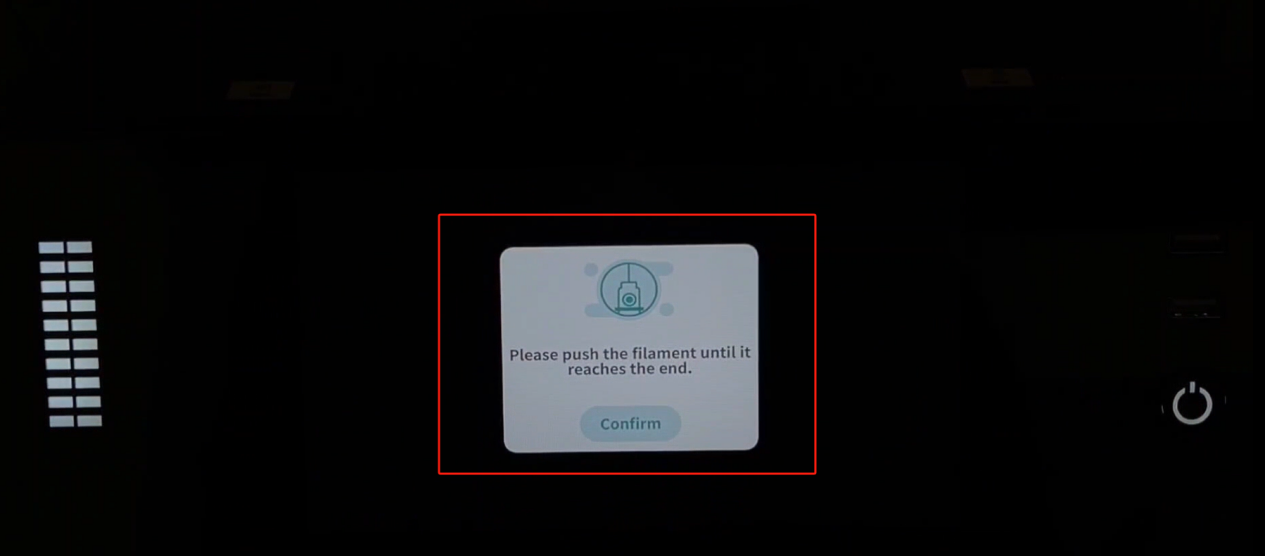
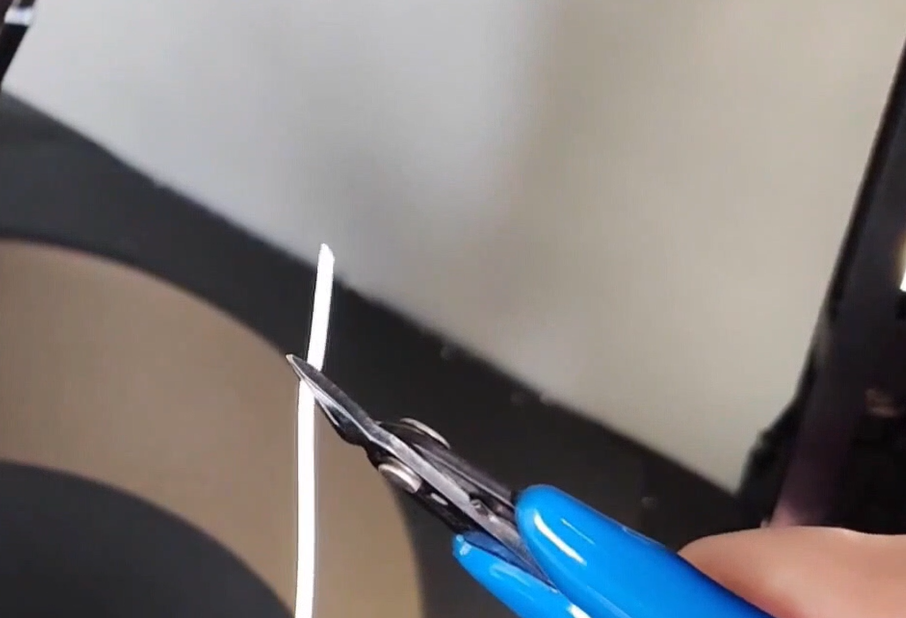
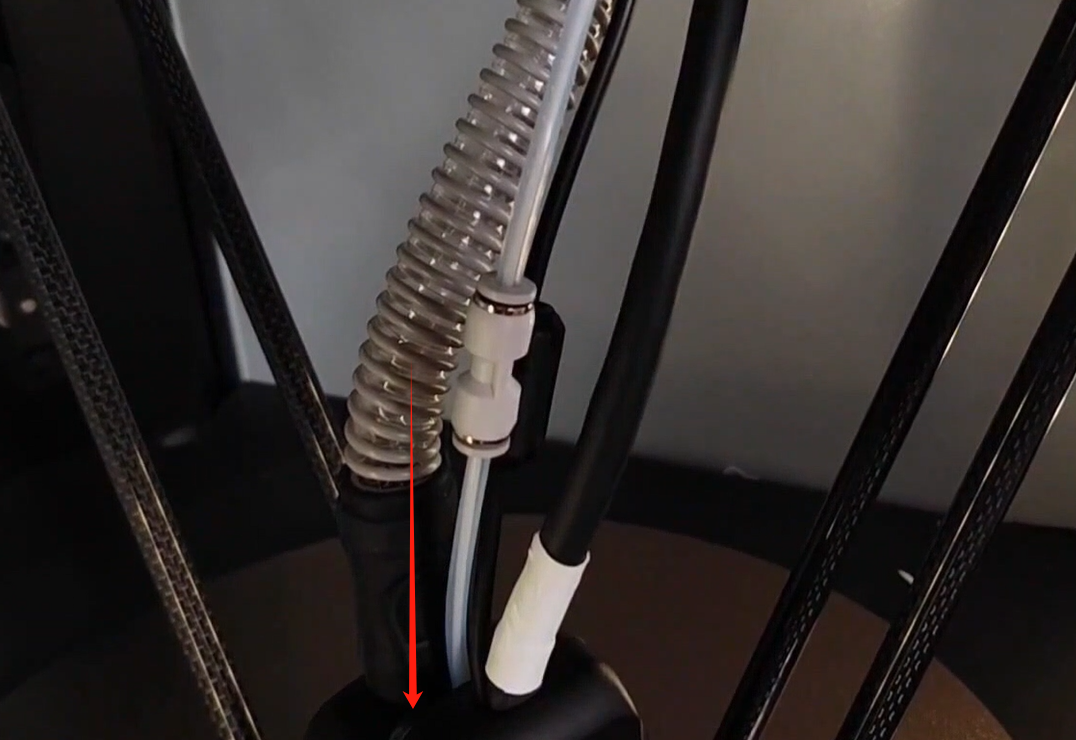
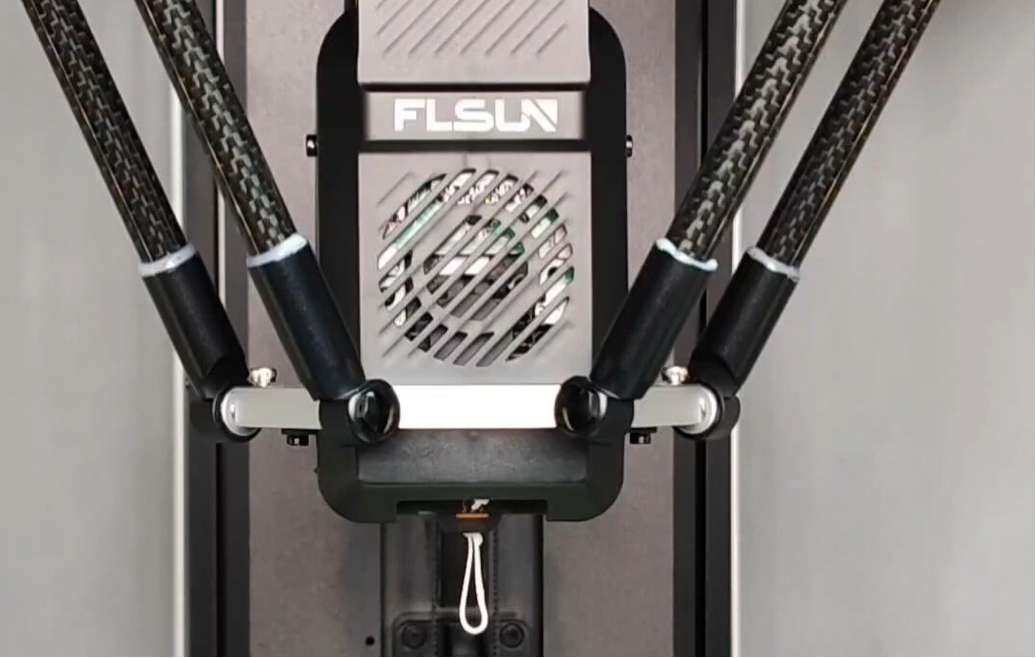
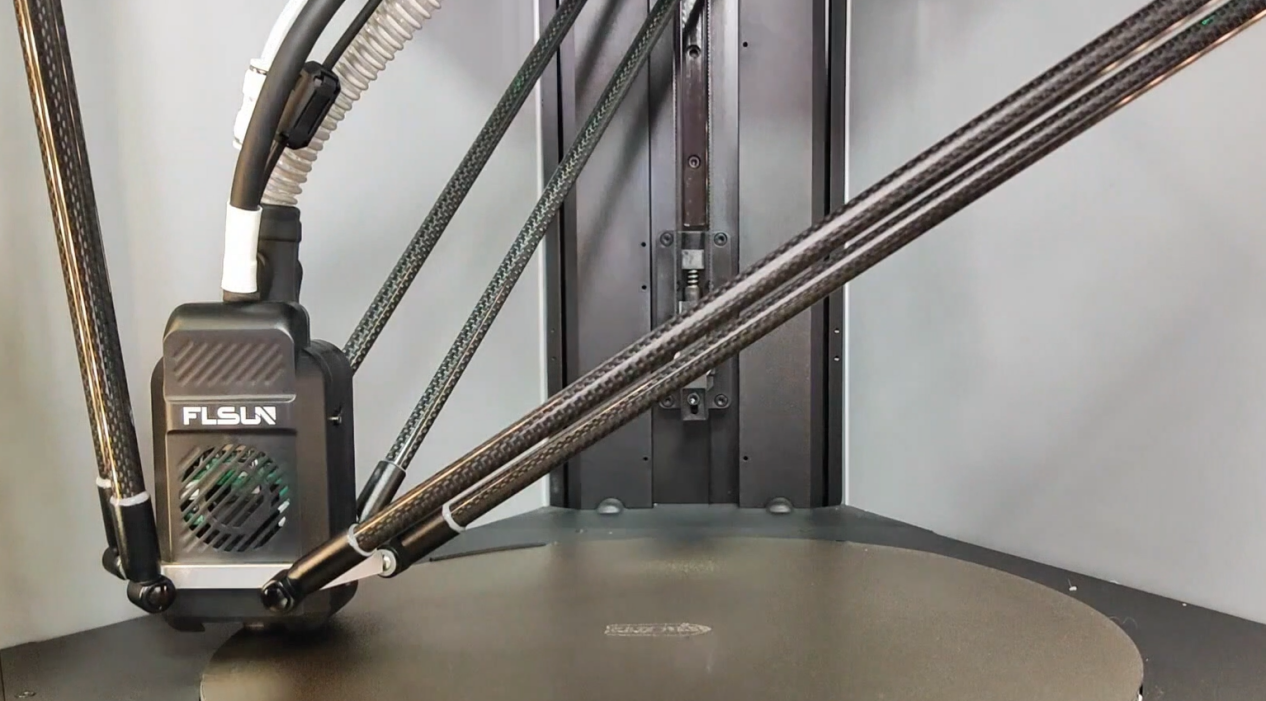
¶ 2. Cut one end of the filament at a 45° angle, push it out from the material tube on the lower side of the filament box, pass through the breaking material detector, and push the filament downward to the effector until the filament cannot be pushed forward;
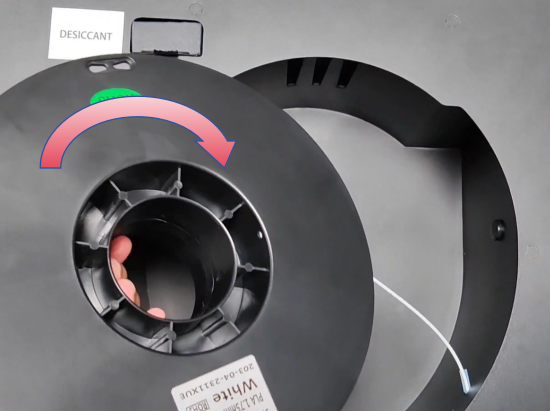
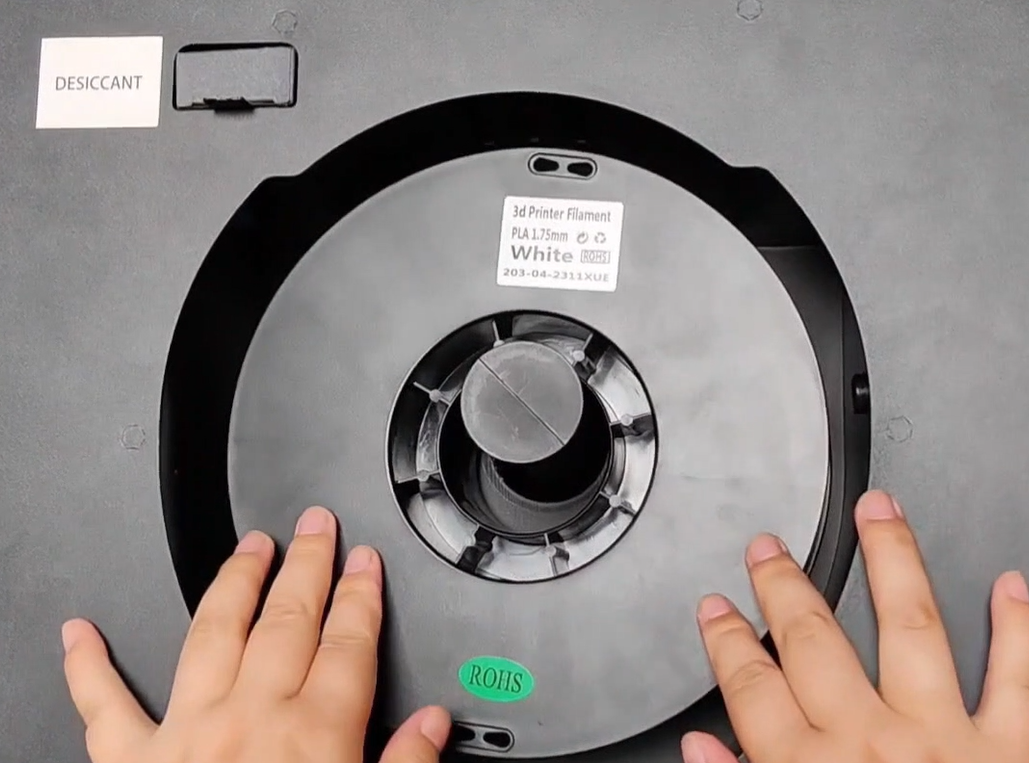
¶ 3. Install the consumables to the filament holder;
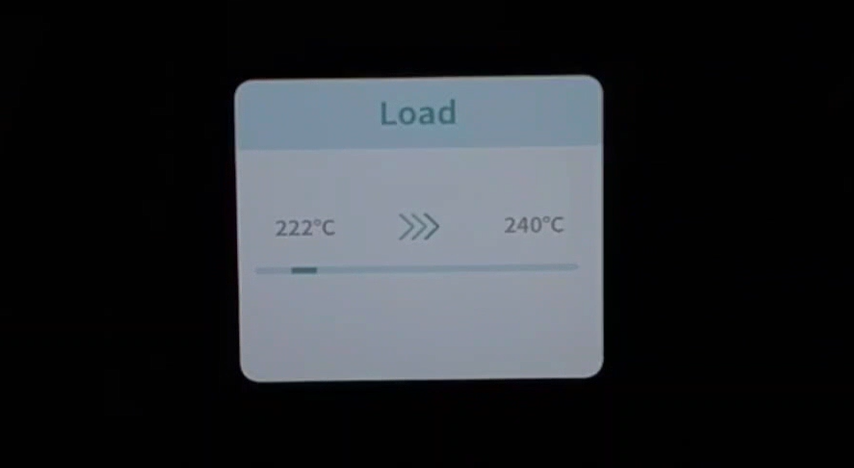
¶ 4. Click "Feed" and wait for the temperature to rise to 240°C. The printer will automatically load the filament;
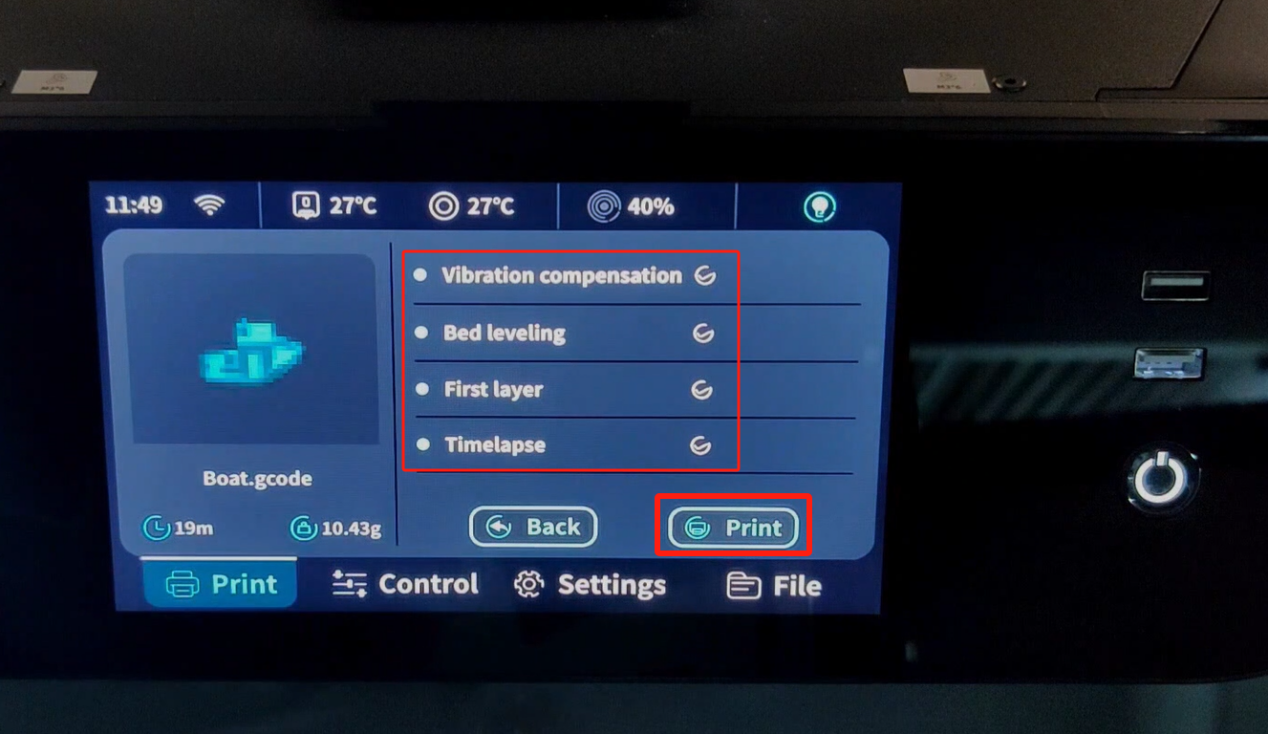
¶ 5. After the feeding is completed, clean the filament on the nozzle, click "Print" and select the print model;
¶ 6. Before starting printing, you can manually choose to turn on the corresponding function according to the printing needs, click "Print", and the printer will start printing;
¶ 7. The effector will drop and move to the side and start heating;
¶ 8. After heating is completed, start printing. Pay attention to the printing condition of the first layer. If the nozzle is too high or too low, you can click Fine Adjustment to adjust the nozzle height.
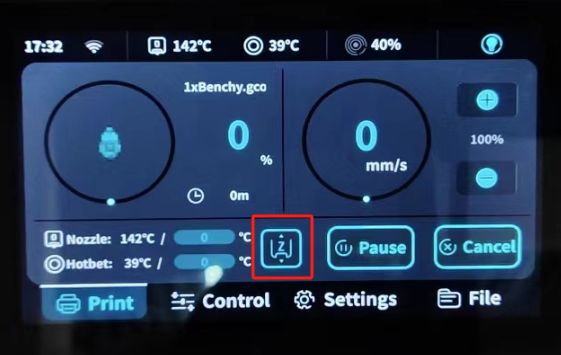
¶ *Introduction to fine-tuning functions
(1) The default display compensation value is 0mm
(2) Click up or down to adjust the distance upper limit +0.02mm and lower limit -0.05mm.
(3) After printing, when printing again, the fine-tuning value will save the status of the last adjustment.
(4) After re-leveling the heating bed, the compensation value is cleared to zero.