¶ (1) Abnormal Flow Rate
- There is a shortage of material in the printing model. It may be that the spring screw of the printer extruder handle is fixed too tight, please adjust the spring screw turns.
- During printing, the filament is wrapped on the filament support, please organize the filament.
- Driver problem results in insufficient extrusion force of the extruder, please replace the driver.
- The concentricity between the throat pipe and the heat sink is less than 1.95mm, please replace the effector heat sink.
¶ (2) Blockage Problems
¶ 1. Problem phenomenon
(1). Click feed, no filament is extruded;
(2). The filament is not extruded during the printing process.
¶ 2. Reason:
The nozzle or throat is blocked, and the extruder is blocked.
¶ 3. Solution:
Note:
a.The disassembly operation needs to be performed when the machine is powered off.
b.After clicking "![]() ", wait for the filament to be completely unload before manually pulling it out. To avoid clogging, do not manually pull out the filament before it is completely ejected.
", wait for the filament to be completely unload before manually pulling it out. To avoid clogging, do not manually pull out the filament before it is completely ejected.
c.When replacing the filament, you can directly cut the filament above the PTFE tube, and then click "Extrude" to allow the filament to be completely extruded to prevent clogging.
¶ (1). First, make sure that the filament is inserted to the bottom, click " ", wait for the nozzle temperature to rise to 240℃, and automatically load the filament.
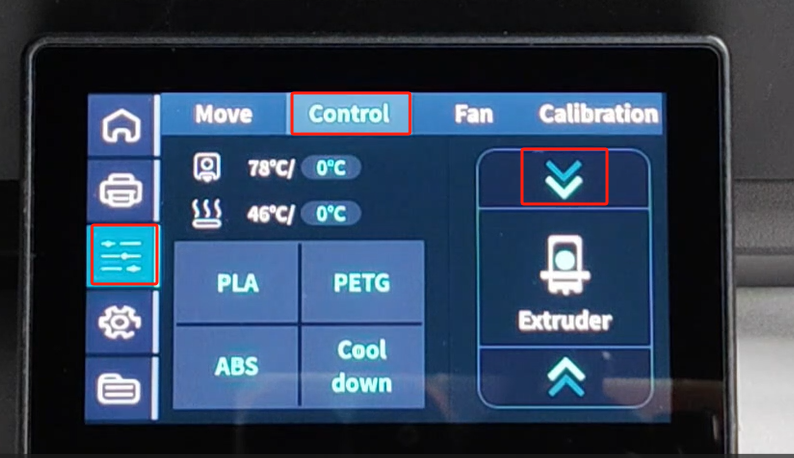
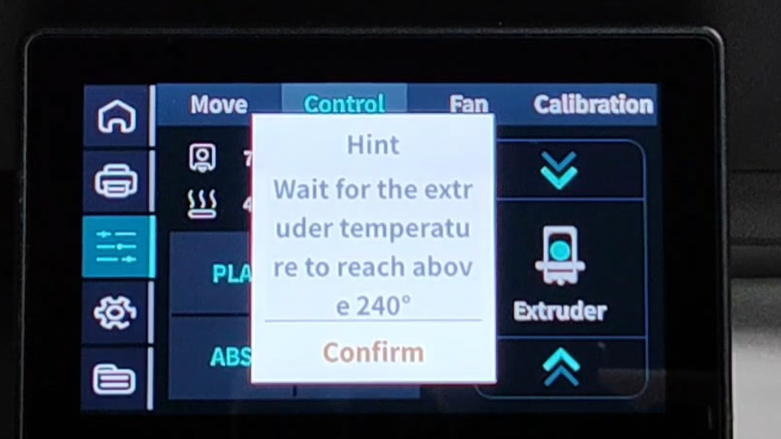
¶ (2). If the filament cannot be extruded, use the silver needle in the accessory box to unclog the nozzle, and click "  " again
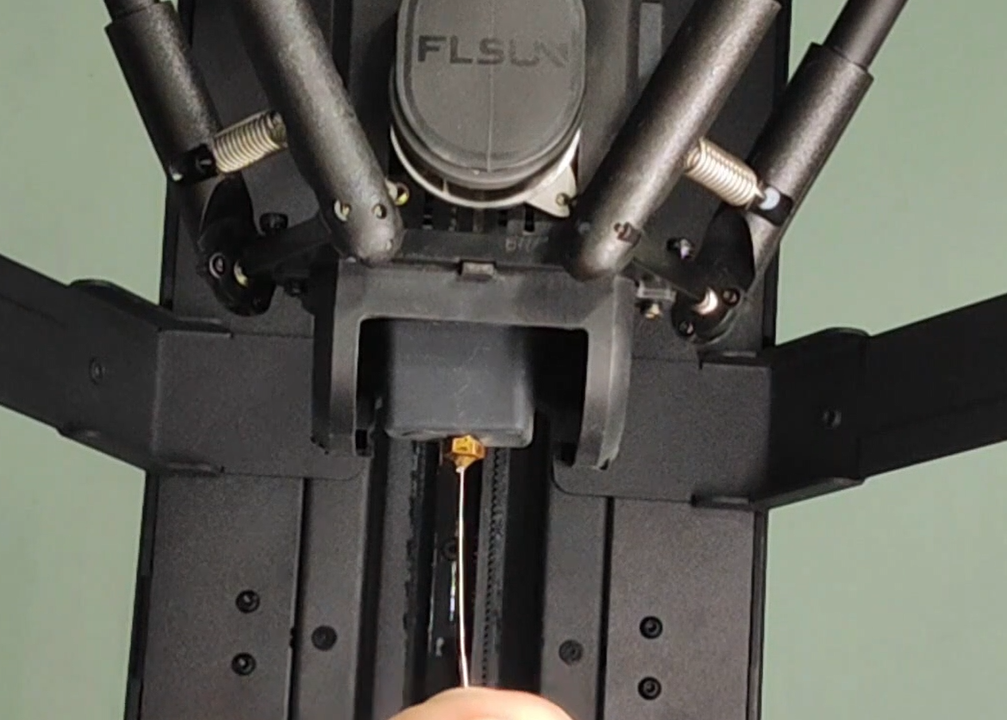
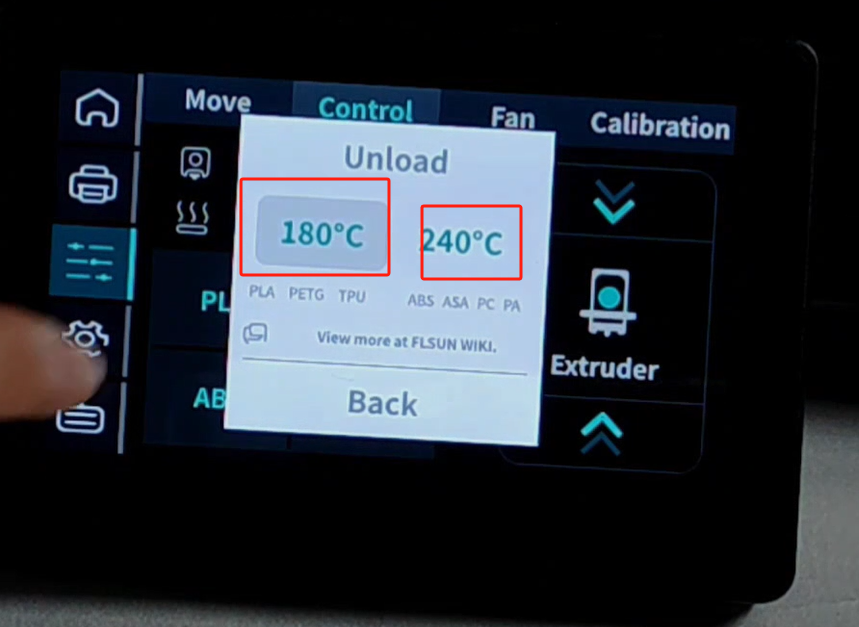
¶ (3). If there is still no filament extruded from the nozzle, try to exit the filament, click " ", and a pop-up window will appear. Please select the appropriate temperature to exit the filament according to the printing filament. It is recommended to select 180℃ for low-temperature filaments and 240℃ for high-temperature filaments;
¶ (4). Pull out the filament;
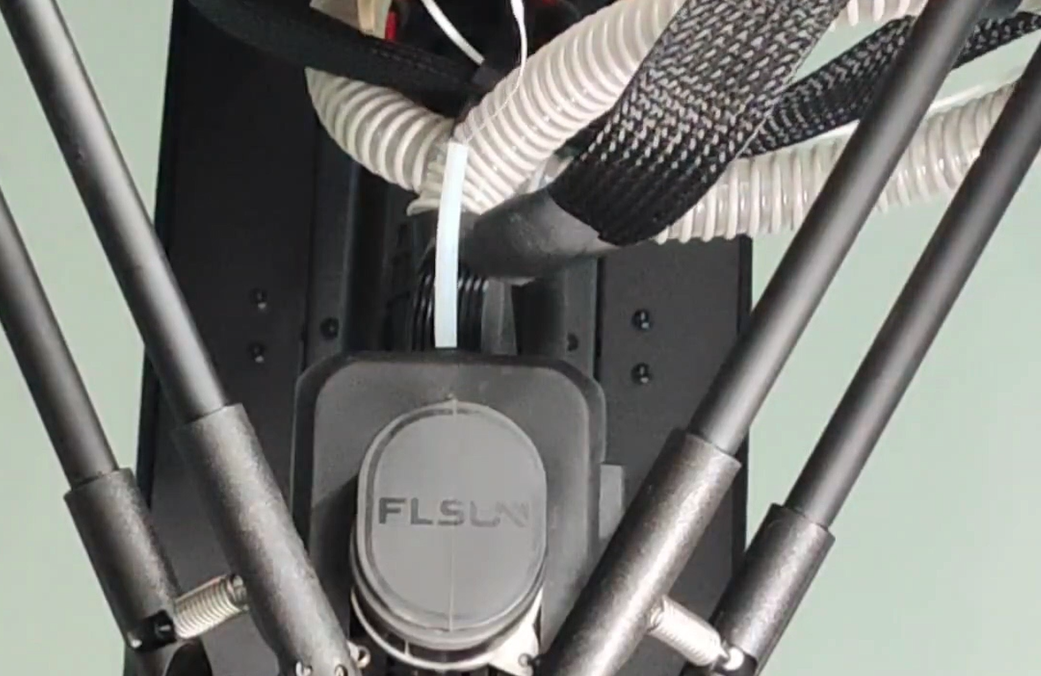
¶ (5). Disassemble the effector to check whether the throat or extruder is blocked;
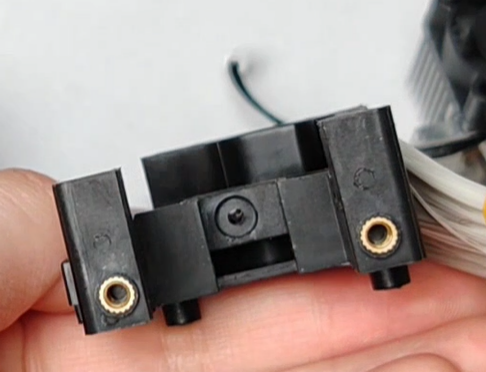
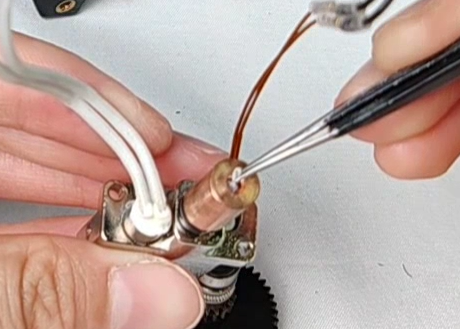
¶ 4. Check the blockage operation video: https://youtu.be/IGPZiFIm7_E
¶ (3) Large Dimensional Accuracy Error
Hardware: Ensure that there is no obvious resistance when sliding the slider, and the slider is not loose; the belt tension of the three axes should be consistent as far as possible; the belt is not worn or stretched.
Firmware:
T1: Please first upgrade the firmware version to 1.0.9.5 or later:
T1Pro: Please first upgrade the firmware version to 1.0.1.0.2 or later:
T1E: Please first upgrade the firmware version to 1.0.1.1 or later:
Step 1: Enter the main page of operation
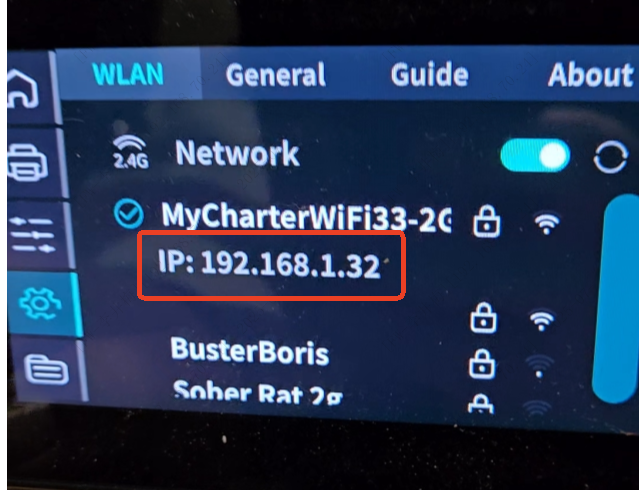
1.1. Connect to WIFI;
1.2. Enter “machine IP” in the browser to enter the operation page.
Step 2: Enable Configuration File
2.1. Choose “Settings” in the upper left corner, select the “MACHINE”, slide down into “printer.cfg”.
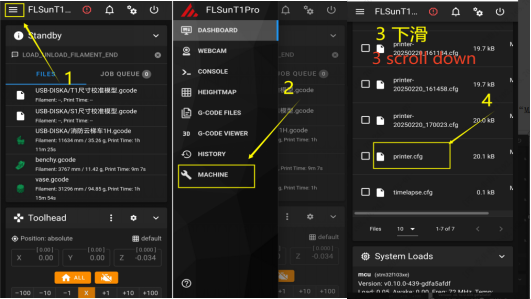
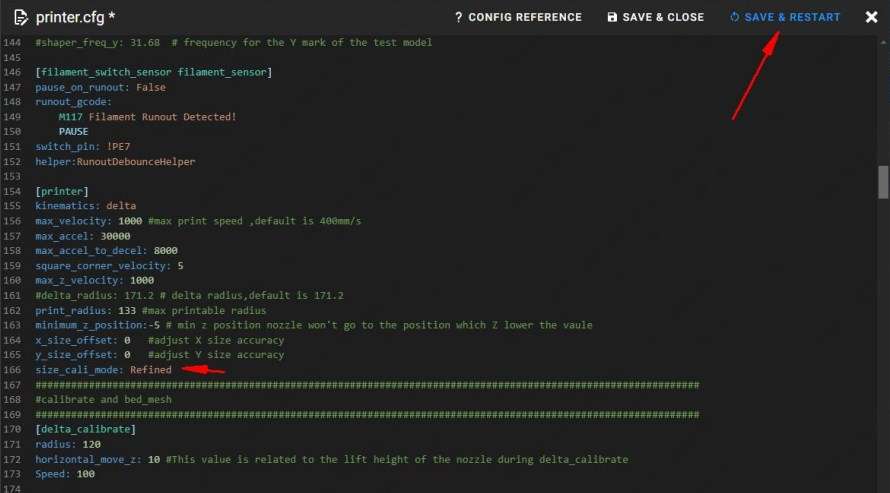
2.2. Add a line “size_cali_mode: Refined” to the 154[printer] column, click SAVE&RESTART, then “printer.cfg successfully saved” appears on the green at the bottom.
Step 3: Printing the calibration model
3.1. Select the “T1 Dimension Calibration Model” to print;
Download Link for T1 Dimension Calibration Model
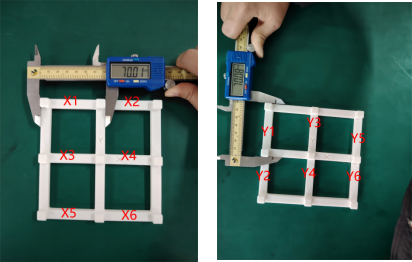
3.2. After printing, measure the T1 size calibration model as shown in the figure below, and record X1~X6, Y1~Y6.
(For example: SIZE_ANALYZE X=70.0,70.0,70.0,70.0,70.0,70.0)
SIZE_ANALYZE Y=70.0,70.0,70.0,70.0,70.0,70.0)
Step 4: Input the result to the web page.
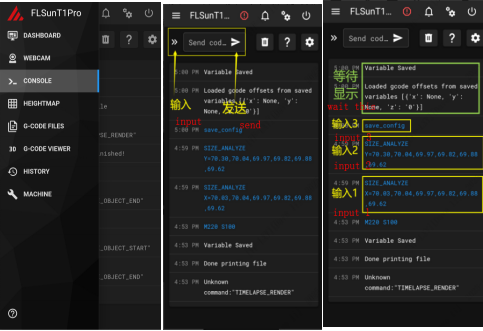
- Click on the upper left corner of the “menu”, select the console “CONSOLE”.
- Enter the results into the web page.
“SIZE_ANALYZE X=X1,X2,X3,X4,X5,X6”
“SIZE_ANALYZE Y=Y1,Y2,Y3,Y4,Y5,Y6”
(Note: adding the space character in front of X/Y when typing) - Save the configuration, enter “save_config”.
- Wait for the platform to save the configuration, the variable has been saved when“Variable Saved”is showed, then operation is complete.
¶ (4) Lost Step
- Adjust the belt tightness to keep it consistent as much as possible, and re-level the printer for testing.
- Check whether the nozzle and slider are loose, whether the screws of the parallel arm and the effector hanger are loose, whether the vertical axis and the upper and lower covers are aligned, and whether the gaps are consistent.
- Swap the positions of the three axis drivers on the mainboard under the power-off state, and print to see if the step loss position changes. If it changes, the axis driver is broken.
¶ (5) Printed Model Stringing
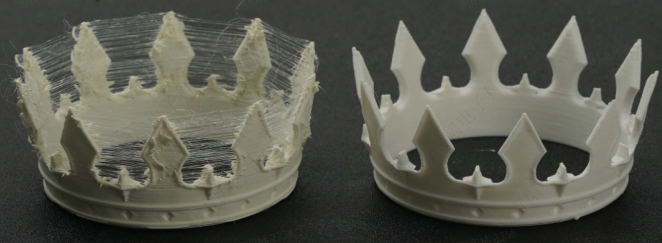
- Filament: The filaments are damp, so you can dry them before use.
- Temperature: A high printing temperature can also cause stringing, so you can reduce the printing temperature properly.
- Retraction: Adjust the retraction parameters to increase the retraction distance properly.
- Nozzle: If the nozzle has been used for too long or is used to print hard filaments, the nozzle will be worn out and will also cause model stringing. It is recommended to replace a new nozzle for printing.
¶ (6) Nozzle Scratch the Model
If the nozzle temperature is insufficient, in the high-speed printing process, the filament is not fully melted, extruded filament melt viscosity is high with poor fluidity, which is easy to cause the nozzle to scratch the model. In this case, it is recommended to increase the nozzle temperature properly. In addition, if the nozzle or the model is partially stuck with the material block, it may also cause the nozzle to hit the model during printing. In this case, it is recommended to clean the nozzle and then choose a lower temperature and speed to print.
¶ (7) Printed Models with Layer Lines
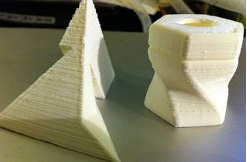
- Slider/Belt: Keep the belt tension of the three axes as consistent as possible; the belt should not be worn or stretched. Ensure that the slider slides without significant resistance, and regularly use grease to fully lubricate the axis and slider; the slider should not be loose.
- Nozzle: If the nozzle is not tightened or shaking during printing can also cause layer lines.
- Environment: Try to place the printer on a flat surface.
- Vibration Compensation: Vibration compensation can be used to improve the layer pattern problem in fast printing.
¶ (8) Non-stick Hot Bed
- Lower or raise Z0 (too high Z0 will cause the model not to stick to the hot bed, too low Z0 will cause the model to warp);
- Apply glue to the hot bed
- Clean impurities on the hot bed surface;
- Properly reduce the first layer printing speed;
- For models with a small contact area with the hot bed, the printing platform attachment area can be properly increased