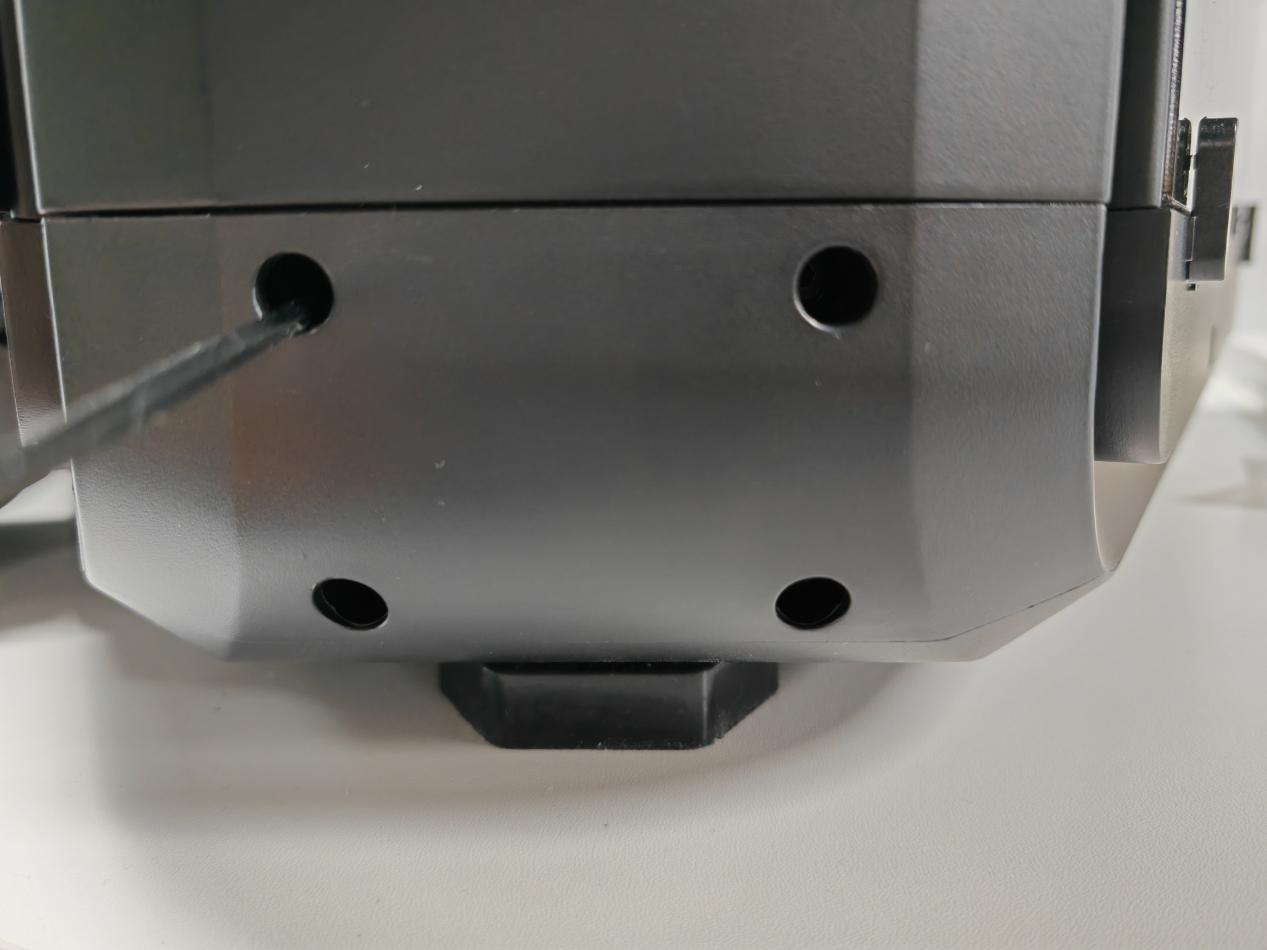
¶ 1. Air filter
¶ (1) Reason:
After adsorbing a certain amount of substances, it will reach a saturated state and will not be able to effectively adsorb harmful substances and particles, and the filtering effect will decrease. It should be replaced regularly.
¶ (2) Replacement time:
If the printer is used for about 8 hours a day, we recommend replacing the activated carbon air filter every three months. If the printer is used as a production machine, we recommend replacing the filter once a month.
(3) How to replace:
Unlock the buckle, take out the old filter, and replace it with a new one.
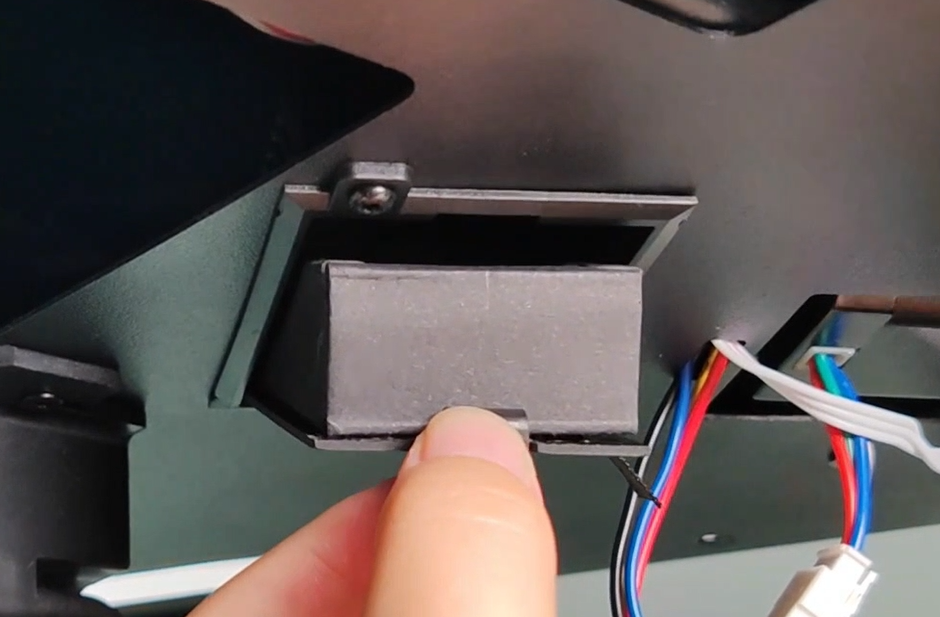
¶ Reference video:
¶ 2. PEI board
¶ (1) Reason:
A clean PEI board can increase the adhesion with the model, reduce the model from falling off during printing, and improve the printing success rate; before each printing, you need to check whether there is dust or residual consumables on the PEI board. If there is, you need to clean it before printing.
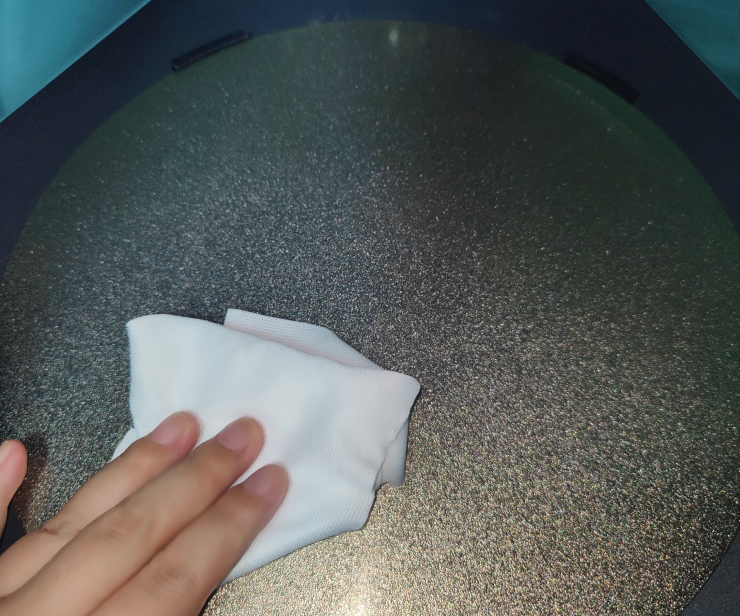
¶ (2) How to clean:
Clean the PEI board with non-woven cloth dipped in alcohol
¶ (3) Note:
Because the printing speed is relatively fast, you can apply a solid glue stick to increase adhesion or increase the skirt and brim to increase the adhesion surface before printing to ensure the printing quality of the model.
¶ 3. Nozzle Kit
¶ (1) Cause:
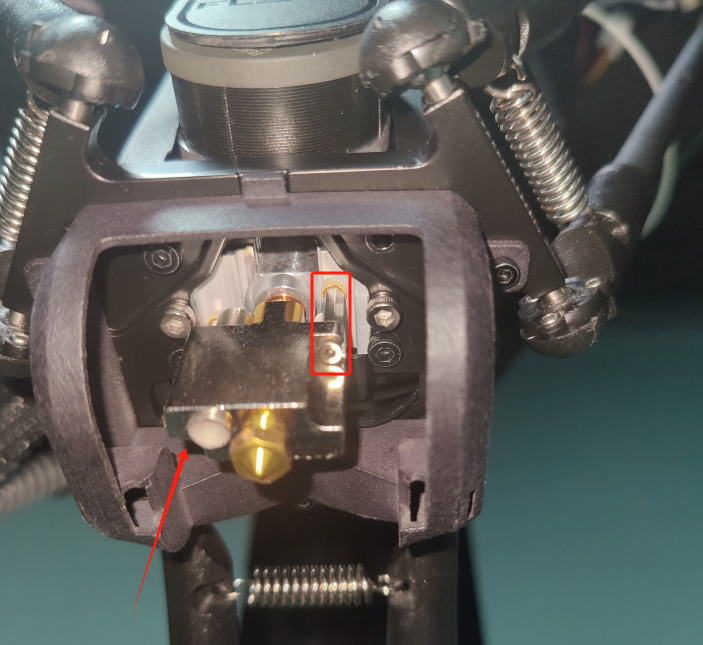
If the screws fixing the nozzle kit are loose or the throat is bent, it will affect the printing quality and use. Regular inspection is required.
¶ (2) Maintenance failure:
It should be checked every 15 days or if there is a print quality problem, depending on the printing situation of the printer.
¶ (3) How to maintain
Screws fixing the nozzle kit: Remove the silicone cover and check whether the screws are loose or damaged. If loose, tighten the screws in time. If damaged, contact the FLsun after-sales team in time.
¶ 4. Linear guide and pulley
¶ (1) Cause:
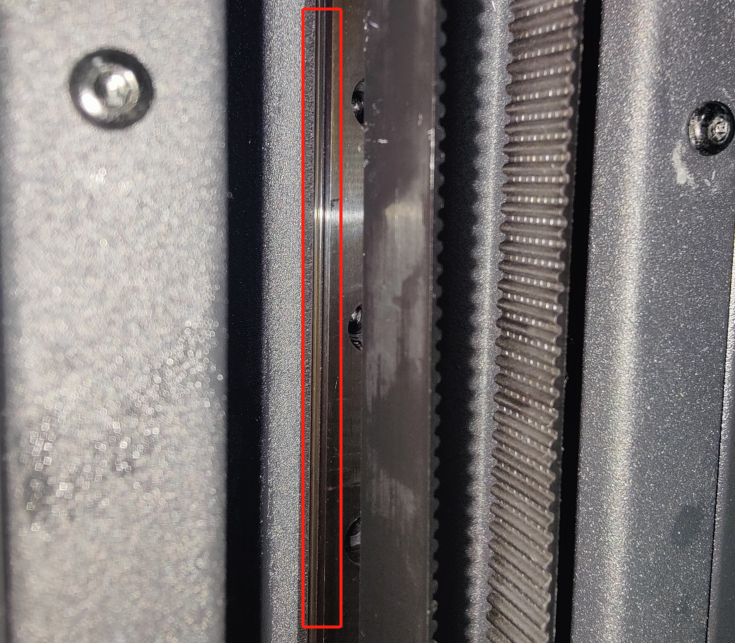
Wire gauge: The three wire gauges need to be lubricated regularly. Proper lubrication can ensure smooth movement and extend service life;
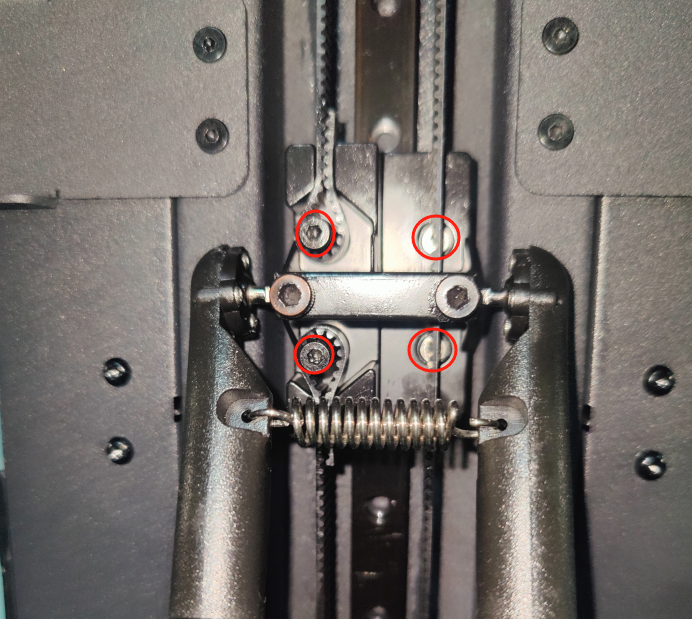
Pulley: If the screws fixing the pulley are loose, it will affect the printing quality. Regular inspection is required.
¶ (2) Maintenance time limit:
It should be checked once a month and grease should be added (PTFE grease is recommended)
¶ (3) How to maintain:
Wire gauge: Squeeze the grease on both sides of the linear guide, slide the pulley up and down, and repeat several times to make the grease evenly distributed on the guide.
Pulley: Use an H3.0 wrench to check if the screws of the pulleys on the three axes are loose. If so, tighten the screws.
¶ 5. Parallel arm
¶ (1) Reason:
The parallel arm is a motion joint that provides movement for the actuator module. It is necessary to regularly check and tighten the screws and lubricate the ball head.
¶ (2) Maintenance period:
It should be checked once a month.
¶ (3) How to maintain:
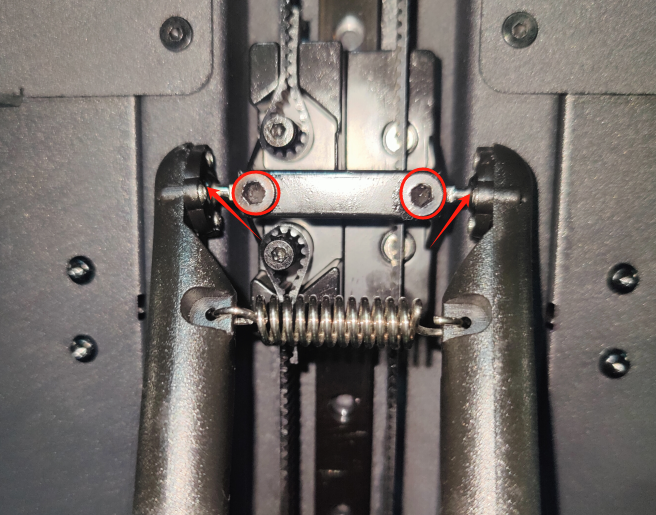
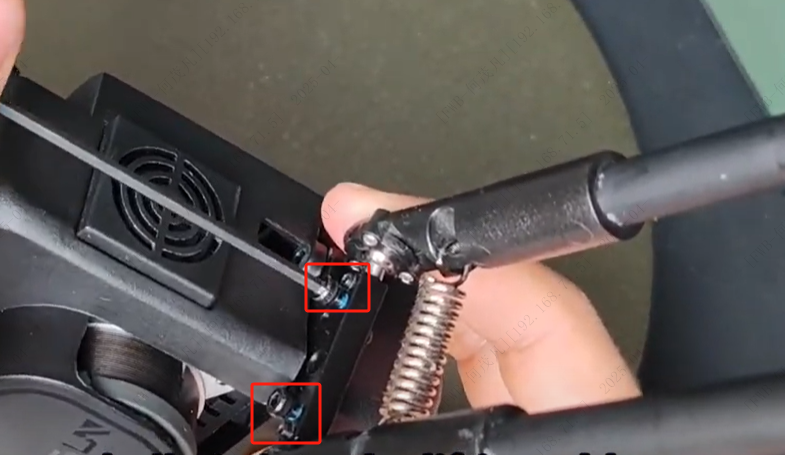
Check if the screws at each joint of the parallel arm are loose and tighten them with a wrench;
Apply grease to the ball heads at both ends of the parallel arm.
¶ 6. Belt
¶ (1) Reason:
The slider provides precise movement of the machine. Long-term use will change the belt tension and affect the printing quality.
¶ (2) Maintenance period:
The belt should be checked every 15 days. Whether to adjust the tension depends on the usage.
¶ (3) How to maintain:
Loosen the two screws on the belt adjuster 3-4 turns to stretch its spring. Slide the parallel arm up and down. The belt will automatically tighten. Tighten the screws again.
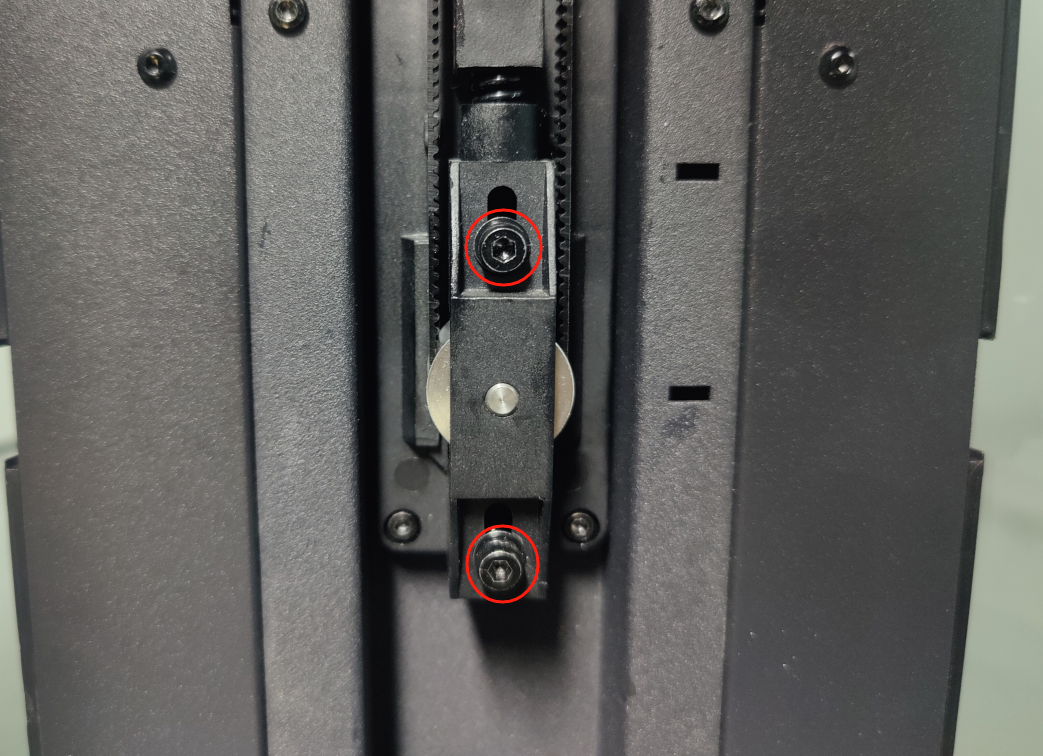
Belt adjustment video: https://youtu.be/paEkXiIwf6s
¶ 7. Extruder
¶ (1) Cause:
Removing debris from the wire feed wheel can reduce the risk of material loss and blockage, ensuring smooth operation and a long service life
¶ (2) Maintenance period:
It is recommended to check once a month and remove the debris of the vulnerable parts on the wire feed wheel, depending on the actual usage.
¶ (3) How to maintain:
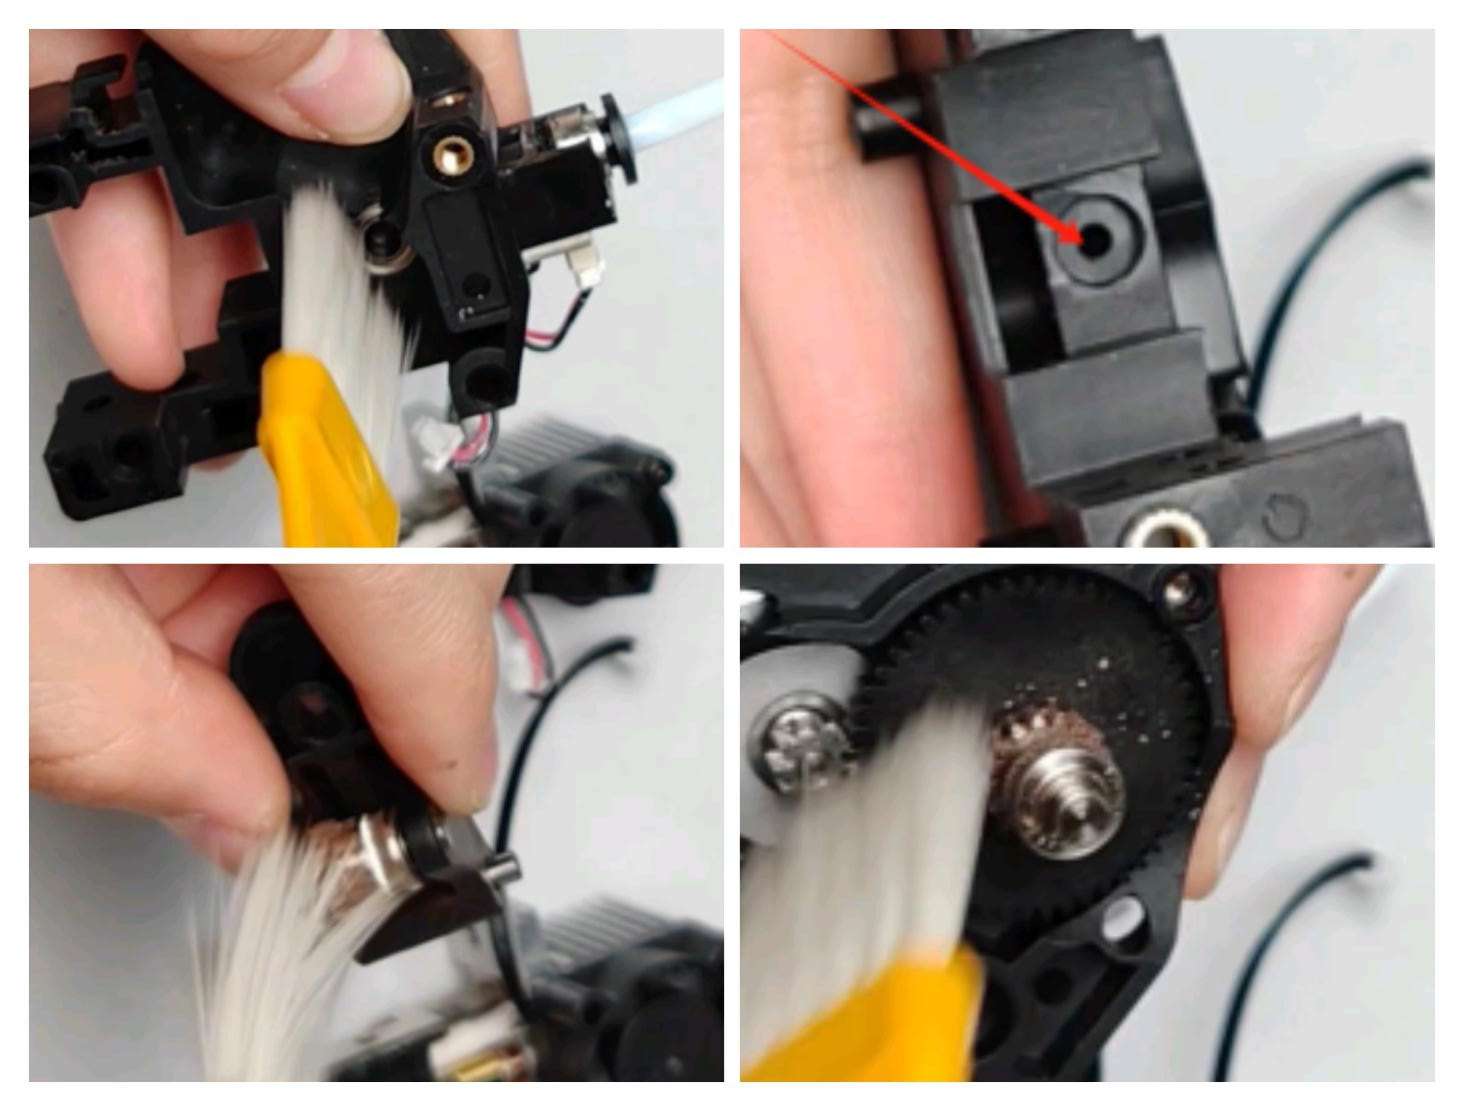
Operate the extruder to rotate and use a fine soft brush to remove the debris on the wire feed wheel.
Note: You can refer to the material blockage video to check the operation.
¶ 8. Motherboard and motherboard fan
¶ (1) Cause:
When the motherboard is dusty, it is likely to affect the use of the printer.
Dust accumulation on the motherboard fan will affect the heat dissipation effect.
¶ (2) Maintenance period:
The motherboard and fan should be checked and cleaned after about half a year of use; if your printing environment is dusty, the cleaning frequency can be appropriately increased.
¶ (3) How to maintain:
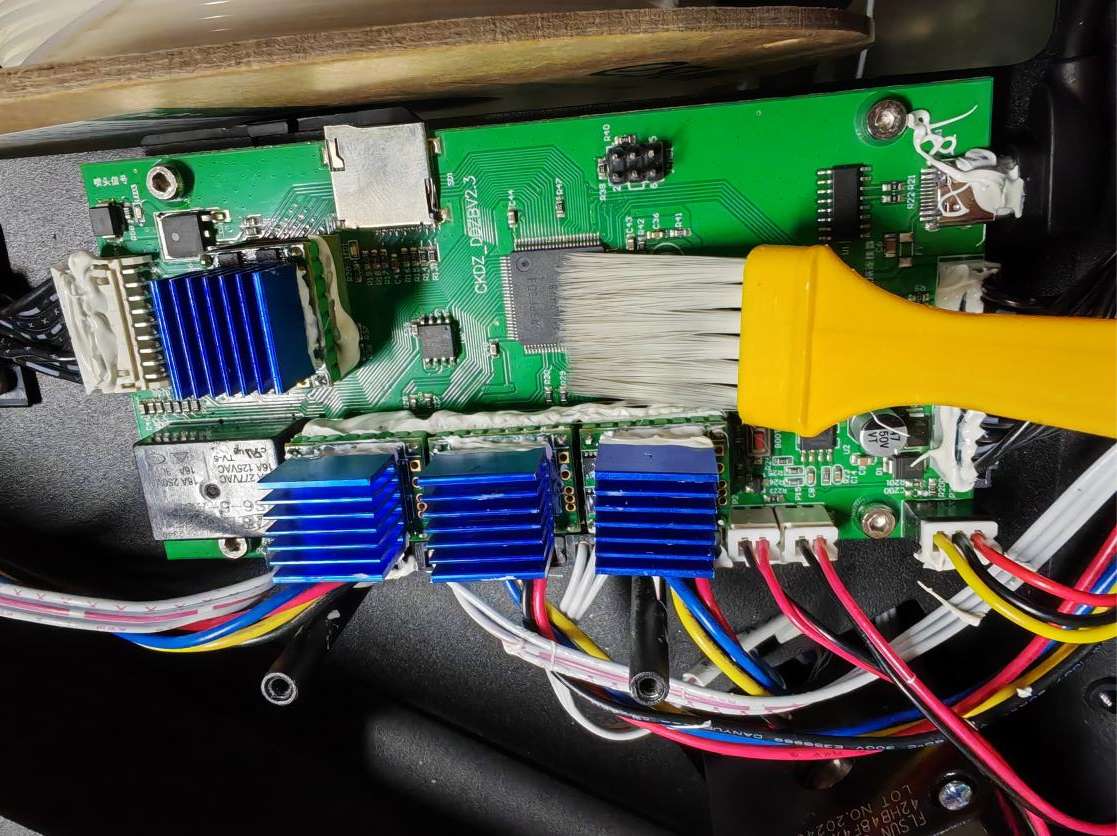
Motherboard: After turning off the power of the machine, open the upper cover and use a brush to clean the motherboard area.
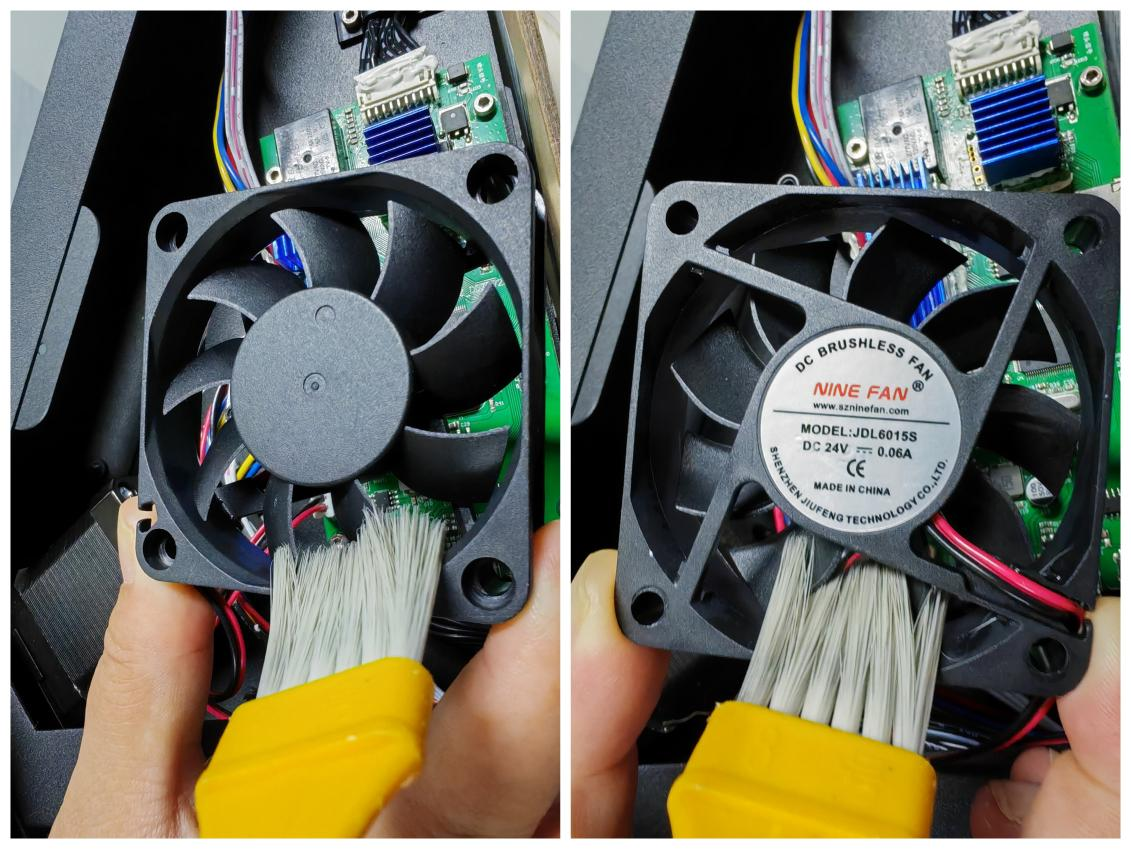
Fan: Use an H2.0 hexagonal wrench to remove the screws, hold the fan, and clean the dust on the front and back of the fan.
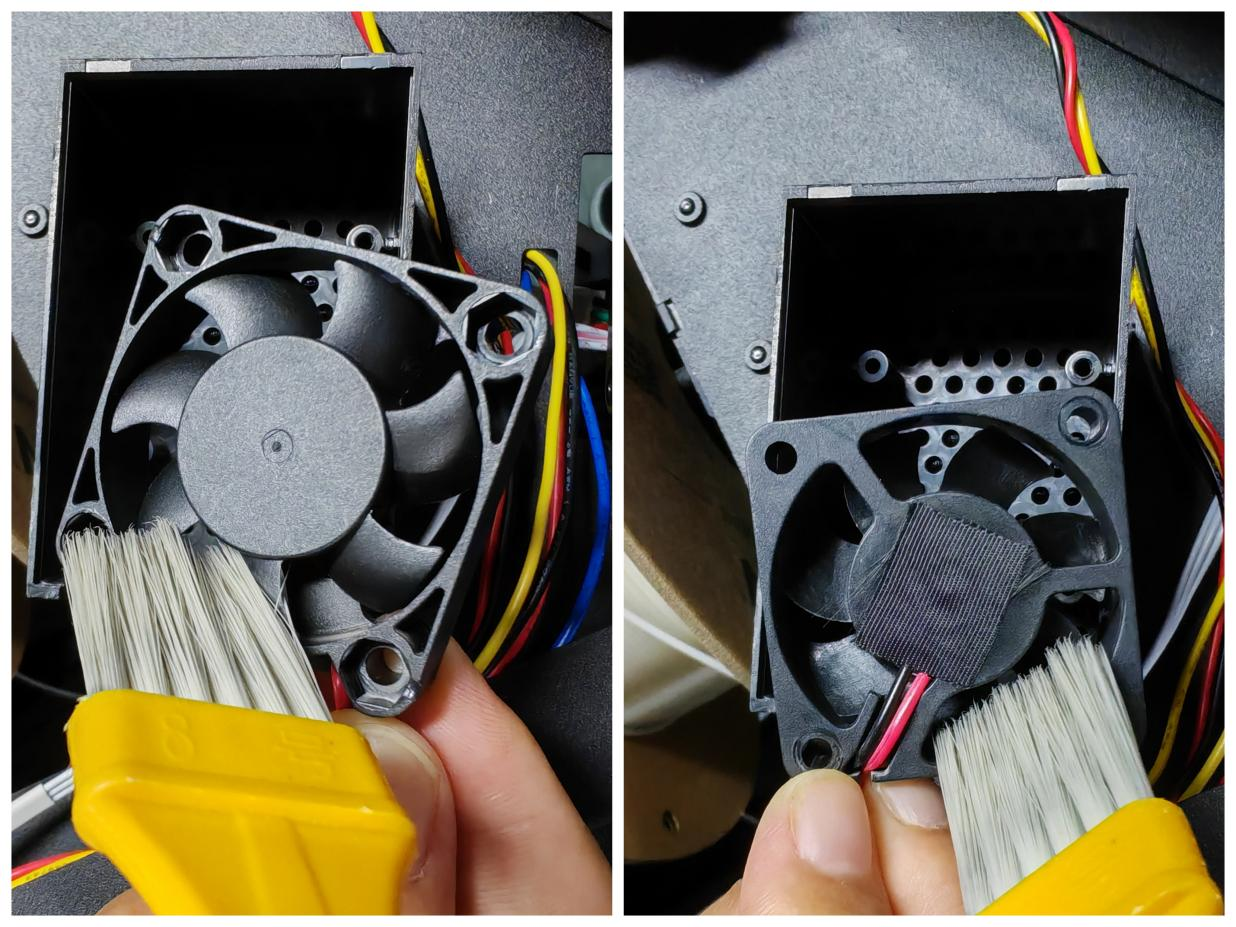
¶ 9. Filter fan
¶ (1) Cause:
Dust accumulation on the filter fan will affect the filtering effect.
¶ (2) Maintenance period:
The fan should be checked and cleaned after about half a year of use; if your printing environment is dusty, the cleaning frequency can be increased appropriately.
¶ (3) How to maintain:
After turning off the power of the machine, open the upper cover, remove the screws that fix the fan, hold the fan, and clean the front and back of the fan.
¶ 10. Blower air inlet
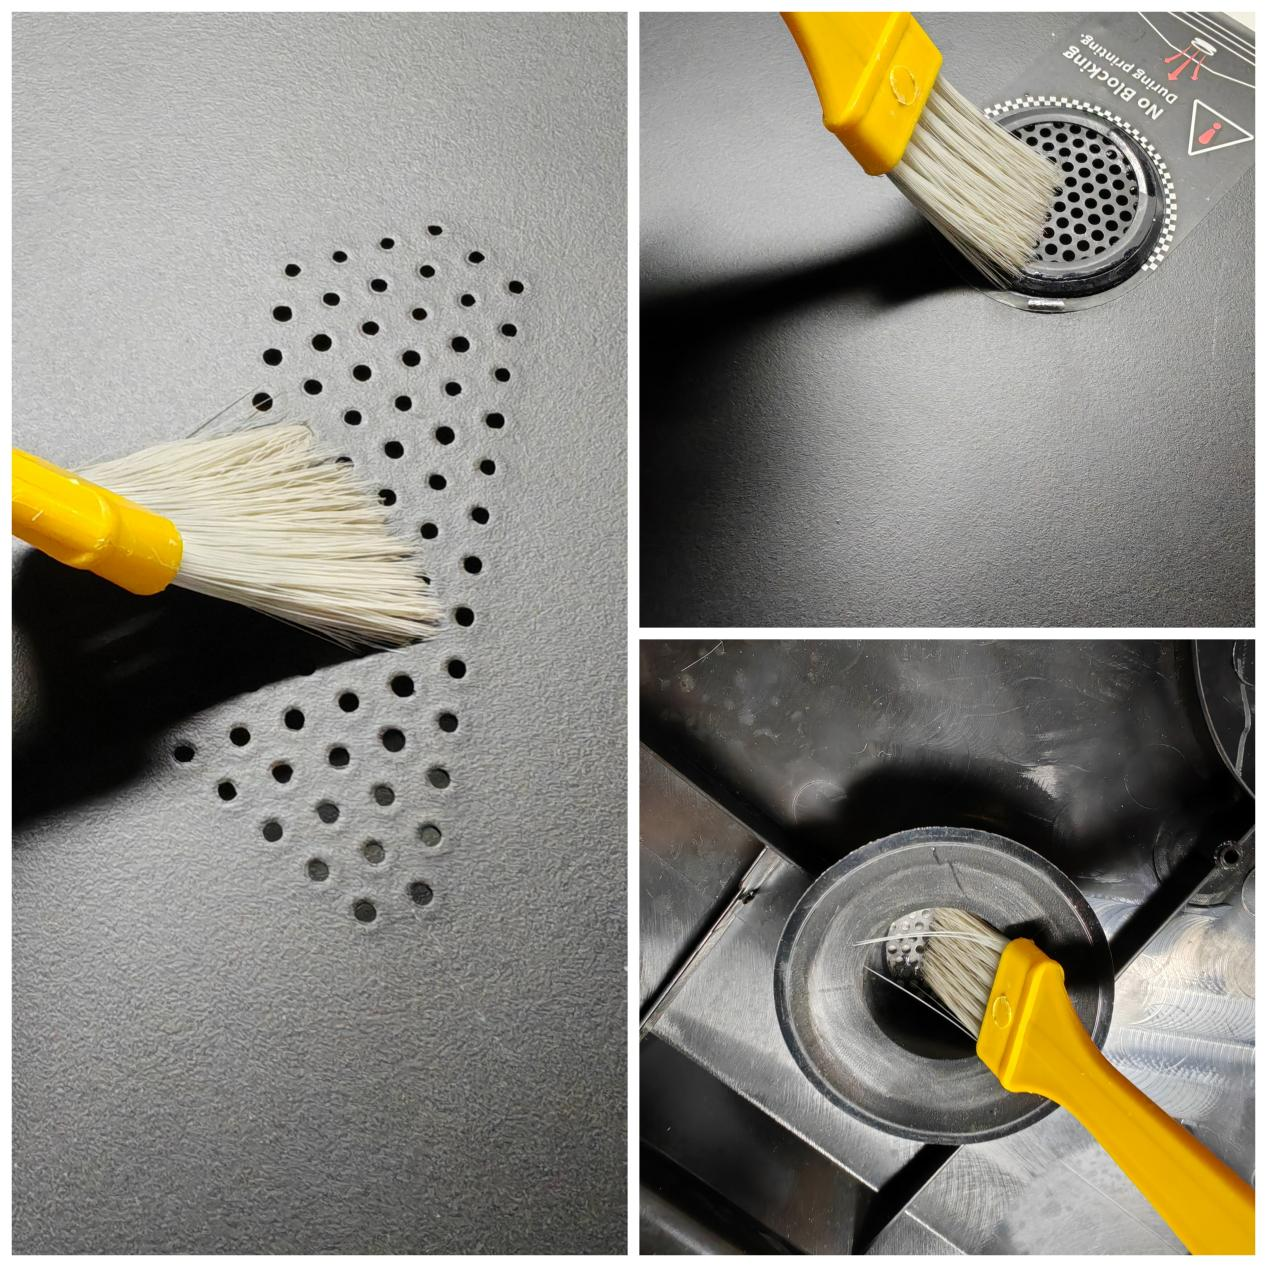
¶ (1) Cause:
Dust accumulation on the air inlet will affect the heat dissipation effect and will suck dust into the chassis, affecting the printing quality.
¶ (2) Maintenance period:
It is recommended to clean the fan once every 15 days. If your printing environment is dusty, the cleaning frequency can be increased appropriately.
¶ (3) How to maintain:
After turning off the power of the machine, remove the screws that fix the upper cover, open the top cover of the upper shell, remove the cover, and use a brush to clean the front and back of the air inlet.
Note: Do not clean directly on the machine to prevent dust from falling inside the chassis.
¶ 11. Fixing screws of the three columns
¶ (1) Reason:
Due to the high printing speed, the screws fixing the three columns may become loose after long-term use, affecting the printing quality.
¶ (2) Maintenance period:
It is recommended to check once every 3 months. If your machine is used frequently, it is recommended to shorten the inspection period.
¶ (3) How to maintain:
Use an H3.0 hexagonal wrench to tighten the screws fixing the three columns.
