-
PEI Sheet
(1) Reason:
A clean PEI sheet increases adhesion to the model, reduces model detachment during printing, and improves print success rate. Before each print, check for dust or residual filament on the PEI sheet, and clean if necessary.
(2) How to Clean:
Clean the PEI sheet with a non-woven cloth dipped in alcohol.
(3) Notes:
Due to fast printing speeds, you can apply a solid glue stick before printing to increase adhesion, or add skirts and brims to enlarge the adhesion area to ensure print quality.

-
Nozzle Assembly
(1) Reason:
Loose screws fixing the nozzle assembly affect print quality and require regular inspection.
(2) Maintenance Interval:
Check every 15 days or when print quality issues arise, depending on usage.
(3) How to Maintain:
Remove the silicone cover, check screws for looseness, and tighten if necessary.
-
Linear Rails and Carriages
(1) Reason:
Rails: The three rails need regular lubrication to ensure smooth movement and prolong lifespan.
Carriages: Loose screws fixing the carriages affect print quality and require regular inspection.
(2) Maintenance Interval:
Check and apply lubricant monthly (recommended PTFE grease).
(3) How to Maintain:
Rails: Apply grease on both sides of the linear rails, move the carriage up and down repeatedly to evenly distribute the lubricant.
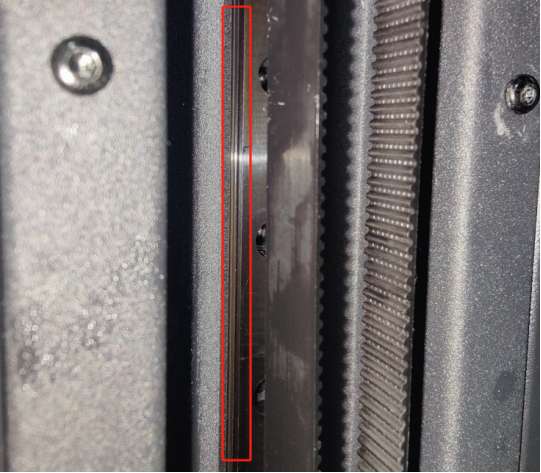
Carriages: Use an H3.0 wrench to check screws on the three carriage shafts; tighten if loose.
-
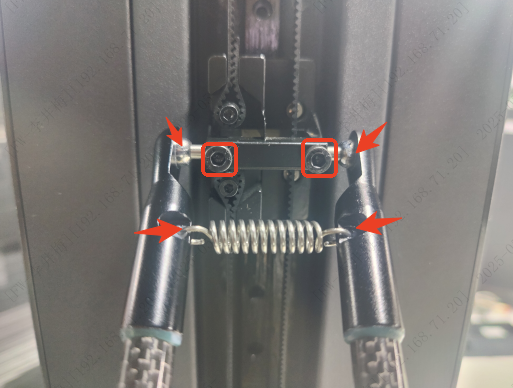
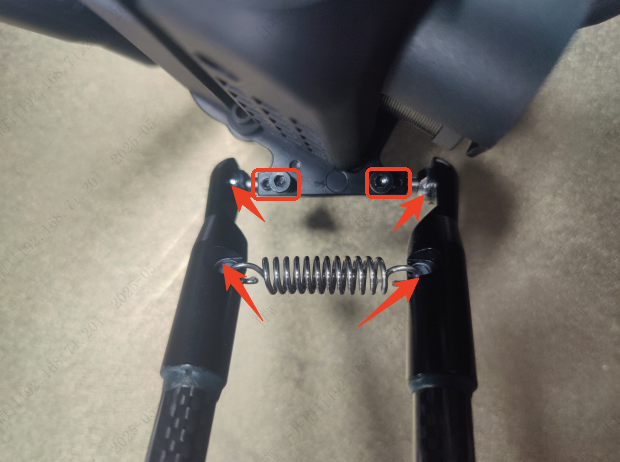
Parallel Arms
(1) Reason:
Parallel arms serve as motion joints for the actuator module and require regular screw tightening and ball head lubrication.
(2) Maintenance Interval:
Check once a month.
(3) How to Maintain:
Check screws at all parallel arm connections and tighten with a wrench; apply grease on ball heads at both ends of the parallel arms.
-
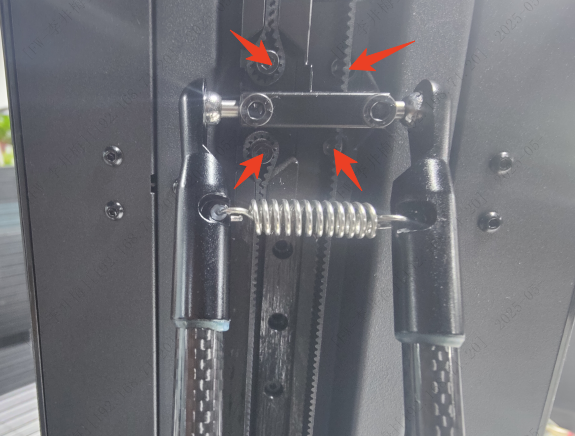
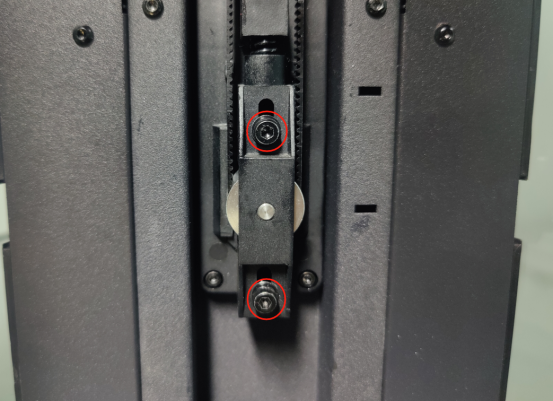
Belts
(1) Reason:
Belts with sliders provide precise machine motion.
(2) Maintenance Interval:
Inspect belts every 15 days and adjust tension as needed based on usage.
(3) How to Maintain:
Loosen the two screws on the belt tensioner by 3-4 turns to extend the spring, move the parallel arms up and down to auto-tighten the belt, then retighten the screws.
Reference video: https://youtu.be/h1ScmAWNHeI
-
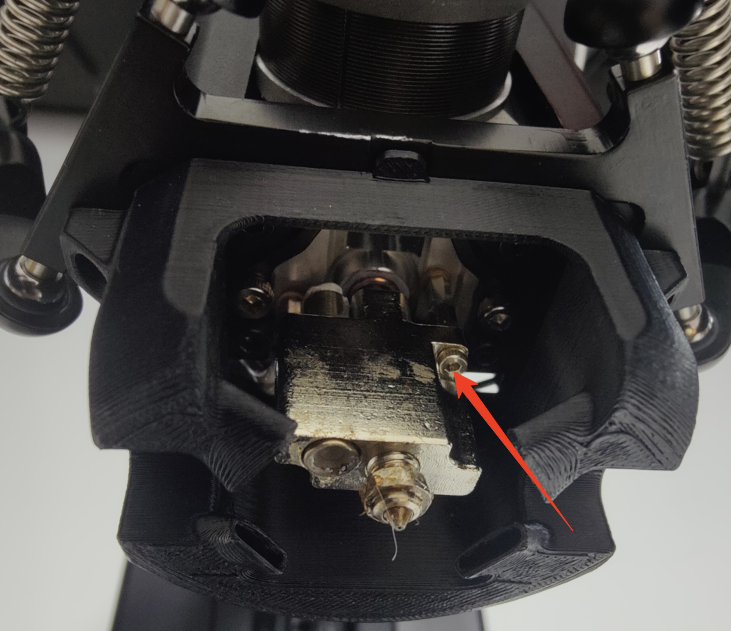
Extruder
(1) Reason:
Removing debris from the filament drive gear reduces material loss and clogging risk, ensuring smooth operation and longer lifespan.
(2) Maintenance Interval:
Recommended monthly inspection and cleaning, depending on actual use.
(3) How to Maintain:
Rotate the extruder and clean debris from the filament drive gear with a soft brush.
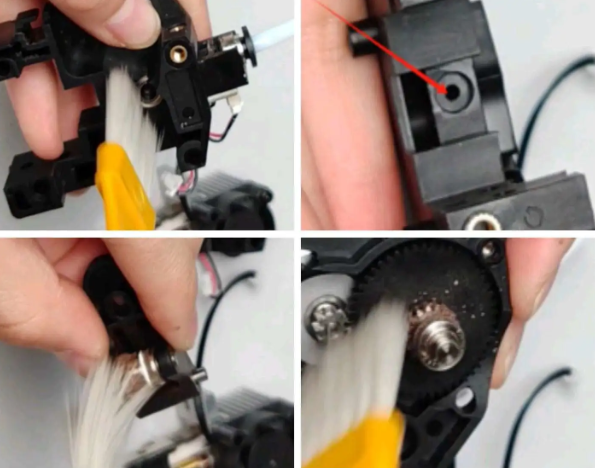
Note: Refer to clog clearing videos for detailed steps.
https://youtu.be/e5D4OzMN0Co -
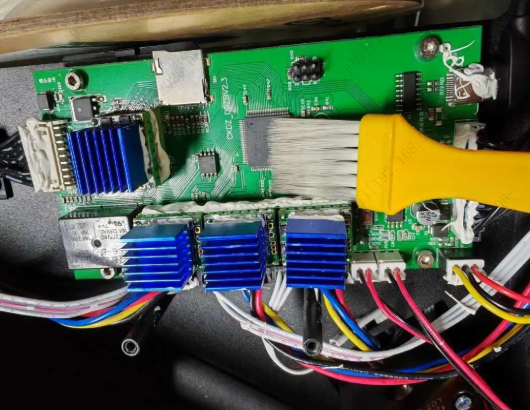
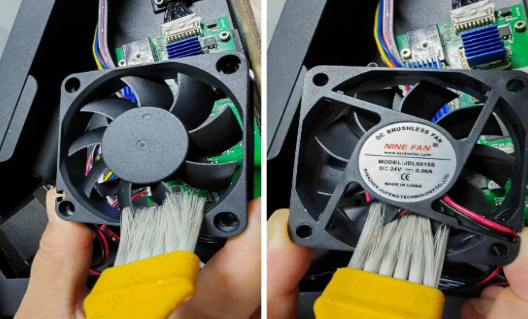
Mainboard and Mainboard Fan
(1) Reason:
Dust accumulation on the mainboard may affect printer operation; dust on the mainboard fan reduces cooling efficiency.
(2) Maintenance Interval:
Check and clean dust every six months; increase frequency in dusty environments.
(3) How to Maintain:
Mainboard: Power off the machine, open the top cover, and brush off dust from the mainboard area.
Fan: Remove screws with an H2.0 hex wrench, hold the fan, and clean dust from both sides.
-
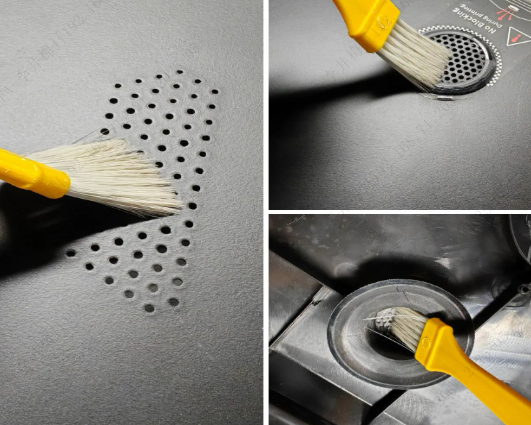
Blower Intake
(1) Reason:
Dust buildup at the intake affects cooling and can blow dust into the chassis, impacting print quality.
(2) Maintenance Interval:
Clean dust every 15 days; increase frequency in dusty environments.
(3) How to Maintain:
Power off the machine, remove screws securing the top cover, open the top cover, and brush dust from both sides of the intake.
Note: Do not clean dust directly on the machine to avoid dust falling inside the chassis.
-
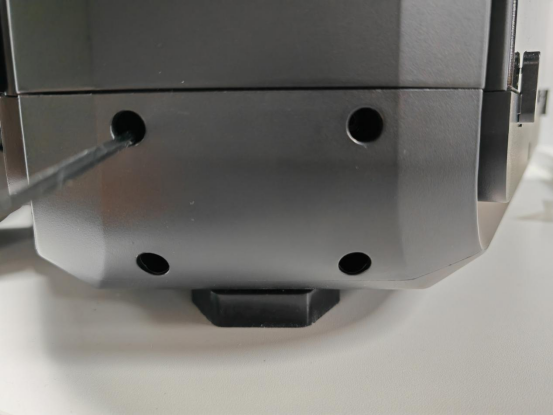
Screws Fixing the Three Vertical Columns
(1) Reason:
Due to high printing speeds and prolonged use, screws fixing the three vertical columns may loosen, affecting print quality.
(2) Maintenance Interval:
Check every 3 months; shorten interval if machine usage is frequent.
(3) How to Maintain:
Use an H3.0 hex wrench to tighten screws fixing the three vertical columns.