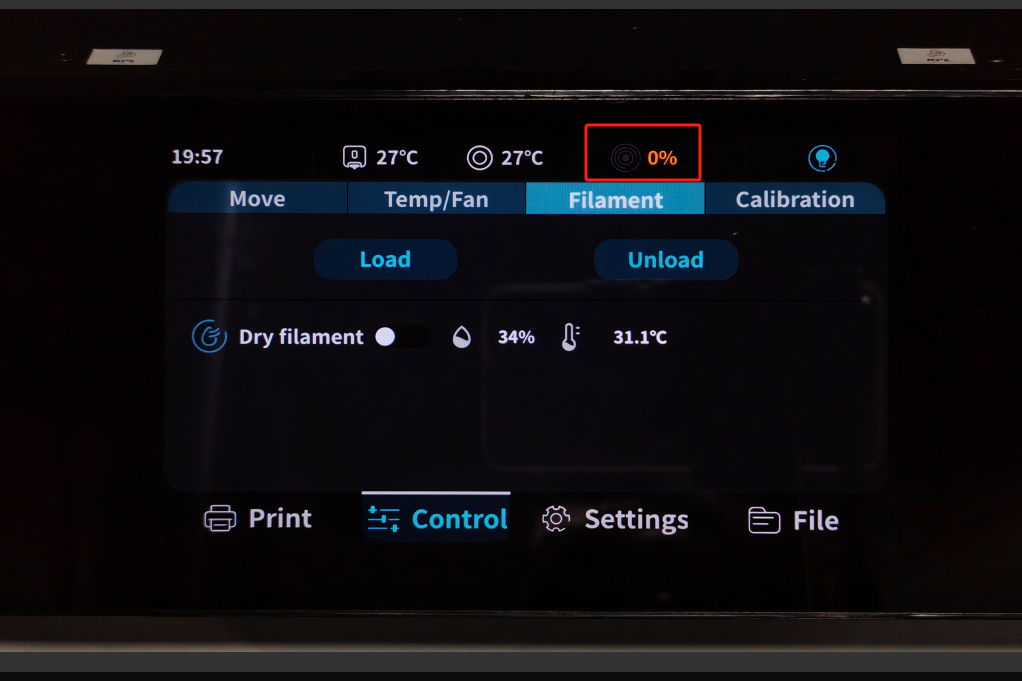
¶ Filament load cell error calibration
¶ Phenomenon:
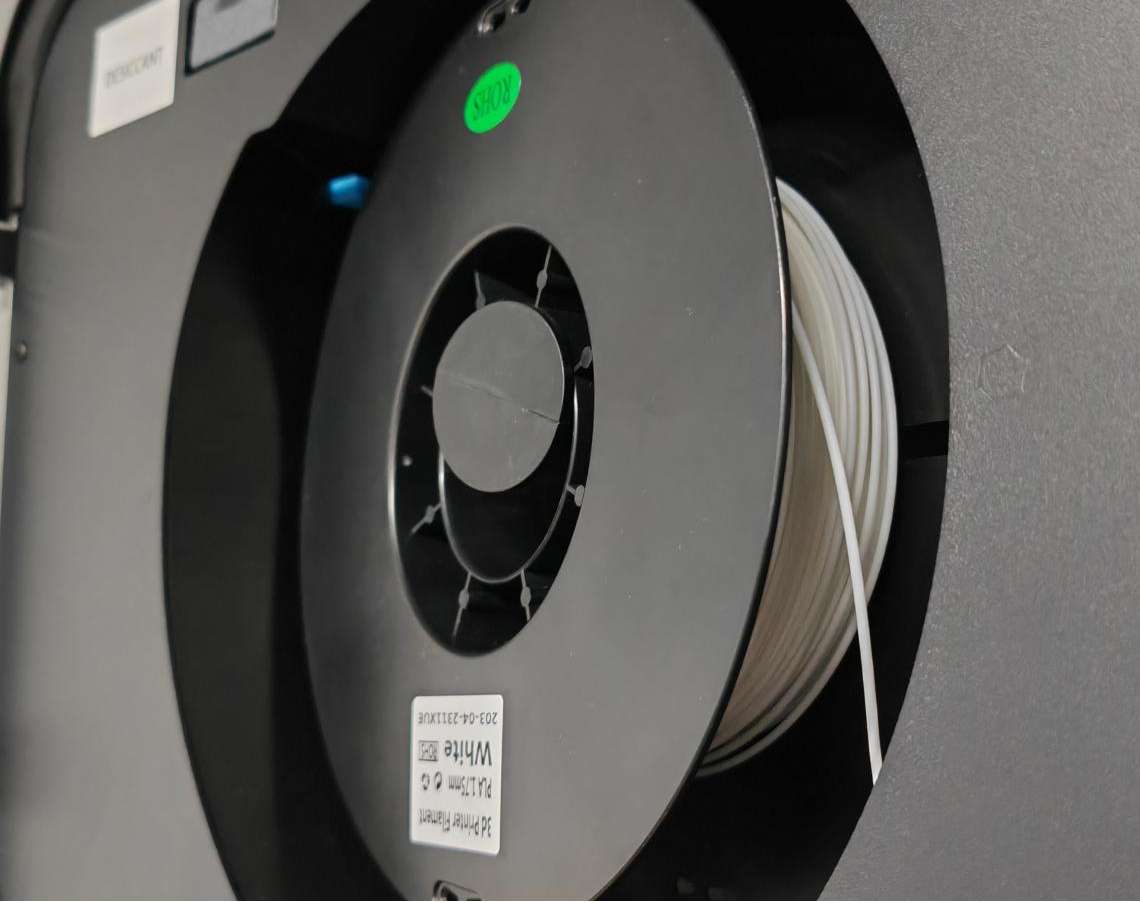
¶ There are filament on the spool, but the remaining amount of filament displayed on the screen is significantly different from the actual remaining amount. This is due to an error in the filament weighing sensor and requires calibration. When 10% is left, the filament display icon will turn orange, normally it is blue.
¶ Filament percentage display range:
Displayed rules
0g<X<100g 10%
100g<X<200g 20%
200g<X<300g 30%
300g<X<400g 40%
400g<X<500g 50%
500g<X<600g 60%
600g<X<700g 70%
700g<X<800g 80%
800g<X<900g 90%
900g<X<1000g 100%
Note: The weight of the spool has been subtracted from the filament weighing display data. Due to the different weight of the spool, there will be some errors in the displayed weighing data.
¶ Steps:
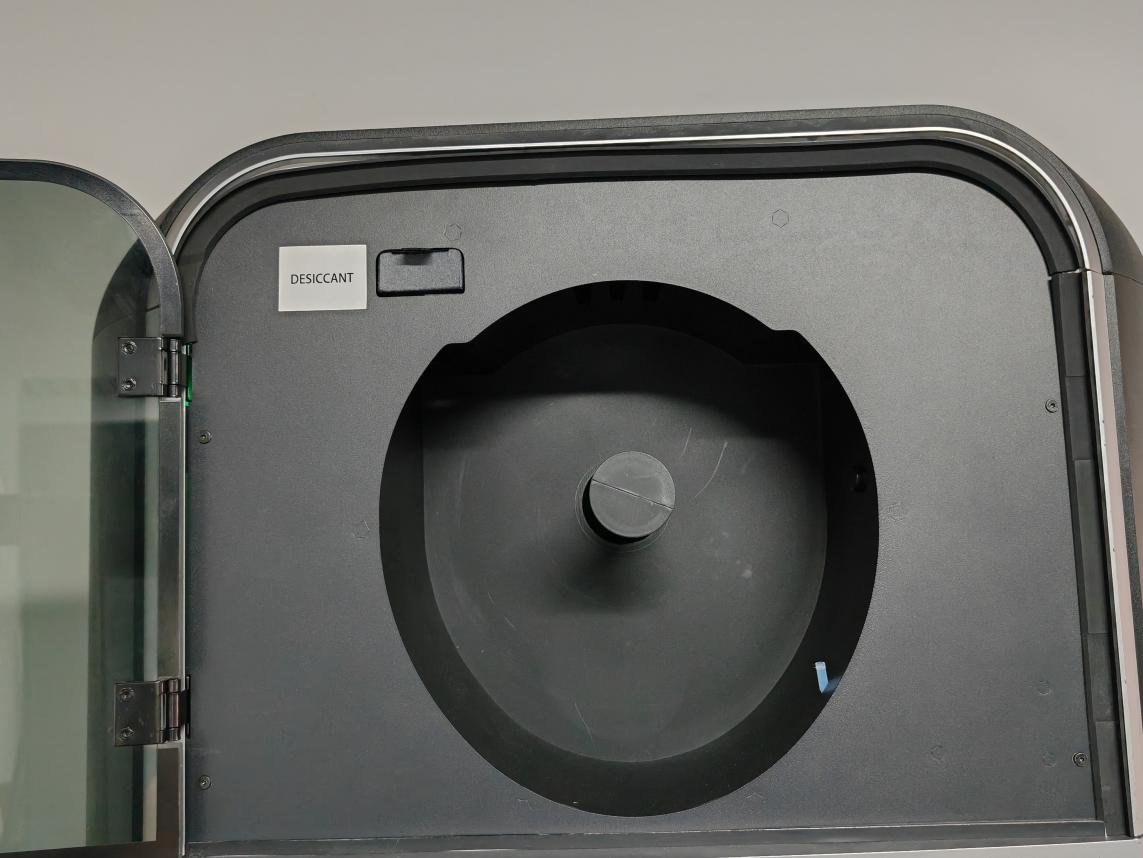
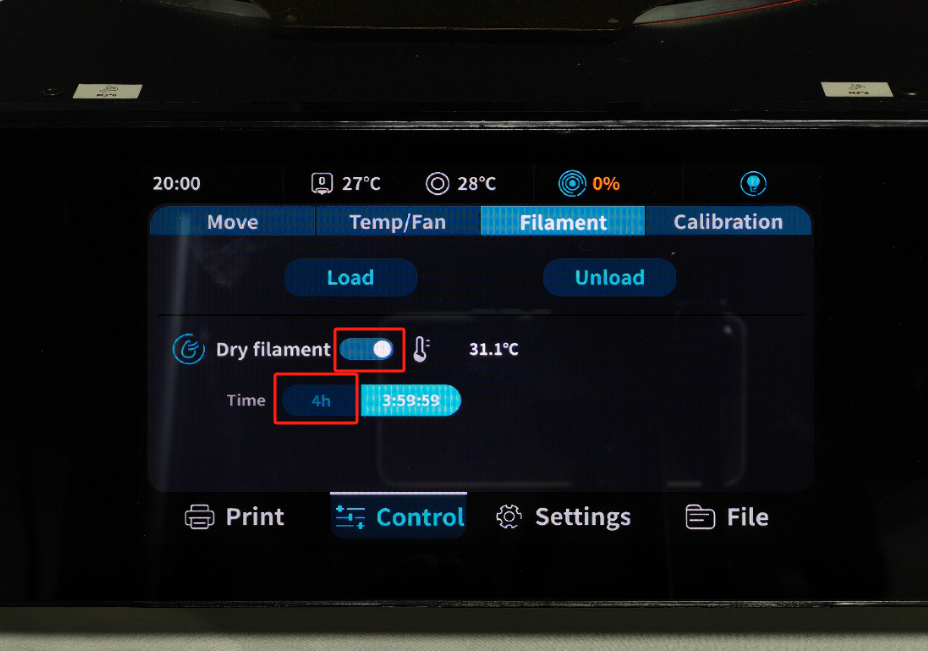
¶ 1. Take the filament out of the drying box;
¶ 2. Turn on the filament drying function and click 4h;
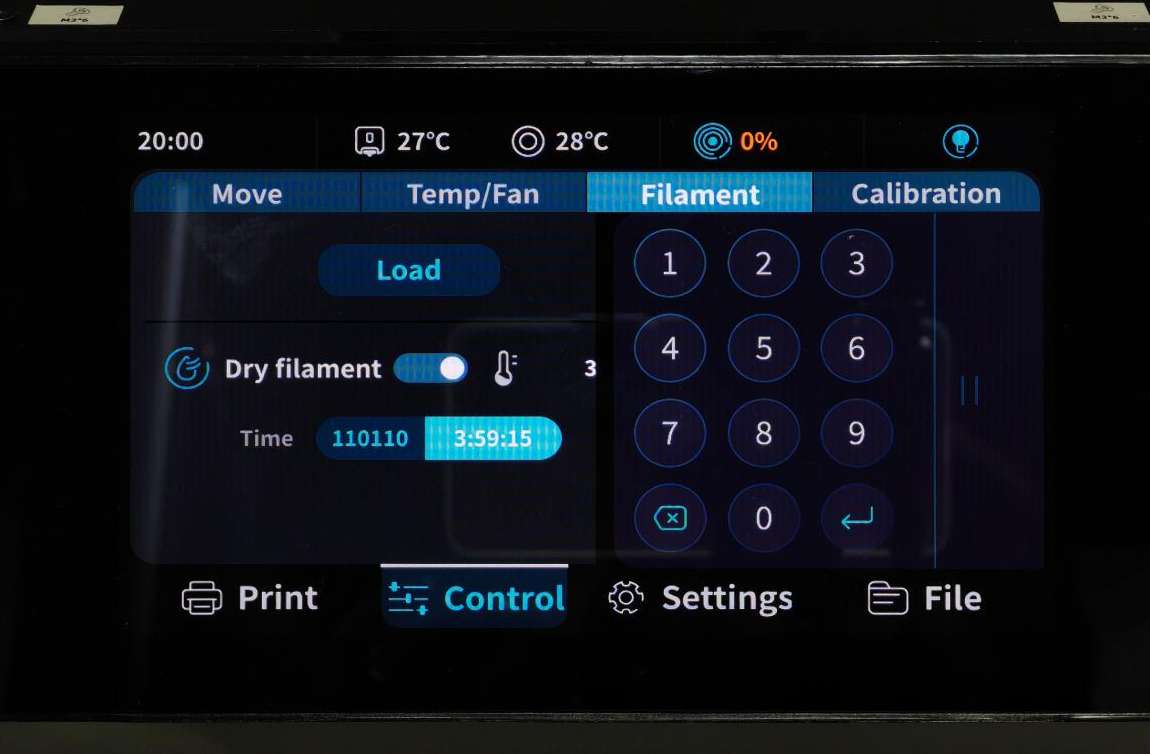
¶ 3. After entering 110110, the "Weighing Calibration" option will pop up;
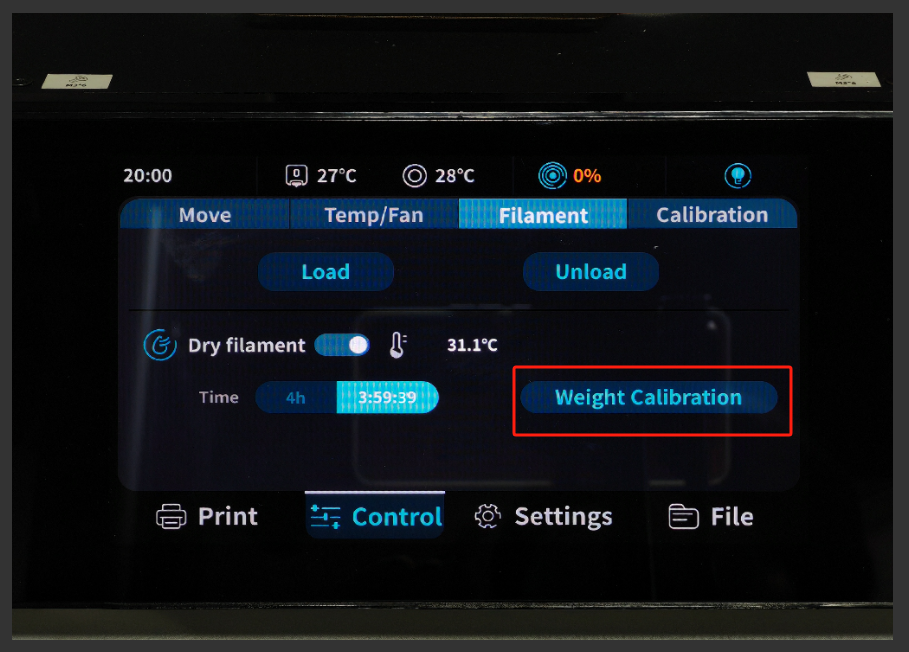
¶ 4. Click "Weight Calibration" and the weighing error will be automatically calibrated;
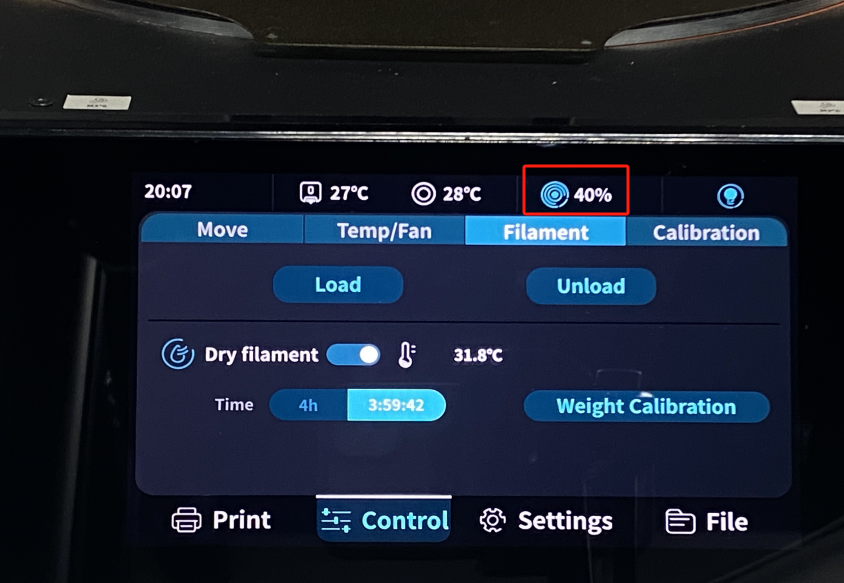
¶ 5. After clicking calibration, perform a filament placement test and display the filament percentage.
¶ 6. Click 4h, enter: 120120, turn off the calibration function;
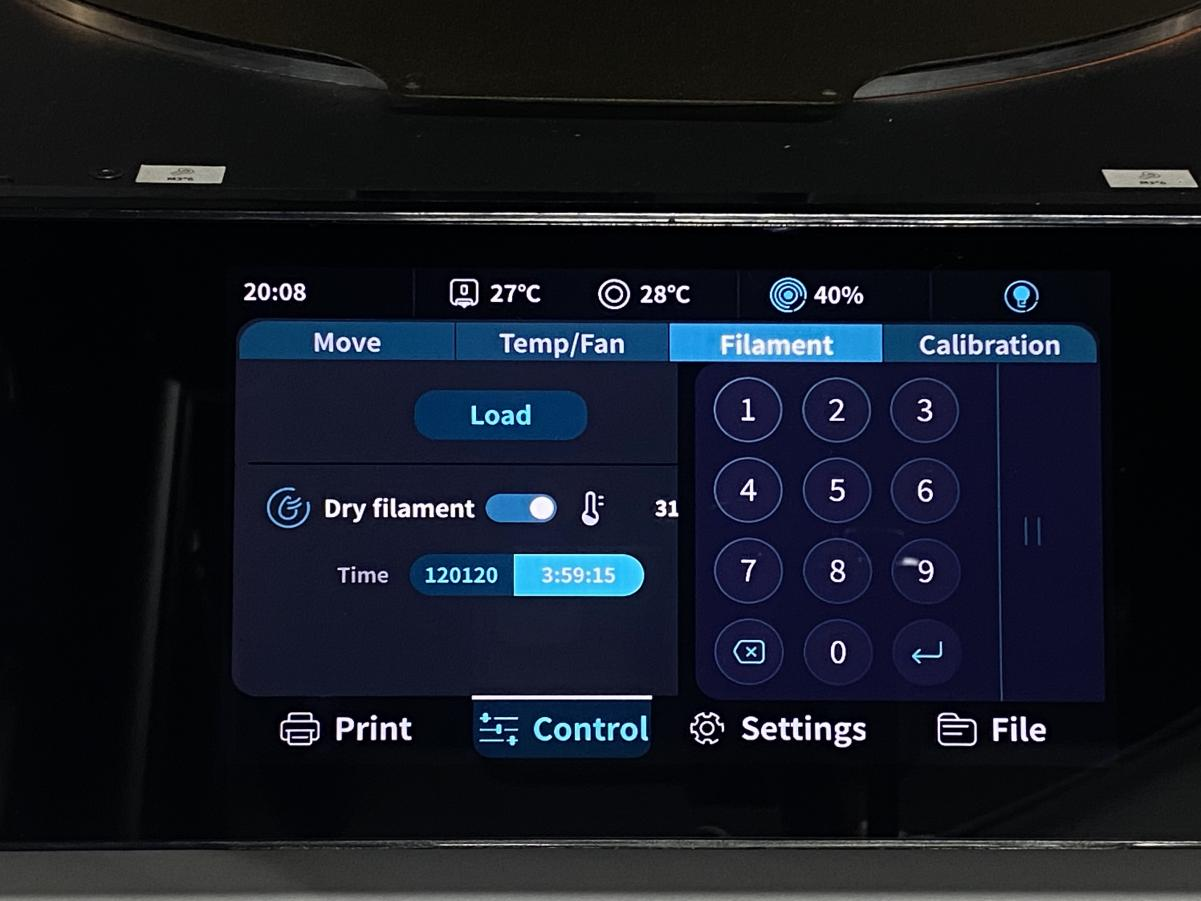
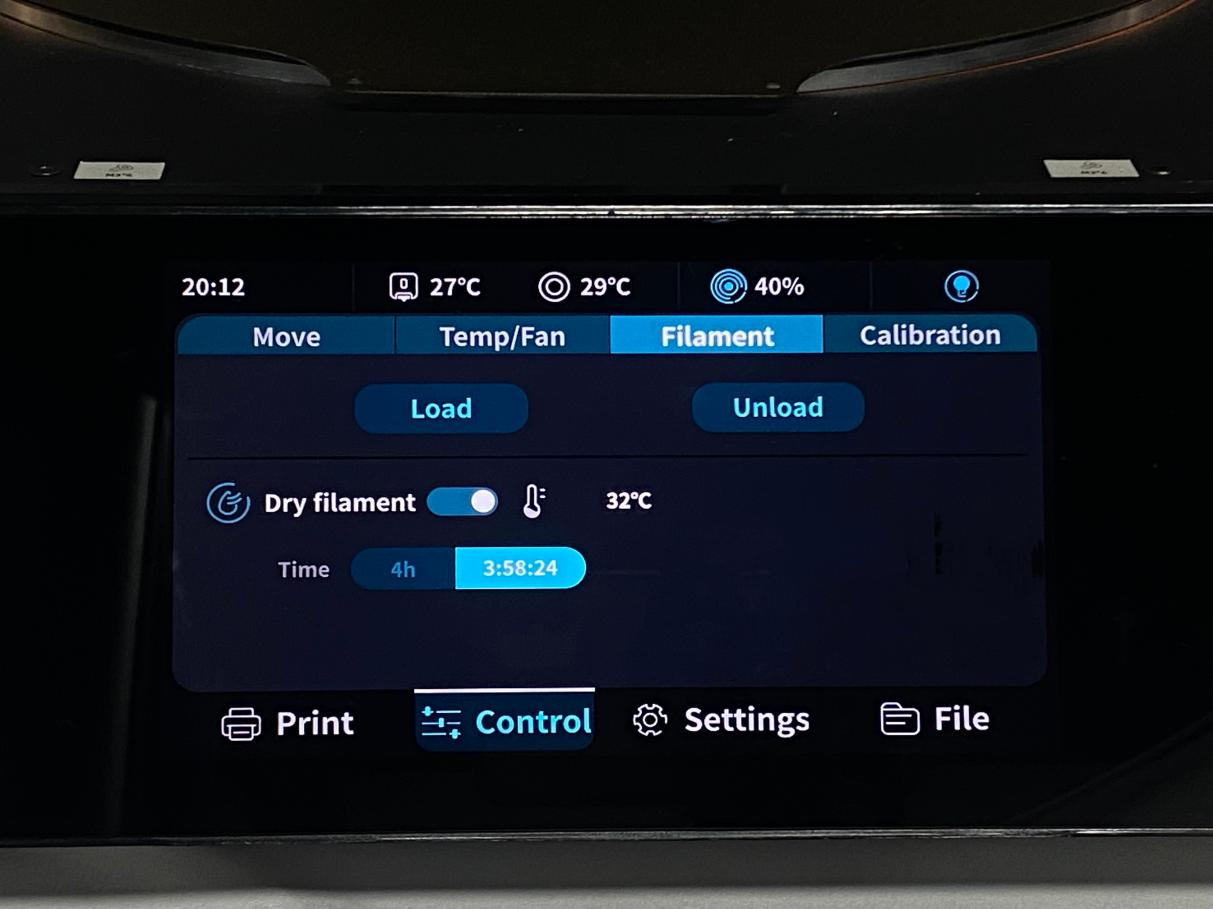
¶ 7. Turn off the drying function to complete the calibration of the filament load cell.
¶ How to Calibrate the Error of Printing Size
Before performing precision calibration on the S1 printer, please check the firmware version to ensure it is at least the following version. If the version is lower than the listed versions, the precision calibration optimization method cannot be used. If the version meets the requirements, you can proceed with the precision adjustment.
S1:1.0.8.1.1
S1 pro:1.0.1.0.2
Step 1: Go to the main operation page
1.1.Connect to WIFI;
1.2.Enter the “machine IP” into the browser to access the operating page.
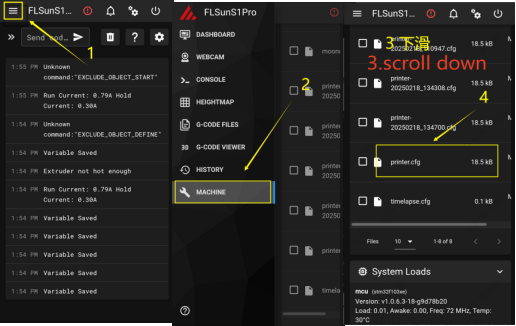
Step 2: Enable Configuration File
2.1. Select the upper left corner of the “Settings”, select the “MACHINE”, slide into the “printer.cfg”.
2.2. Add a line “size_cali_mode: Refined” to the 133[printer] column, click SAVE&RESTART, and printer.cfg successfully saved appears on the green at the bottom.

Step 3: Print the calibration model
3.1. Select “S1 Dimensional Calibration Model” for printing;
Download Link for S1 Dimension Calibration Model
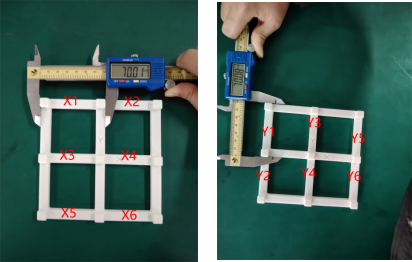
3.2. Measure the S1 size calibration model after printing, the measurement method is shown in the following figure, record X1-X6,Y1-Y6
(For example:SIZE_ANALYZE X=70.0,70.0,70.0,70.0,70.0,70.0
SIZE_ANALYZE Y=70.0,70.0,70.0,70.0,70.0,70.0)
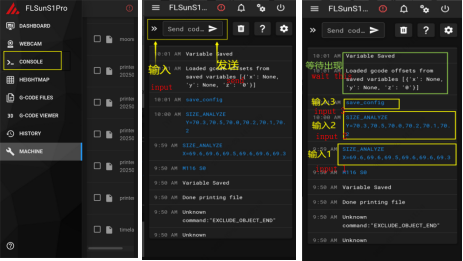
Step 4:Inputting the results to the web site.
1.Click on “Menu” in the upper left corner and select the “CONSOLE”.
2.Entering the results into the Web site.
“SIZE_ANALYZE X=X1,X2,X3,X4,X5,X6”
“SIZE_ANALYZE Y=Y1,Y2,Y3,Y4,Y5,Y6”
(Note:adding the space character in front of X/Y when typing)
3. To save the configuration, type “save_config”.
Wait for the platform to save the configuration, the variable has been saved when“Variable Saved”is showed, then operation is complete.
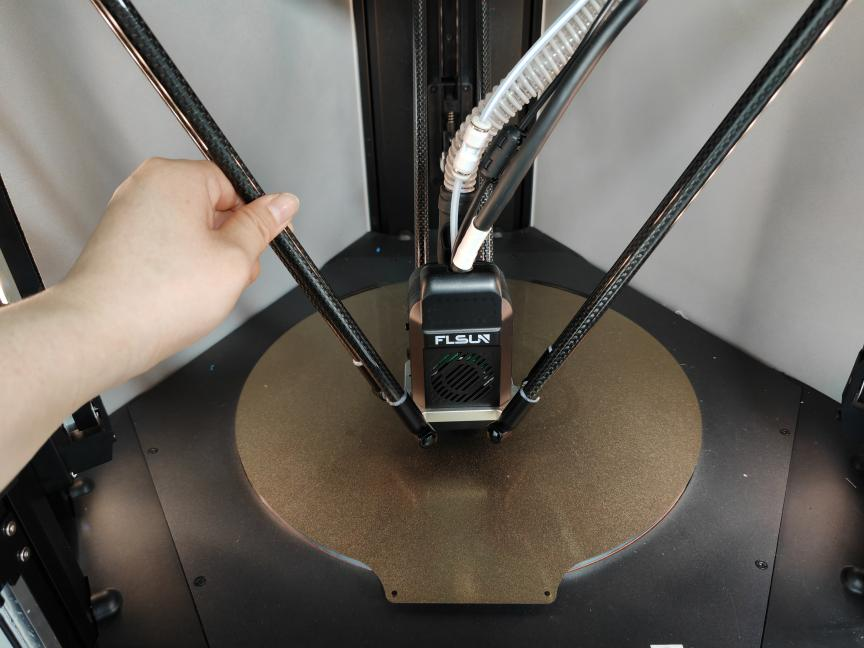
¶ Effector home interference problem
¶ If you have manually moved the effector beyond the range of the heating bed, as shown in the figure below;
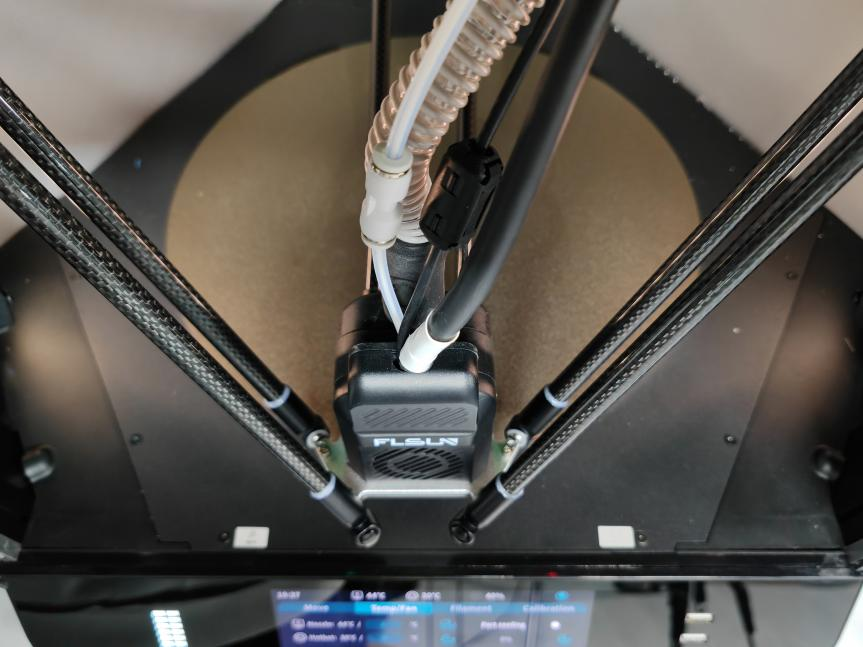
¶ Click Home at this point and the effector will hit the belt and dry box;
¶ So be sure to move the effector to the print area before printing or clicking "Home".