¶ 1.Cooling fan
The model is 2515, which is used to dissipate heat from the throat to prevent the filament from melting in advance and causing blockage.
¶ 2.When to replace
¶ (1). Abnormal noise
¶ (2). The fan does not rotate
¶ 3.Tools used
H2.0
new cooling fan
¶ 4.Replacement steps
Note: Before replacement, please heat and eject the consumables first, and then disassemble them; the disassembly operation needs to be performed when the machine is powered off.
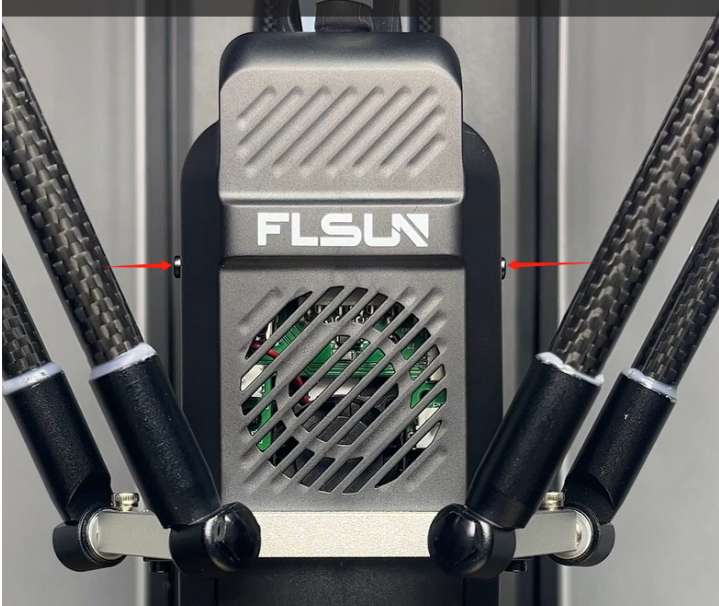
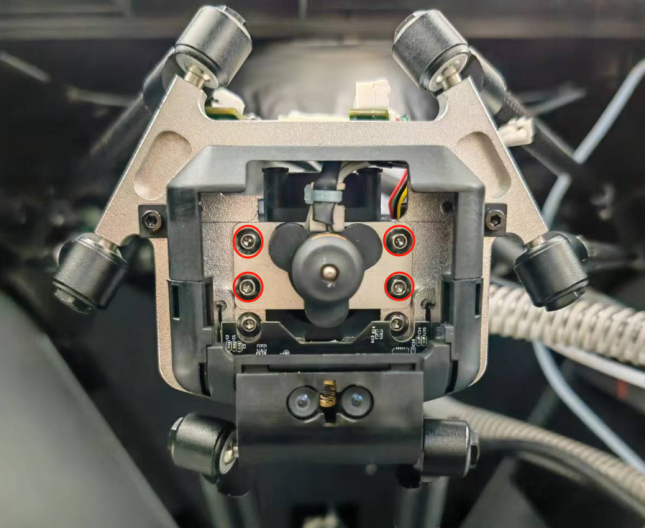
¶ (1). Use the H2.0 Allen wrench in the accessory box to remove the two screws fixing the effector cover and remove the cover.
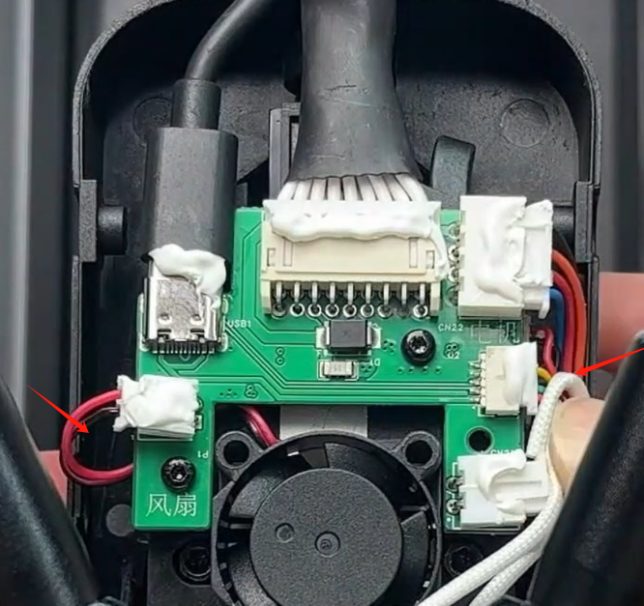
¶ (2). Unplug the effector cable, USB cable, fan and heating ring ports on the effector PCB board.
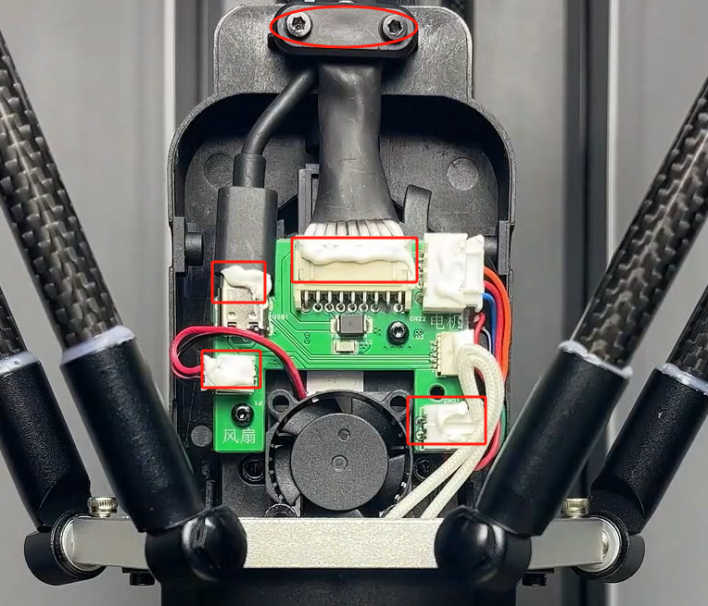
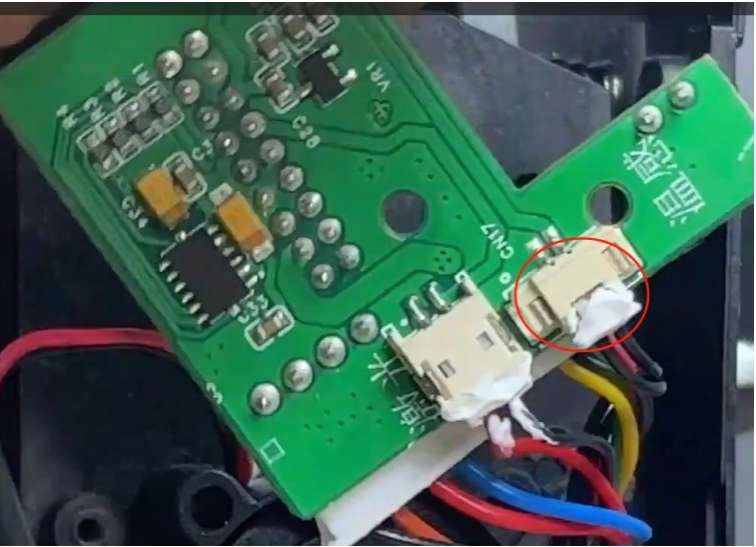
¶ (3). Remove the three screws holding the effector PCB board and gently unplug the temperature sensor port.
NOTE: The port for the temperature sensor is on the back of the effector pcb board
¶ (4). Use the H2.0 hexagonal wrench in the accessory box to remove the four screws fixing the hot end on the ceiling and take out the entire hot end.

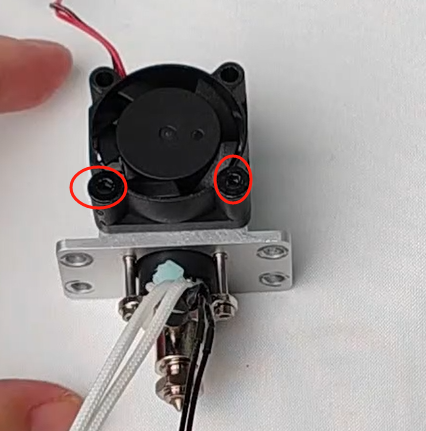
¶ (5). Use an H2.0 Allen wrench to remove the two screws holding the fan and replace it with a new one.
¶ (6). Pay attention to sorting out the wire sequence before installing the effector shell, and place the wire sequence inside the shell.